4
I
MPORTANT: Apply thread sealant tape to all male threads in your air line for airtight
connection.
3. Close the in-line shuto valve between the compressor and the tool.
4. Turn on the air compressor according to the manufacturer’s directions and allow it
to build up pressure until it cycles o.
5. Adjust the air compressor’s output regulator so that the air output is enough to
properly power the tool, but the output will not exceed the tool’s maximum air
pressure at any time. Adjust the pressure gradually, while checking the air output
gauge to set the right pressure range.
IMPORTANT: An individual air tool has its specication of air consumption (CFM).
Check the specications of your air compressor to be sure that it can support both
minimum CFM (cubic feet per minute) and PSI (pounds per square inch) required.
An air hose (like 3/8" x 50 ft. air hose) may cause up to 15 PSI drop in pressure
from the air compressor to the tool, so you may need to set the output air pressure
of the compressor higher to maintain the required pressure at the tool.
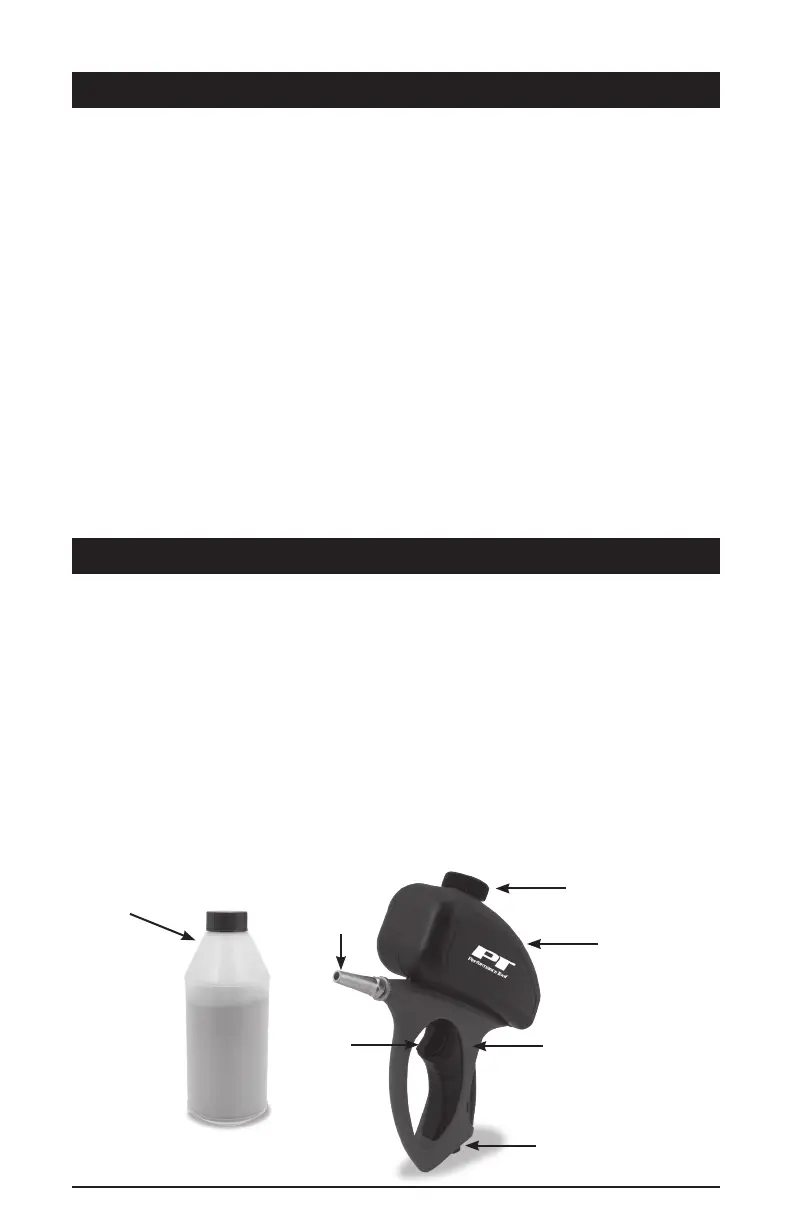
AIR SUPPLY SETUP
1. Remove the hopper lid (1) and ll the hopper (2) with the provided
abrasive sand (3) in bottle. Ensure that you are not exceeding the
maximum ll level for the hopper of 17.2 oz. (Fig. 1)
IMPORTANT: Use the provided abrasive sand or other blasting medium which
does not contain silica. Heed the safety instructions provided by the manufac-
turer of the blasting medium.
IMPORTANT: Ensure that the blasting medium is totally dry and not too coarse-
grained. Moist or too coarsegrained blasting medium will clog the gun.
2. Replace the hopper lid once the hopper is lled.
TOOL SETUP
FIG. 1
1
2
3
4
7
5
6
 Loading...