3
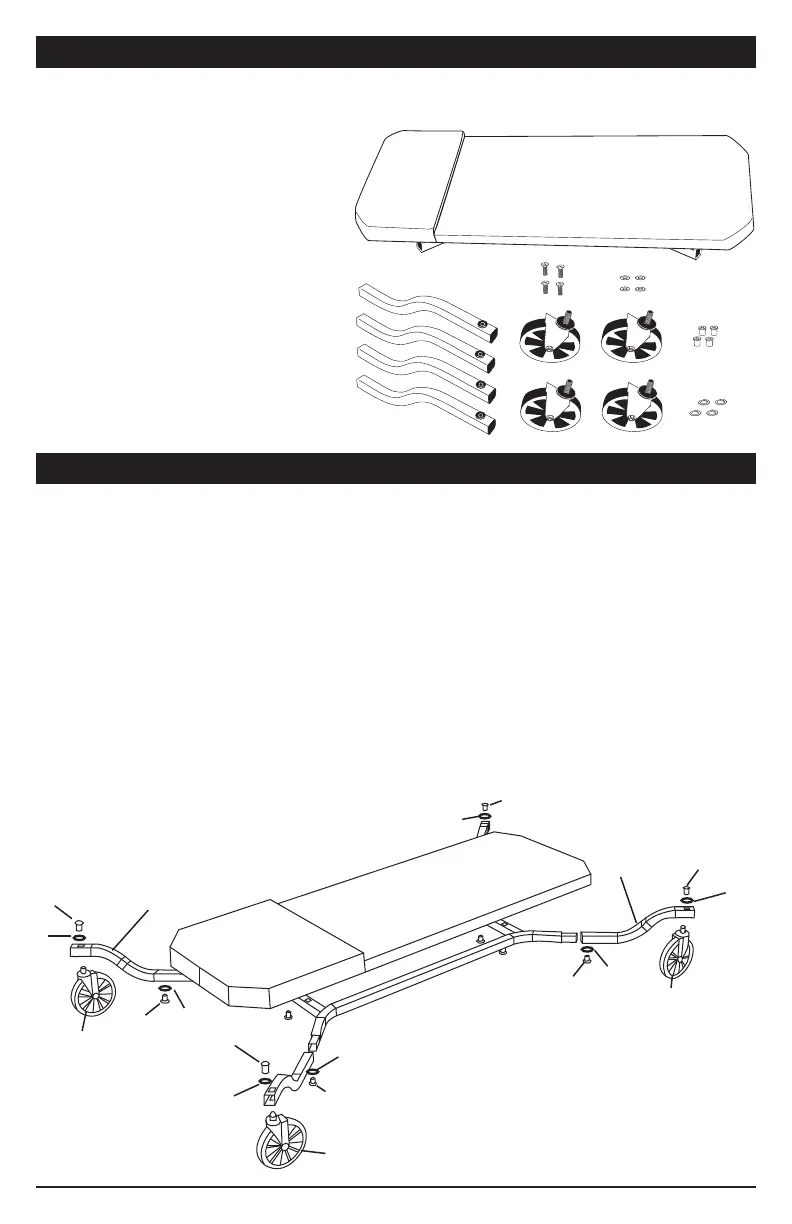
PACKAGING AND CONTENTS
Tools needed: #2 phillips screwdriver, T-40 star bit socket and ratchet or T-40 driver
1.Setthecreeperpadandbaseassembly(1)onaatworksurfacesuchasatableorworkbench.
2. Insert one of the drop frame legs (2) into the expose square tubing in one of the corners of the
frame. Be sure the bend is positioned so that the leg rises above the top surface of the pad.
3. Insert one screw (3) with washer (4) into the threaded opening where the leg and corner of the
frame connect, and tighten.
4. Repeat steps 2 & 3 for all 4 legs, always making sure the bend in each leg is positioned close to
the pad.
5. Remove cap screw (6) and spring washer (7) (if pre-threaded on stem) from poly caster (5). Insert
the threaded stem of one caster (5) into the square opening at the end of a leg (2).
6.Alignthesquareportionofthecasterstemwiththesquareopening,thenplacethespringwasher
(7) and cap screw (6) and hand tighten until snug.
7. Using a T-40 star bit driver or star driver tighten cap screw by hand only. Do not over tighten.
8. Repeat steps 5-7 for remaining casters.
ASSEMBLY INSTRUCTIONS
Open packaging and inspect all parts for anything that may be missing, or for any damage. If any
parts are missing or damage contact Performance Tool. DO NOT use the creeper without all of the
components properly assembled.
Youshouldhavethefollowingcomponents:
1. Creeper pad assembly (frame underneath)
2. (4) Drop frame legs
3.(4)3/16in.Phillipsscrews
4.(4)1/2in.O.D.washers
5. (
4) 5 in. x 1 in. Wide poly casters
(125 mm x 25 mm)
6.
Recessed cap screws T-40
7. Spring washers
1
6
5
2
3
4
7
3
5
2
4
7
6
2
5
6
7
7
6
5
6
3
4
6
7
3
4
1