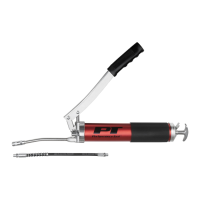
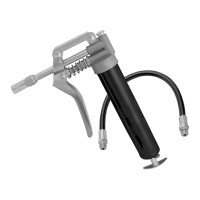
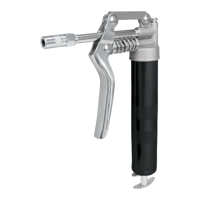
GREASE CARTRIDGE LOADING/PARA LLENAR CARTUCHO DE GRASA BULK LOADING WITH DISPENSER/RELLENO EN VOLUMEN CON DISPENSADOR
SUCTION FILLING/RELLENO A SUCCIÓN
NOTE- This is a basic instruction manual which covers various models of grease guns. The illustrations-
below may not depict exactly your specic gun.1. Rotating counter clockwise, unscrew Head Cap from
gun Barrel. (Fig. 1)
NOTA- Este es un manual de instruciones basico que cubre varios modelos de pistolas de grasa. Lasi-
lustraciones de abajo puenden no ser exactamente iguales que su pistola especica.1. Desatornille la
tapa del barril de la pistola girando en dirección opuesta a las manecillas del reloj.(Fig. 1)
NOTE- Used cartridges must be removed prior to bulk loading.
1. Make sure the bulk loading ller valve is compatible with the adapter on the pump. (Figure 5)
2. Attach the ller valve to the adapter by pushing in and rotating slightly.
3.
Operate the pump handle while holding the gun rmly to the pump. As the grease pumps into the
grease gun barrel the plunger handle will extend. Loading is complete when the plunger rod is fully extended.
4. A slight twist of the gun will detach it from the pump. Depress lock release and push the plunger
rod back into the gun.
NOTA - Los cartuchos usados de deben remover antes de ser recargados en volumen.
1. Asegurese que la válvula sea compatible con el adaptador en la bomba. (Fig. 5)
2. Sujete la válvula de relleno al adaptador empujandola y rotando ligeramente.
3. Opere el mango de la bomba mientras sujeta la pistola rmamente hacia la bomba. La barra del
piston se extendera al momento de entrar la grasa al barril. El relleno se termina cuando la barra
del piston esta completamente extendidia.
4. La pistola se desprende de la bomba con un pequeño giro. Quite el sujetador del seguro y empuje
la barra del piston de nuevo en la pistola.
Head Cap/
Tapa de
Cabeza
Barrel/Barril
Fig. 1
Plunger
Handle /
Piston
de
Mango
Fig. 2
Grease Cartridge
Plastic Cap/Tapa de plástico
Cartucho de grasa
Barrel/Barril
Fig. 3
Flip-top Tab/Tapa Quita-pon
Fig. 4
Note - Because they lack lubrication on the rubber plunger, new grease guns may be difcult to load
with grease cartridges the rst time. Apply a liberal coating of grease to plunger when using gun for the
rst time. This grease gun requires a 3 oz. grease cartridge.
2. Draw handle back fully so that the plunger rod catches and locks into place. (Fig. 2)
Caution: Depressing the lock release when empty causes
the handle to snap back quickly.
3. After removing the plastic cap from the grease cartridge,
apply a small amount of grease to the inside edge of the
cartridge. This will make insertion of the plunger easier. (Fig. 3)
4. Push grease cartridge into gun barrel completely, until
metal edge tightly seals on top of the grease gun barrel.
Detach ip-top seal from cartridge. (Fig. 4)
5. Screw on head cap approximately two turns, being sure
not to tighten. Release plunger rod from its locked position
and push in. Push on plunger rod handle to force plunger
into cartridge. At the same time, pump the lever or handle to release trapped air. When grease
comes through vents and the head of the gun, fully tighten the head cap to the barrel.
6. As soon as the gun is pumping grease, carefully depress the lock release and push plunger
rod back into gun.
Nota - Debido a la escasa lubricacion del piston de goma, puede ser dicil llenar la primera
vez de grasa los cartuchos. Aplique una capa suciente de grasa a el piston cuandose usa la pistola por
primera vez. Esta pistola de grasa requiere un cartucho de grasa de 85 g.
2. Jale completamente el mango hacia atras para que la cabeza del piston se asegure en su lugar (Fig. 2)
Precaucíon: Si se jala el sujetador del seguro al estar vacio, causa que el mango haga repentinamente
para atras.
3. Despues de remover la tapa de plastico del cartucho de grasa, aplique una pequeña cantidad de
grasa al borde interior del cartucho. (Fig. 3)
4. Empuje el cartucho de grasa hacia el barril completamente, hasta que el metal selle con la parte
superior de la pistola de grasa. Retire le sello de arriba del cartucho. (Fig. 4)
5. Atornille la cabeza de la tapa aproximadamente dos vueltas, asegurandose que no apriete. Saque el
piston de su posición asegurada. Empuje el mango para forzar la cabeza del piston contra el cartucho.
Al mismo tiempo, bombee el mango para liberar el aire. Cuando la grasa salga de los extremos de la
pistola, Apriete la cabeza de la tapa contra al barril.
6. Al momento que la pistola bombee grasa, cuidadosamente jale el sujetador del seguro y empuje la
cabeza del piston de vuelta en la pistola.
WARNING / PRECAUCIÓN
DO NOT REFILL
USED CARTRIDGES
NO RELLENE CARTUCHOS
USADOS
NOTE - Used cartridges must be removed prior to suction lling.
1. Remove the gun head cap from the barrel.
2. Submerge open end of the barrel into grease bucket. Be sure the plunger handle is depressed
completely. Grasp the barrel rmly and pull back slowly on the plunger handle. Be sure the mouth
of the barrel is always under the surface so that air is not transferred into the barrel. (Figure 6)
3. Loading is complete when plunger rod is fully extended.
4. Reattach the gun head cap to the barrel. Depress lock release and push the plunger rod back
into the gun.
NOTE - Grease guns may lose their prime on occasion, because of air pockets in the grease. If this
occurs, remove the trapped air by bleeding the head cap and resume pumping.
NOTA - Los cartuchos usados se deben remover antes de llenar a succión.
1. Remueva la tapa de la cabeza de la pistola del barril.
2. Sumerja la parte abierta del barril en el cubo de grasa. Aserurese que el
mango del piston esta completamente suelto. Sujete el barril rmemente
y jale despacio el mango del piston. Asegurese que la boca del barril
este siempre sumergida en el cubo para que no pase aire a el barril. (Fig. 6)
3. El relleno se termina cuando la barra del piston esta completamente
extendida.
4. Ponga de nuevo la tapa de la cabeza de la pistola a el barril. Quite
el sujetador del seguro y ponga la barra del piston de nuevo en la
pistola.
NOTA - En ocasiones las pistolas de grasa pueden perder su fuerza
debido a bolsas de aire en la grasa, si esto ocurre, remueva el aire
atrapado purgando la tapa de la cabeza y sigua bombeando.
Fig. 5
Fig. 6