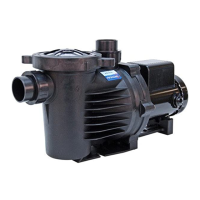
INSTALLATION
Installation
1. After thorough inspection, carefully remove the pump from the box.
2. Secure the pump on a solid, at foundation. A covered location is always best and care should
be taken to ensure adequate ventilation. See installation tips for benecial tips.
3. Install a ball or swing type check valve as needed to facilitate pump disconnection, ow control and
servicing.
4. Connect plumbing to the pump by dry t testing rst to ensure proper t and proper pipe
alignment. Be sure the union nut is on the union tailpiece before gluing in place.
5. Once proper t and alignment is established, use proper pipe sealant designed for plastic pipe.
Support plumbing as needed to prevent strain and damage. Do not over tighten the nut
included with the pump in the quick connect ttings. Hand tightening is sucient.
6. Wiring of this pump should be in accordance with the wiring diagram located on the motor.
Ensure the pump is wired for the correct supply voltage and is supplied by no smaller than 16
gauge wire and should be based on horsepower. The circuit breaker should be 20 to 30 amps.
See page 6. It is recommended that wiring be performed by a licensed electrician.
For 3 phase wiring, see section 7 under Electrical.
7. If your pump will be hardwired be sure to ground the motor correctly by connecting code
compliant wiring to the green grounding screw located under the wiring plate.
8. When wiring is complete, double check intake and discharge ttings to ensure a snug t.
Note: There may be installations in which plumbing allows for trapped air in the system. If this
happens, priming will be dicult. In this case, loosen the discharge tting slightly to allow
trapped air to bleed o. Once primed tighten the discharge tting.
9. On ooded suction systems where the water source is higher than the pump, the pump will ll
with water once the supply valve is opened. However, on both ooded and non-ooded
systems it is recommended to open the strainer pot lid, ll with water, ensure the lid oring is
clean of any debris and close the lid securely prior to starting.
10. Once priming pot is lled and supply valves (if present) are opened your pump is now ready
to prime. Turn the motor on by plugging in the unit or switching on the power supply. Priming will vary
in length. See page 3 for details. Water should continue to ow into the basket as the pump
goes through the priming process. The priming process should not take longer than 15 minutes. The
pump should never run dry. If water stops owing into the strainer pot, shut the pump o immediately
and see Troubleshooting Tips or Pump Operation pages for more information.
Note: At initial start up, the water level in the pump housing, as seen through the clear lid should drop rapidly
and have a small amount of water entering the pump in less than 3 minutes. There is no need to be
alarmed as this is normal. If no air leaks are present the small amount of water ow will continue to
gradually increase resulting in a fully primed pump operating at maximum performance.
5
 Loading...