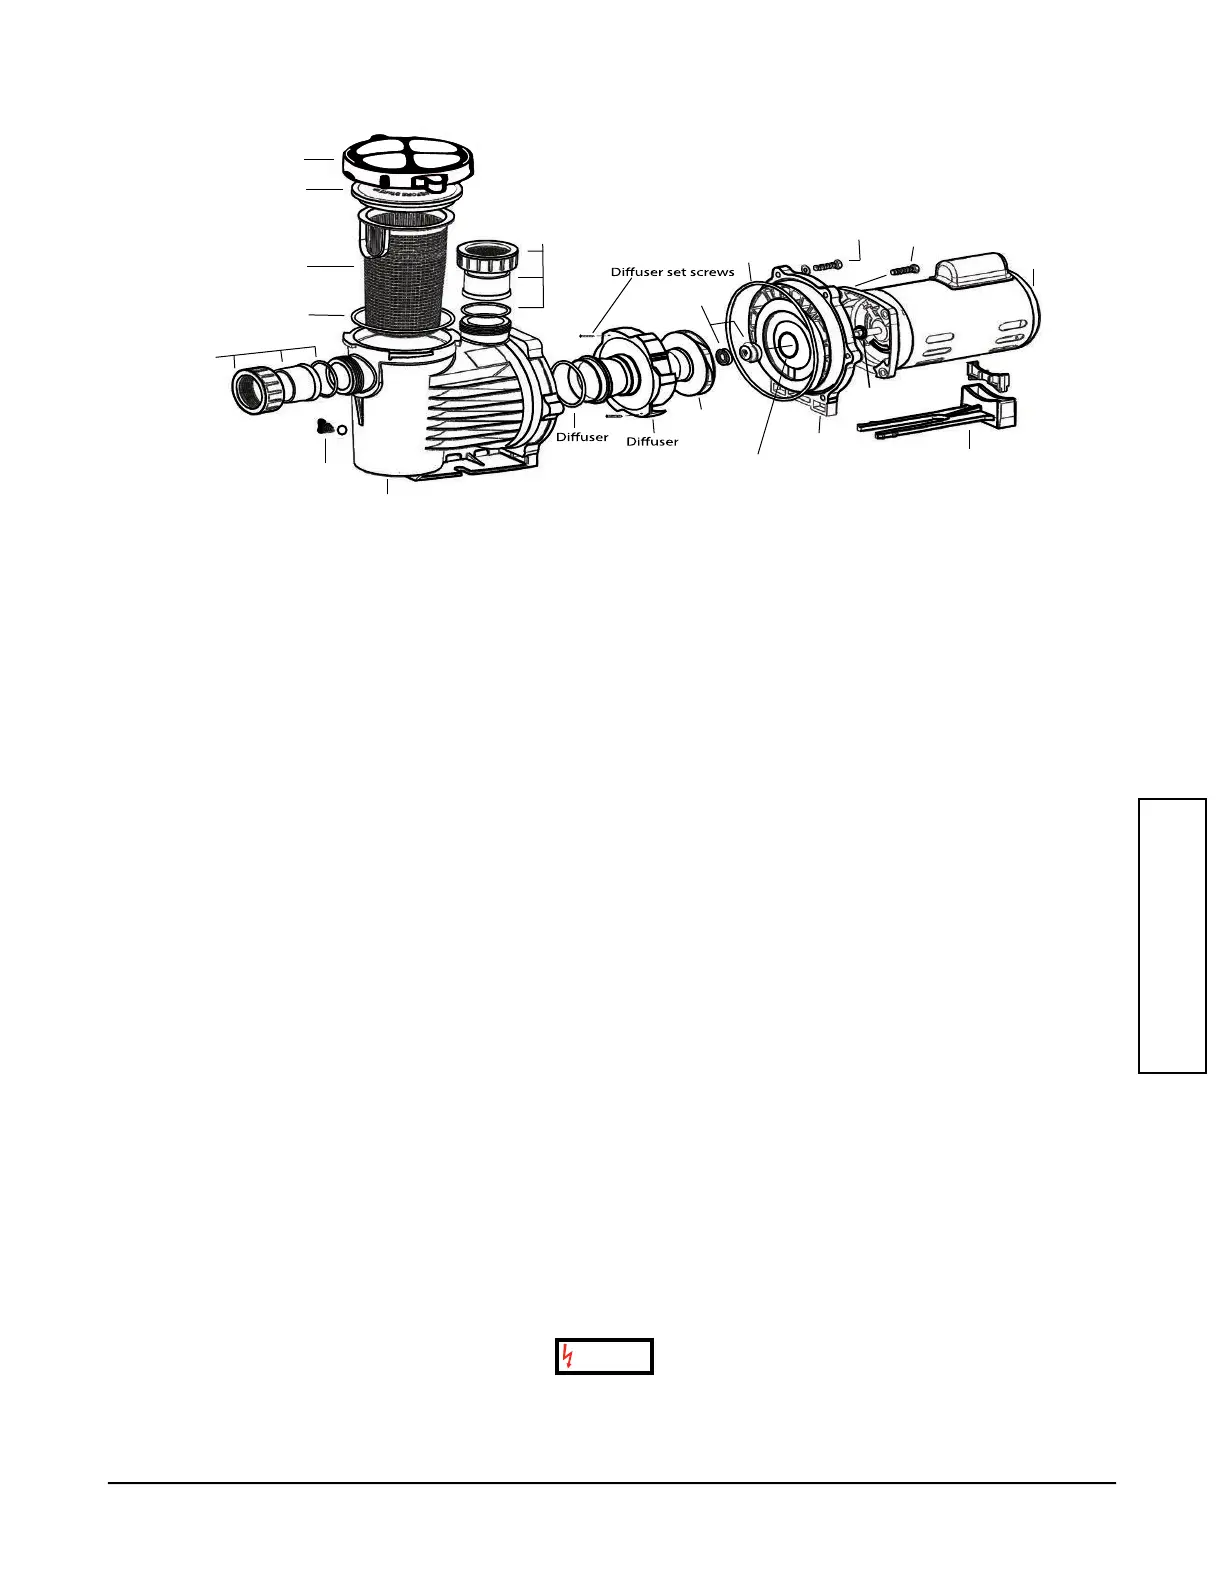
Clamp Ring
Lid
Basket
Lid o-ring
Nut
Tailpiece
Tailpiece
o-ring
Drain plug
& o-ring
Volute
Union
Assembly
o-ring
Impeller
Bracket
Motor Base
Motor
1 1/8”
Hex Bolts (6)
7/8”
Hex Bolts (4)
Bracket o-ring
Mechanical
Seal
Union
Assembly
Bracket Bore
o-ring
Slinger
1. To install a new shaft seal, clean or replace the bracket bore o-ring. Moisten bracket bore
o-ring with water prior to installing to prevent rolling.
2. Press the seal into the bore without touching or putting pressure on the delicate carbon face
by pushing on the stainless steel collar. (A large socket or pipe nipple may be used to facilitate
installation.)
3. Clean as necessary the impeller hub and press in the ceramic part (see tip). Make sure that it is
sitting at. The polished white ceramic face must be face out, not the rubber boot!
Tip: Moistening the rubber boot with water prior to installation aids in proper seating.
4. Install the slinger rubber washer on the motor shaft. Install the bracket to the motor. Install and
tighten the four (4) 7/8” hex bolts.
5. Screw the impeller clockwise onto the motor shaft while holding the motor shaft stationary until it
makes rm contact.
* Handle the mechanical seal with care to protect the polished and lapped faces of the seal from damage.
* DO NOT RUN THE PUMP DRY. Pump must be lled with water and sealed before it is turned on.
Parts Replacement and Pump Assembly
MAINTENANCE
9
WARNING
6. Mount the diuser onto the bracket tting the plastic pins into the holes in the bracket, then
tighten both diuser set screws.
7. Make sure the diuser o-ring and bracket gasket are clean and properly seated.
8. Assemble the motor sub-assembly to the volute using the six (6) 1-1/8” hex bolts. Do not tighten
until all six (6) hex bolts are in place and hand tightened, then tighten all six (6) bolts uniformly in an
alternating opposing sides pattern.
9. Insert both drain plugs with o-rings installed and tighten. Install strainer basket and ll the
volute/strainer pot with water.
10. Reinstall the lid and clamp ring, turning clockwise until snug.
11. Open all valves on the system, if present, and reconnect the power to start. Wait for the pump to
prime. Monitor water level in the volute/basket area to ensure water is always present. If the pump has
been running with no incoming water ow for more than 15 minutes, shut the system o immediately
and call PerformancePro Pumps for technical assistance.
 Loading...