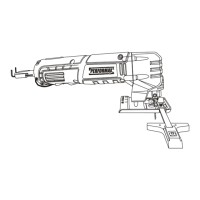
ASSEMBLING THE CUTTING & MITER GUIDE
– cont’d
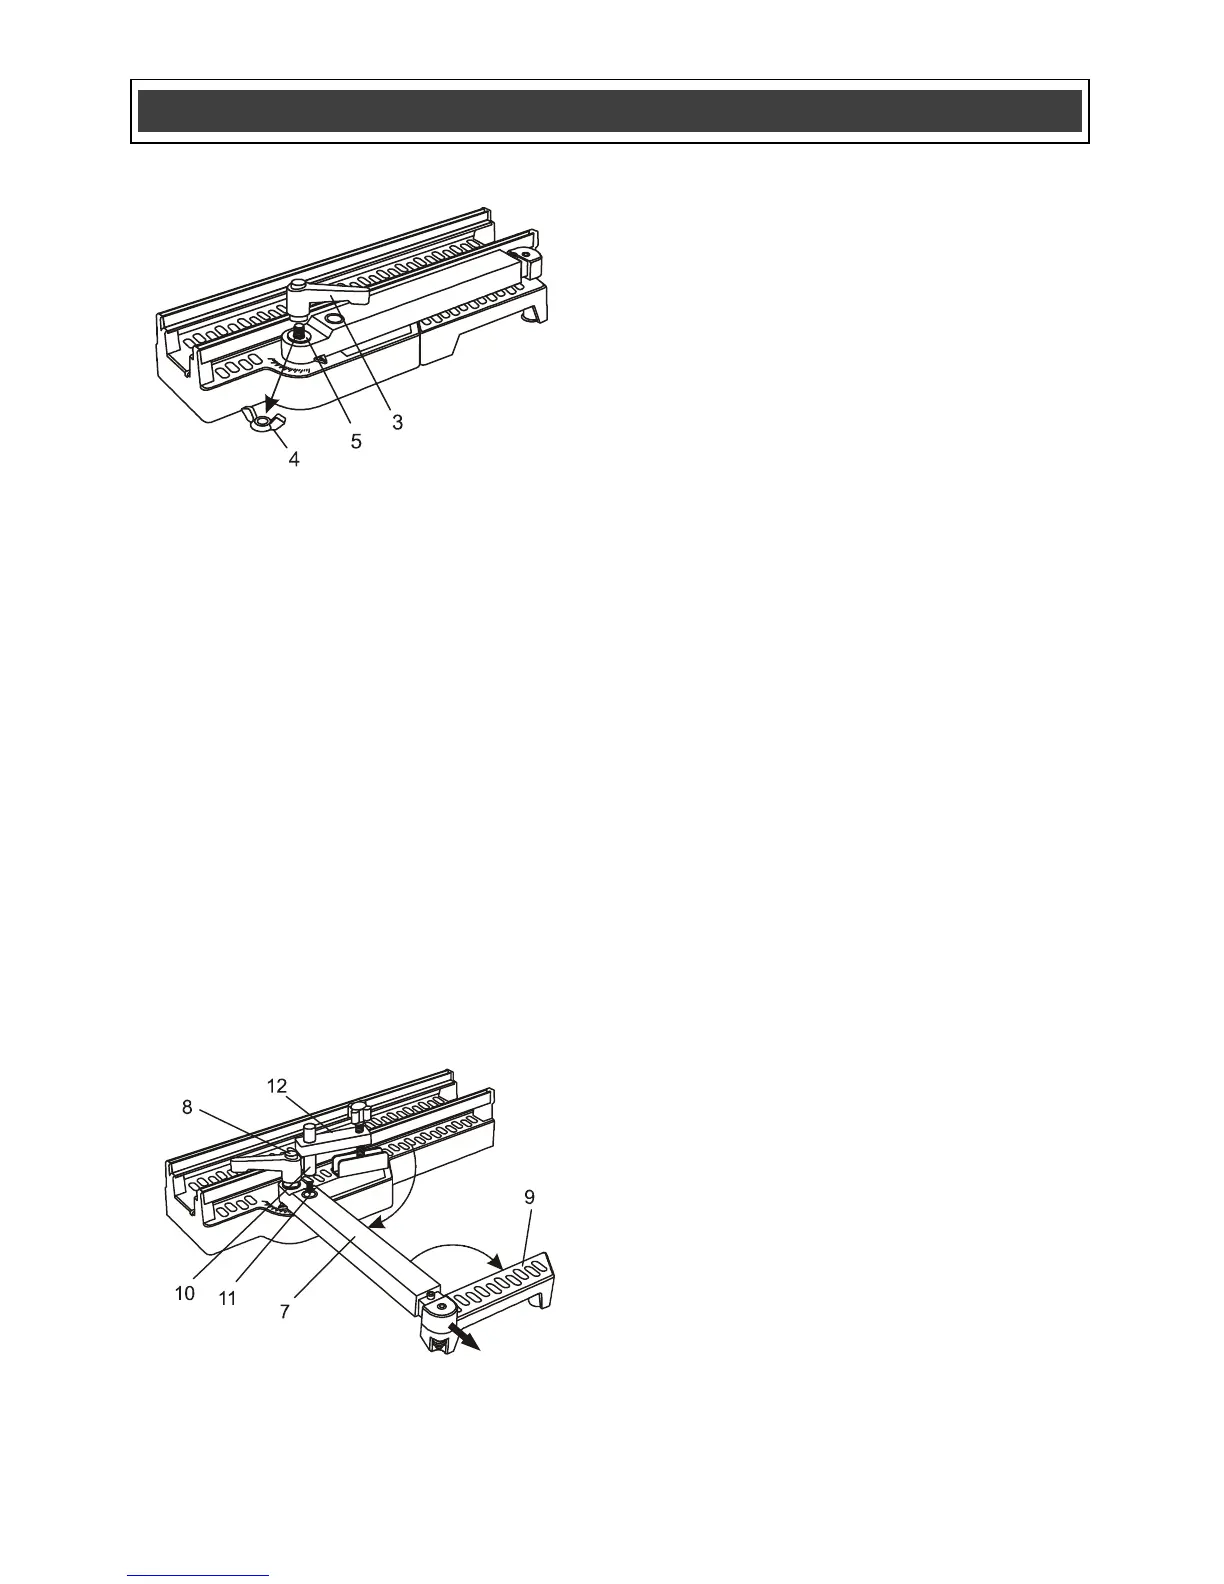
4. Rotate the inner support arm (7) away from
the main housing approximately 90° and
lock it in place by turning the miter
adjusting lever clockwise.
NOTE: The miter adjusting lever can be
repositioned by pressing on the spring
loaded button (8) in the top of the lever
(Fig. 12).
5. Rotate the outer support arm (9) so it is
pointing toward the operator and is parallel
with the main housing.
NOTE: The inner support arm is
telescoping to allow the outer support arm
to be moved outward to support longer
workpieces.
6. Insert the hold-down clamp pin (10) into the
hole (11) in the support arm, then slide the
hole of the hold-down cross bar (12) onto
the hold-down clamp pin.
CUTTING WITH THE CUTTING & MITER
GUIDE
1. Assemble the cutting & miter guide as
outlined in Fig. 10, 11 & 12.
2. Loosen the miter adjusting lever (3) by
turning it counter clockwise (Fig. 13).
3. Rotate the inner support arm to the
appropriate angle (11) and tighten the miter
adjusting lever.
NOTE: If the lever interferes with the hold-
down clamp, press the button in the centre
of the lever and rotate it to a better
position.
4. Mark a scrap workpiece with the
appropriate angle. Place it against the
inner support arm and resting on the outer
support arm.
NOTE: The inner support arm is
telescoping and can be pulled out to
support a longer workpiece.
5. Slide the scrap workpiece under the guide
rail (13) while holding it against the support
arm until the cutting line is approximately
3/4" inside the guide rail.
6. Install the hold-down clamp knob and
position it where it will hold the workpiece
in place, then clamp the scrap workpiece to
the support arm by turning the hold-down
clamp knob (14) clockwise.
NOTE: Do not over tighten. You will break
the support arm.
7. Set the cutting depth on the multi-cut saw
to the maximum depth.
8. Slide the blade guard into the matching
grooves (15) in the cutting & miter guide
until the cut line indicator in the blade
guard is centered over the cutting mark on
the scrap workpiece.
NOTE: If the cutting mark does not appear
in the centre of the cut line indicator,
loosen the hold-down clamp and reposition
the scrap workpiece accordingly.
 Loading...