CHANGING A SANDING BELT
The sanding belt must be changed for the
following reasons:
• The belt is badly worn or torn
• The belt is filled with sawdust or paint
• A different grit is required
WARNING: Always remove the plug
from the power source before attempting to
change the sanding belt.
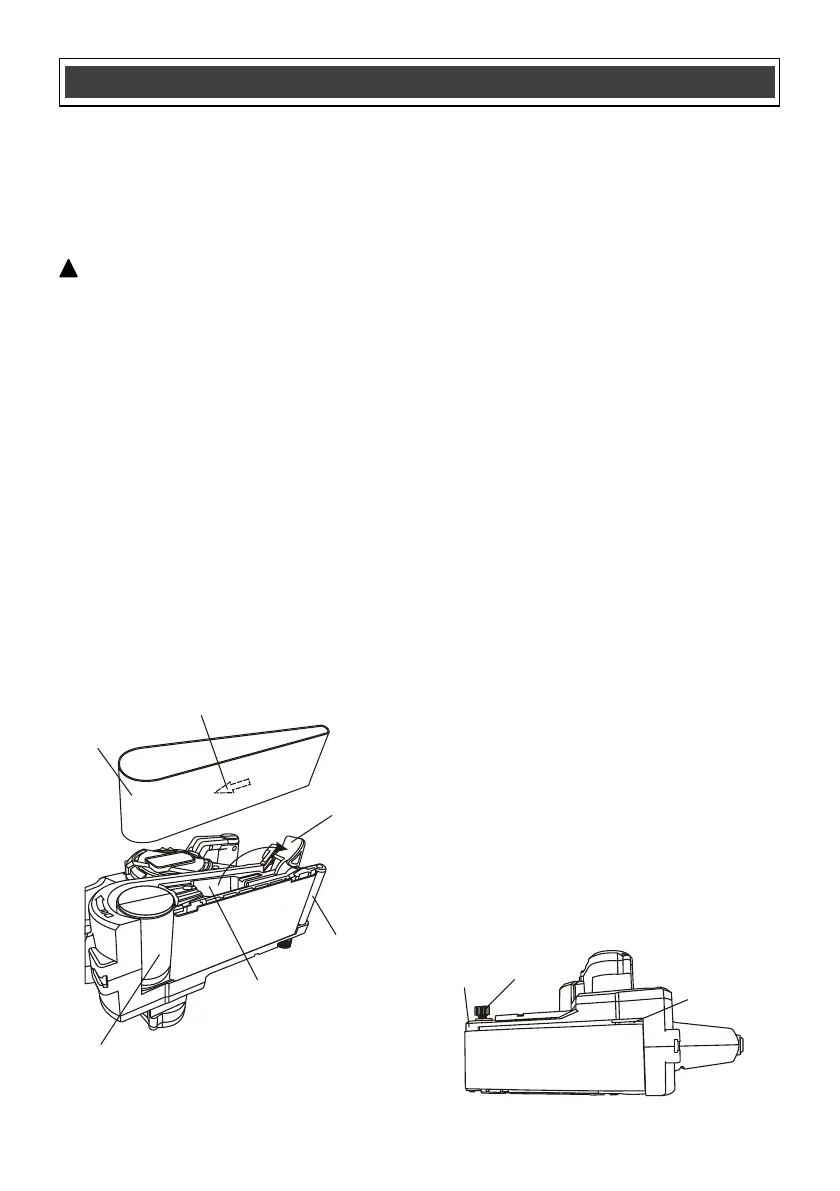
1. Pull the belt tension release lever (1) away
from the side of the sanding belt carrier (2)
(Fig. 5).
NOTE: The hinged front sanding belt cover
may be lifted up for easier access to the front
roller.
2. Slide the sanding belt (3) off the rear roller (4)
and the front roller (5).
3. To install a new sanding belt, slide the new
sanding belt over the rear and front rollers.
NOTES:
a) Make sure the rotation arrow (6) inside the
bottom of the sanding belt is pointing toward
the rear of the tool.
b) Make sure the sanding belt is centered on the
rear and front rollers.
4. Push the tension release lever back into the
side of the sanding belt carrier.
5. Squeeze the ON/OFF trigger switch
momentarily and check to make sure the
sanding belt is centered on the rear and front
rollers. If the sanding belt is not centered on
the rollers, adjust the sanding belt tracking as
outlined in the following section.
ADJUSTING THE SANDING BELT TRACKING
If the sanding belt does not run in the center of
the sanding belt rollers, the sanding belt tracking
adjustment knob must be used to correct the
sanding belt alignment.
1. Turn the sander up-side down. Make sure
the sanding belt is NOT touching anything.
Set speed to #1.
2. Turn the sander switch ON and let the tool
run for a few seconds.
3. While the sanding belt is turning, turn the
tracking adjustment knob (1) very slightly
and observe how the sanding belt moves
on the sanding belt rollers (2) (Fig. 6).
NOTES:
a) Make very small adjustments and let the tool
run for a few seconds after each adjustment
to allow the sanding belt to move to its new
tracking position on the rollers.
b) Turn the tracking adjustment knob clockwise
to make the belt move toward the tracking
knob. Turn the tracking adjustment knob
counter clockwise to make the sanding belt
move away from the tracking adjustment
knob.
c) Continue to make SMALL adjustments until
the sanding belt is tracking in the center of
the rollers before using the sander on the
workpiece.
 Loading...