EasyManua.ls Logo

Performax GTC2DP User Manual

Performax GTC2DP
6 pages
To Next Page IconTo Next Page
Page #1 background imageLoading...
Page #1 background image
1 of 6
Assembly Instructions
GARAGE STORAGE SOLUTIONS
TALL CABINET
Model: GTC2DP
SKU: 211-4354
Safety Instructions
- Use caution when handling and assembling metal parts. The metal may have sharp edges or corners.
The use of protective gloves is recommended.
- This unit should be securely anchored to a wall with suitable fasteners (stud fastener included).
- DO NOT use this unit for anything that is outside the designed function of storage.
- DO NOT step or stand on the shelves.
- The maximum evenly distributed weight for each shelf is 100 lbs.
General Instructions
It is recommended that the cabinet be assembled by more than one person. During shipping and handling, some
of the tabs that are used for assembly may have closed together. Use a flat tipped screwdriver to either pry up or
push from behind the tab to re-open. To assure the squareness of the unit, do not fully tighten the nuts and screws
used in the assembly until all are in place. After all nuts and screws are in place, square the unit on a level surface
and tighten all nuts and screws appropriately.
Parts List & Product Specification
Tools Required
-Rubber Mallet
-Small Blade Screwdriver
-Philips Head Screwdriver
ASSEMBLY QUESTIONS: PLEASE CALL TOLL FREE (866) 441-5080
Ref#
Description
QTY
Ref#
Description
QTY
A
Right Hand Back
1
H
Left Hand Door
1
B
Left Hand Back
1
I
Right Hand Door
1
C
Right Hand Side
1
J
Bolt,M6*10
10
D
Left Hand Side
1
K
Nut,M6
10
E
Top
1
L
Leg leveler
4
F
Bottom
1
M
Screw
1
G
Shelves
3
N
Washer (stud attachment)
1
Question and Answer IconNeed help?

Do you have a question about the Performax GTC2DP and is the answer not in the manual?

Performax GTC2DP Specifications

General IconGeneral
BrandPerformax
ModelGTC2DP
CategoryIndoor Furnishing
LanguageEnglish

Summary

Safety Instructions

General Safety Advice

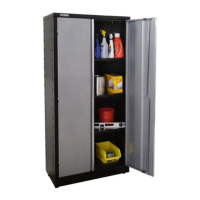
Use caution with metal parts, wear gloves. Anchor unit to wall. Do not step on shelves. Max shelf weight is 100 lbs.

General Instructions

Assembly Tips

Assembly recommended by two people. Pry closed tabs open. Do not fully tighten until unit is square and all parts are in place.

Assembly Steps

Getting Started

Unpack and inspect parts. Gently move bent corners back. Push tabs from behind to open for easier assembly.

Back Assembly

Place left/right hand backs on surface. Slide tabs into rectangular holes to connect backs. Ensure screw holes align.

Side Assembly

Identify side panels. Push tabs out slightly. Slide side panels into back assembly, ensuring tabs engage. Tighten with mallet.

Bottom Assembly

Push tabs out on bottom. Place bottom onto back/side assembly. Engage rear tabs and attach front to sides with screws/nuts.

Leveler Assembly

Install 4 leg levelers into the bottom. Screw them in fully. Adjust once the unit is in its final position.

Top Assembly

Attach top to back/side assembly. Align tabs with holes. Lift assembly slightly to engage tabs. Secure with bolts and nuts.

Door Assembly

Align door hinge pins with side panel hinges. Gently slide pins into holes. Repeat for the other door.

Shelf Assembly

Select shelf position. Angle shelf to engage notches on side panels. Ensure shelf is level and seat into notches.

Final Assembly and Wall Attachment

Adjust levelers for squareness and free door movement. Secure unit to wall stud using screw and washer.

Related product manuals