This document is an instruction manual for the Perlesmith Tilting TV Wall Mount, model PSLTK1. It provides comprehensive guidance for installation, including safety information, weight restrictions, VESA pattern compatibility, required tools, supplied parts, and step-by-step assembly instructions.
Function Description:
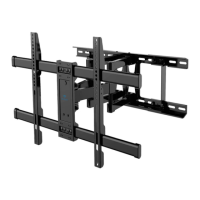
The Perlesmith Tilting TV Wall Mount is designed to securely mount a television to a wall, allowing for a tilting adjustment to optimize viewing angles. It is suitable for use in wood stud, solid concrete, concrete block, and brick walls. The mount is not intended for installation into drywall alone. The tilting feature allows users to adjust the TV's vertical angle, which can help reduce glare and improve viewing comfort from different positions in a room. The design incorporates a locking mechanism to secure the TV to the wall plate once mounted, and a release system for easy removal.
Important Technical Specifications:
- Weight Capacity: The mount can support TVs weighing up to 132 lbs (60 kg). It is crucial not to exceed this maximum weight to prevent failure of the mount and potential damage or injury.
- Wall Compatibility: Designed for wood stud, solid concrete, concrete block, and brick walls.
- For wood stud installation, the nominal wood stud size should be common 2 x 4 inches (51 x 102mm) with a minimum of 1 1/2 x 3 1/2 inches (38 x 89mm). The wall material covering the stud must not exceed 5/8 inch (16mm).
- For solid concrete or concrete block installation, the minimum solid concrete thickness is 8 inches (203mm). The minimum concrete block size is 8 x 8 x 16 inches (203 x 203 x 406mm).
- VESA Pattern Compatibility:
- Minimum VESA pattern: 200mm (7.9 inches) (W) x 100mm (3.9 inches) (H).
- Maximum VESA pattern: 600mm (23.6 inches) (W) x 400mm (15.7 inches) (H).
- If a TV's VESA pattern is outside this range, the mount is not compatible.
- Lag Screw (A1) Dimensions: ST5/16 x 2-3/4 inches.
- Wall Anchor (A2) Dimensions: φ10mm. These are for concrete or brick walls ONLY.
- Drill Bit Sizes:
- For wood stud installation: 7/32 inch (5.5mm) diameter wood drill bit, with a drilling depth of NOT less than 2 3/4 inches (70mm).
- For solid concrete/concrete block installation: 3/8 inch (10mm) diameter concrete drill bit, with a drilling depth of NOT less than 3 inches (75mm).
- Wrench Sizes: 5/16 inch (8mm) wrench and 1/2 inch (13mm) socket wrench.
Usage Features:
- Tilting Mechanism: The mount allows for adjustment of the TV's tilt angle. This is achieved by loosening four preassembled tilt tension bolts (S) on the TV brackets, adjusting the hooks (H) to the desired angle, and then tightening the bolts to fix the angle. The manual emphasizes that the tilt angles of the hooks on both TV brackets must be the same.
- Easy Installation: The manual provides clear, step-by-step instructions for both wood stud and concrete/brick wall installations, including diagrams for each stage.
- TV Bracket Options: The manual illustrates different options for securing TV brackets to the TV, accommodating various TV back designs (flat back, round back, or TVs with a "bump") and scenarios involving cable interference or inset holes, which may require the use of spacers.
- Locking System: Once the TV is hung on the wall plate, a latching mechanism secures it in place. This is engaged by pressing the bottom of the TV into the wall plate while pulling and holding two ropes (R). Releasing the ropes locks the latches.
- Easy TV Removal: To remove the TV, users must first disconnect all cables, then pull down and hold both ropes (R) while gently pulling the bottom of the TV away from the wall. This disengages the locking latches. The TV can then be lifted up and removed from the wall plate.
- Hardware Selection: The manual provides a selection of TV bolts (M4, M6, M8 in various lengths) and spacers to ensure compatibility with a wide range of TV models. It also mentions an optional "PSUHP" Universal Hardware Kit for older or unique TV applications.
Maintenance Features:
- Pre-Installation Check: Before assembly, users are instructed to verify that all parts are included and undamaged. Damaged or defective parts should not be used, and replacement parts can be requested from customer service.
- Secure Fastening Verification: After attaching the wall plate to the wall, users are advised to pull down on the TV wall mount with their hands to ensure it is firmly secured before attaching the TV.
- Bolt Engagement Verification: When securing TV brackets to the TV, users must verify adequate thread engagement with bolts or bolt/spacer combinations, recommending at least 5 turns of engagement. This prevents the TV from being too loose or damaging the TV if the bolts are too long.
- Customer Support: The manual provides contact information (phone and email) for AV Supply Group in New Zealand and Australia for any parts enquiries or installation difficulties. This ensures users can get assistance if they encounter issues or require replacement parts.
- Safety Warnings: The manual includes prominent safety warnings throughout, emphasizing the importance of reading all instructions, avoiding exceeding weight capacity, not installing into drywall alone, and ensuring the wall can support the combined weight of the TV and mount. It also warns against overtightening lag screws and using specific tools for certain steps.