Do you have a question about the Perlesmith PSTVS21 and is the answer not in the manual?
Critical safety guidelines and warnings for product installation and use.
Verifies TV VESA pattern compatibility before installation, essential for correct mounting.
Lists essential tools not provided with the TV stand for assembly.
Lists all parts and hardware required for Step 1 of the assembly process.
Lists all parts and hardware required for Step 2 of the assembly process.
Lists all parts and hardware required for Step 3 of the assembly process.
Lists all parts and hardware required for Step 4 of the assembly process.
Lists all parts and hardware required for Step 5 of the assembly process.
Guides the assembly of the TV stand base structure.
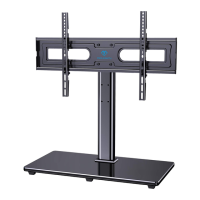
Details connecting the TV plate to the support pillar for height adjustment.
Explains how to attach wire clips to the support pillar for cable management.
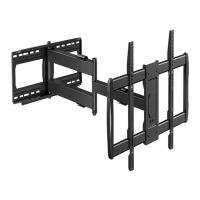
Instructions for attaching TV brackets to the television using appropriate bolts.
Covers mounting the TV onto the plate and organizing cables.
Provides guidance on manually adjusting the swivel angle of the TV stand.
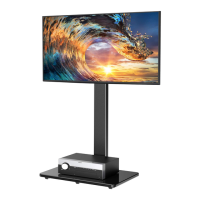
This document outlines the assembly and usage of a TV stand, designed to provide a stable and adjustable mounting solution for various television sets. The stand's primary function is to elevate a television to an optimal viewing height and allow for swivel adjustments, enhancing the viewing experience in different room configurations.
The assembly process begins with the base, which consists of a tempered glass base and a support pillar. The tempered glass base is designed with a shiny side intended to face upwards, contributing to the aesthetic appeal of the stand. Foot pads are applied to the painted side of the glass base in the corners to protect surfaces and provide stability. The support pillar is then securely connected to the tempered glass base using bolts, steel washers, and plastic washers. This step may require assistance due to the size and weight of the components, emphasizing the importance of careful handling during assembly.
Following the base assembly, the TV plate is connected to the support pillar. This connection is crucial for determining the TV's height and swivel capabilities. The design offers three distinct height choices, allowing users to select their desired viewing position. When attaching the swivel component and TV plate to the support pillar, it's important to ensure the bump on the TV plate faces the back side of the TV stand. This detail is critical for proper alignment and functionality. Like the base assembly, this step might also benefit from additional assistance to ensure correct and safe installation.
Cable management is addressed with the inclusion of wire clips, which are secured to the support pillar. These clips help organize and conceal cables, contributing to a cleaner and more organized appearance around the television. This feature is particularly useful for maintaining a tidy entertainment area, preventing tangled wires and reducing visual clutter.
A significant portion of the manual is dedicated to securing the TV brackets to the television itself. This step is critical for ensuring the TV is safely mounted. The manual provides detailed guidance on selecting the correct bolts based on the TV's VESA pattern. It highlights the importance of adequate thread engagement, recommending at least five turns to ensure the bolts are securely fastened. Warnings are given against using bolts that are too short, which would fail to hold the TV, or too long, which could damage the TV. The manual also illustrates various bolt and spacer combinations, accommodating different TV back designs such as flat, round, or those with a "bump" or inset holes. Spacers are used to create extra space between the TV and the brackets, particularly useful for cable interference or uneven TV backs. Washers are also specified for use with spacers to prevent them from falling down, ensuring a secure fit. The TV brackets themselves are three-height-adjustable, offering further customization for optimal viewing height. It is crucial to ensure the TV brackets are equally centered on the TV and securely fastened in place to prevent accidents. The manual notes that bolt hole locations can vary by TV manufacturer, and the illustrations provided are general examples.
Once the TV brackets are attached to the television, the TV is then attached to the TV plate. This involves carefully lifting the TV and inserting safety locks into upward-facing hooks on the TV bracket. These safety locks are then tightened until their bolts touch the TV plate, securing the TV in position. The instruction "Be gentle" during this step underscores the need for careful handling to prevent damage to the TV or the stand.
Finally, the stand allows for adjustment of the swivel angle. If necessary, the TV plate or the entire TV can be manually swivelled to achieve the desired viewing angle. This flexibility is a key usage feature, enabling viewers to adjust the screen position to suit different seating arrangements or to reduce glare from windows or lights.
Maintenance features are implicitly integrated into the design and assembly instructions. The use of durable materials like tempered glass and metal components suggests a long-lasting product. The emphasis on correct bolt selection and secure fastening during assembly is a preventative measure against future issues, reducing the need for frequent maintenance. The wire clips, while primarily for organization, also protect cables from damage, indirectly contributing to the longevity of the connected devices. The clear instructions for assembly and the warnings about proper usage are designed to ensure the stand functions correctly over time, minimizing wear and tear that might arise from incorrect setup. In case of any issues or if replacement parts are needed, the manual provides contact information for technical support, ensuring users can maintain their stand effectively. This comprehensive approach to assembly and usage aims to provide a reliable and user-friendly experience, with built-in considerations for the stand's long-term performance and safety.
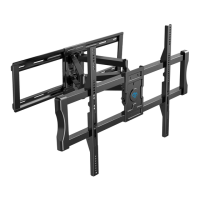
| Mount Type | Full Motion |
|---|---|
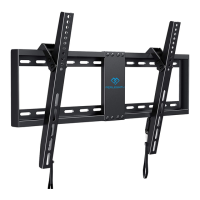
| Tilt Range | -5° to +15° |
| Material | Steel |
| Color | Black |
| Swivel Range | ±90° |