Key Definitions
Remote Transmitter
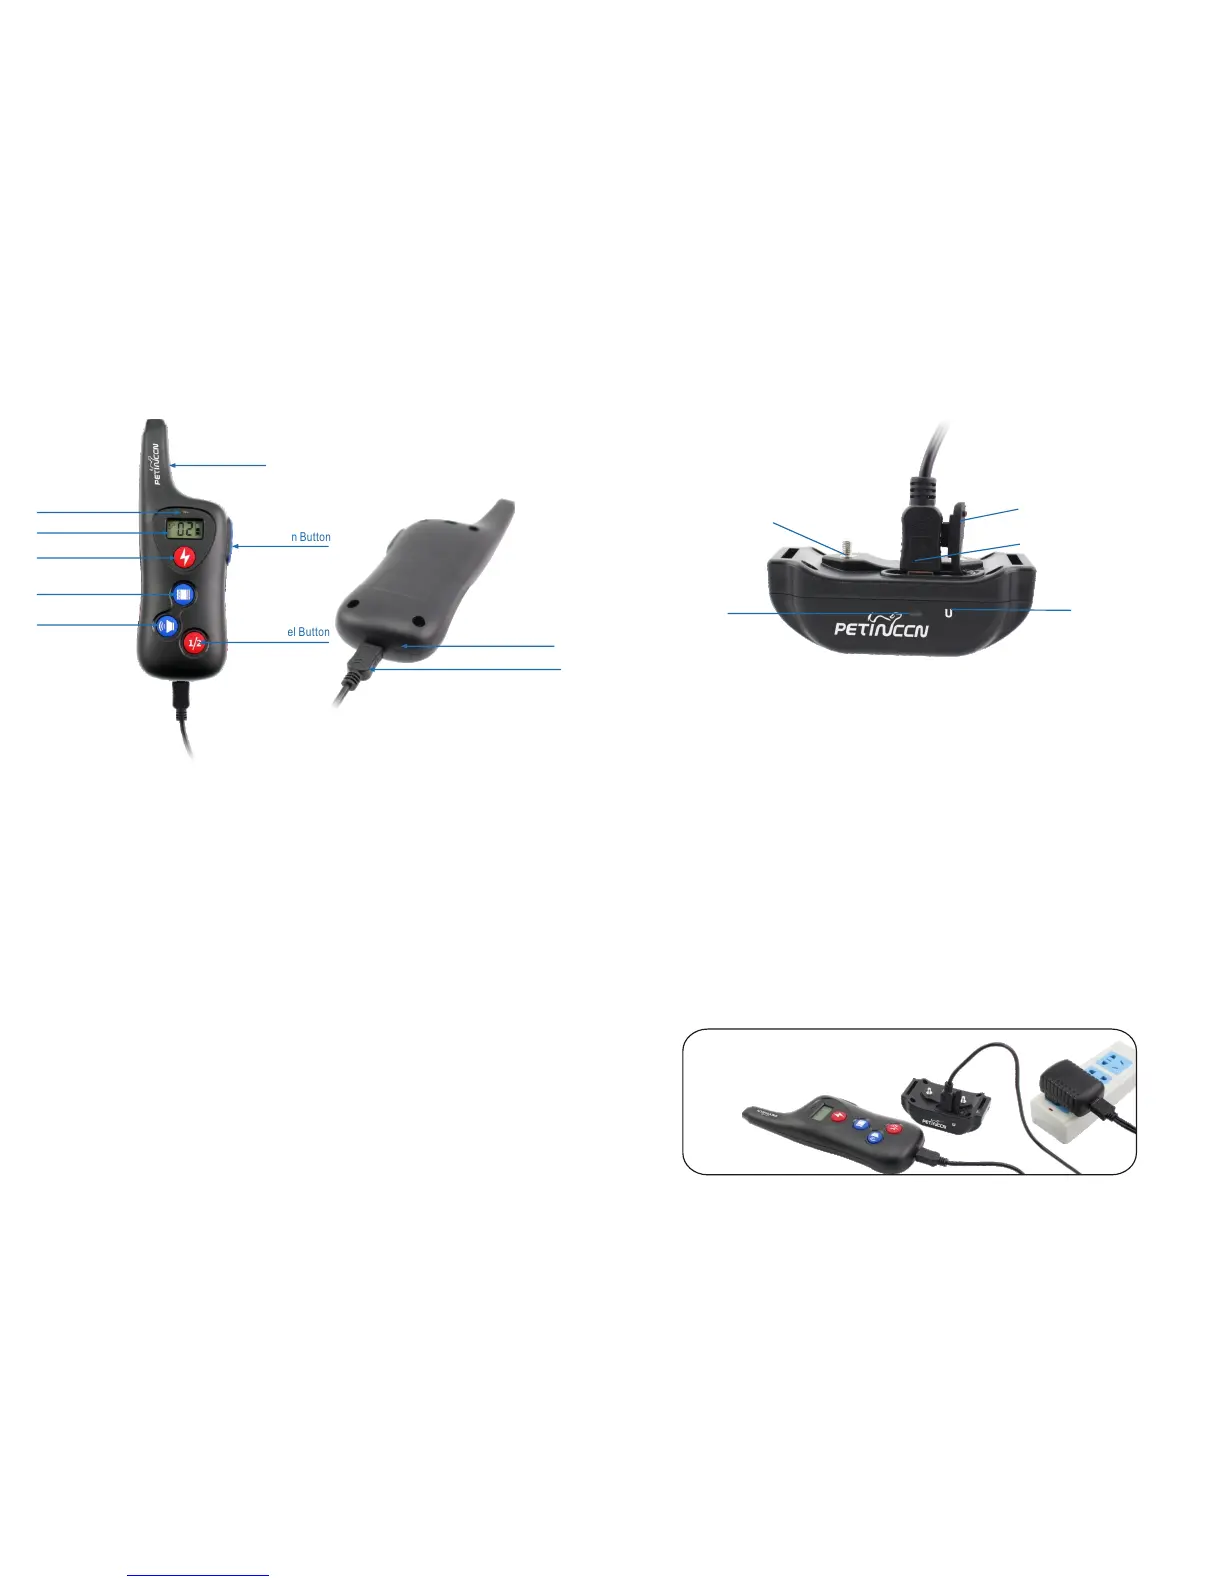
1. Antenna: Transmits signal from Remote Transmitter to the Collar Receiver.
2. LED indicator: The light will be activating when any of the stimulation buttons
(Static Button/ Vibration Button/ Sound Button) are pressed or charging.
6. Sound Button: Pressing this button will deliver a sound to a Collar Receiver
of selected channel.
7. Channel Button: Pressing this button will swap between the first and second
collar receiver.
4. Static Button: Pressing this button will deliver electronic pulse stimulation
to a Collar Receiver of selected channel.
3. LCD Screen: Indicating intensity level, battery and dog selection.
5. Vibration Button: Pressing this button will deliver vibration to a Collar Receiver
of selected channel.
8. Up/Down Button: Selects intensity level for Tone, Vibration and Static Shock.
Collar Receiver
2. Magnetic Sensor Icon:
1. LED Indicator: Flashes green when any of the stimulations are pressed. It
will blink red if the battery power is low to indicate the Collar Receiver needs
recharging.
3. Receiver Charging Port: Insert charging connector into charging jack to charge
the receiver.
HOW TO USE
Antenna
Indicator Light
Channel Button
Static Button
Vibration Button
Sound Button
Up/Down Button
Contact points
Magnetic Sensor Icon
Receiver Charging Port
9. Magnetic Sensor Icon:
1) Turn ON/OFF the receiver collar.
2) Pair the transmitter and receiver.
10. Transmitter Charging Jack: Insert charging connector into charging hole to
charge the Transmitter.
1) Turn ON/OFF the receiver collar.
2) Pair the transmitter and receiver.
4. Contact Points: Helps deliver safe static correction.
5. Rubber Cover: Seals charging jack to keep dust and water from entering. If
not sealed, then the item will not be waterproof.
Note: Please charge before using the product! Please ensure you're putting the
correct side of the cable into the USB charger port as the connector is not the
same size on both ends.
-6- -7-
LCD Indicator
Transmitter Charging Jack
Magnetic Sensor Icon
LED Indicator
Rubber Cover