How To Use
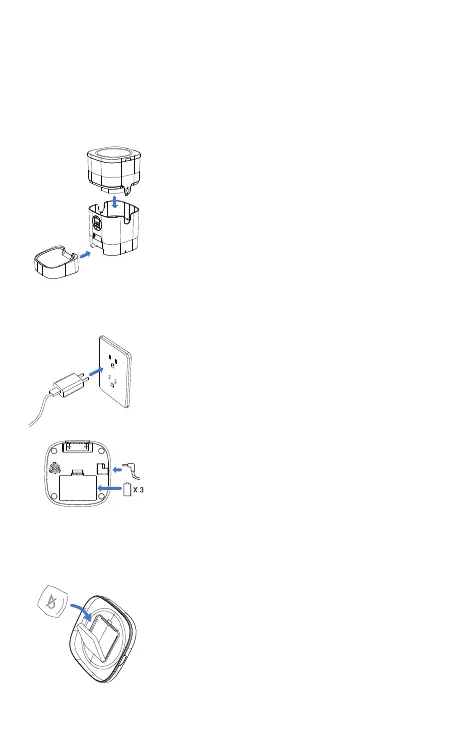
• Place the feeder in a desired location. Check the
food tank is in place.
• Align the bulging of the food tray and holes in the
base, and push upward to connect the two.
Note: Before moving the feeder, please empty the
tray, press it down to remove from the base. Hold
the base instead of any other parts when lifting the
feeder.
• Insert the 5V power adapter into a wall socket.
Plug in the power socket of the feeder.
• Open the battery compartment at the bottom of
the unit, and install 3 alkaline D batteries (not
included) in case of outage.
• The LCD display will light up automatically
indicating the feeder is on now.
Note:
1) Battery NOT included.
2) Before connecting to power, make sure all parts
are clean and completely dry.
3) The battery should power with an output of 4-5V;
the battery level icon on the display blinks on a
low battery level (<4V).
• Open the lid, place the desiccant bag (1 included)
into the desiccant carrier underneath.
Note:
1) It’s recommended to use a desiccant bag and
change them frequently in case of mold.
2) Please remove the desiccant bag before cleaning
the lid.
Warning: Please use the original 5V power supply.
1. Assembling Food Tray
2. Connecting Power
3. Placing Desiccant bag
5