petsafe.com 17
DEITNL
ES
FR
EN
7. To prevent the receiver collar from going into over-stimulation protection mode, walk back into the pet area
until the toning stops.
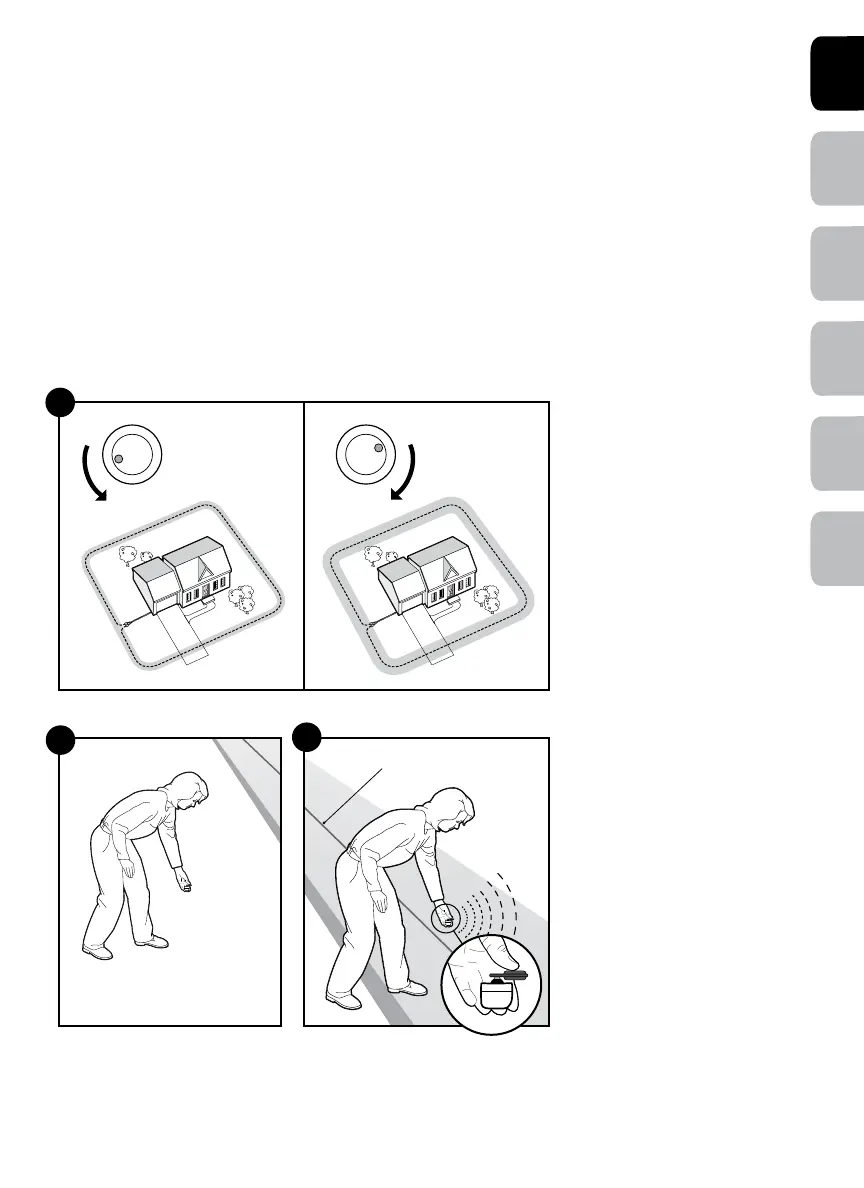
If the receiver collar does not tone at the desired range, adjust the boundary width control
knob to obtain the desired range. Turning the boundary width control knob clockwise increases the boundary
width while turning it anti-clockwise decreases
it (8E). Repeat this activity as needed until the receiver collar
tones between 2 m to 3 m from the boundary wire. If using a double loop layout, you may need to increase the
separation of the boundary wire and/or increase the size of the boundary width to achieve the desired range.
8. Test the boundary width in a number of different locations around the pet area until you are satisfied that the
system is functioning properly.
9. Next, walk all around the pet area (8F) to ensure there are no areas where the receiver collar may activate from
signals coupled onto buried wires or cables. Test the collar in and around the inside of the house as well. As
mentioned, cable and wires from cable TV, electrical or telephone lines may conduct pet fencing signals inside
and outside the house that can activate the pet’s collar accidentally. While rare, if this occurs, your boundary
wire is probably too close to these outside lines and should be moved or modified as shown in figure 1A.
10. To test the run-through prevention feature, walk towards the boundary wire. The receiver collar should tone and
the test light should flash brighter as you enter the run through area (8G). If you are satisfied that your system is
functioning properly, you are ready to start burying the boundary wire. If the receiver collar did not tone or the
test light did not flash, see the troubleshooting section.
8E
5
2 8
4
10
3
9
1
7
0
6
5
2 8
4
10
3
9
1
7
0
6
Wire
Pet Area
8G
8F
 Loading...