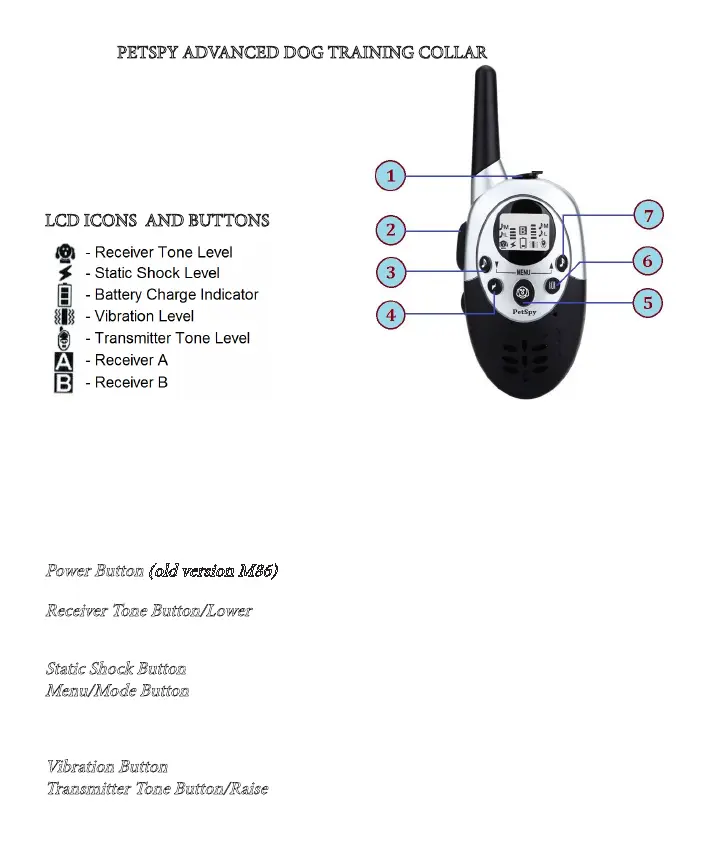
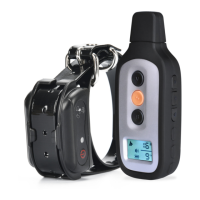
PETSPY ADVANCED DOG TRAINING COLLAR
1. Charging Port
2. Power Button (old version M86)
3. Receiver Tone Button/Lower
4. Static Shock Button
5. Menu/Mode Button
6. Vibration Button
7. Transmitter Tone Button/Raise
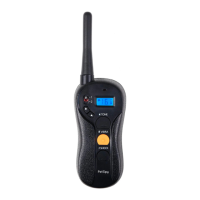
LCD ICONS AND BUTTONS
•Receiver Tone Level: indicates 3 Levels of Receiver Tone.
•Static Shock Level: indicates 8 Levels of Static Shock.
•Battery Charge Indicator: indicates 3 Levels of Battery Charge.
•Vibration Level: indicates 8 Levels of Vibration.
•Transmitter Tone Level: indicates 3 Levels of Transmitter Tone.
•A - Receiver A is being Controlled; B - Receiver B is being Controlled.
•A&B - both Receivers are being Controlled.
Power Button (old version M86)
- Press the button to turn Transmitter on. Press and
hold the button for 2-3 seconds to turn it o. New version M86N is always on.
Receiver Tone Button/Lower
- Press the button to produce a beep in the Receiver Collar
for Sound Training. In Programming Mode, the button is used to LOWER the stimula-
tion level (e.g. Shock).
Static Shock Button
- Press the button to deliver a Static Shock Stimulation to your Dog.
Menu/Mode Button
- Press the button to change control between Receiver A, Receiv-
er B, or Both Receivers A&B. Press and hold the button for 3 seconds to enter/exit
Programming Mode. While in Programming Mode, press the button to conrm your
selected settings (e.g. Static Shock or Vibration Level) and go to another one.
Vibration Button
- Press the button to deliver a Vibration Stimulation to your Dog.
Transmitter Tone Button/Raise
- Press the button to produce a tone in the Transmitter.
In Programming Mode, the button is used to RAISE the stimulation level (e.g. Shock).