The thread tension is regulated by turning thumb nut 18 back of the tension
discs. Turn
the
nut
counter-clockwise
for a
tighter
tension,
or clockwise for a
looser
tension.
If the threod should pile up
at
one
end
of the bobbin, adjust the position of the
tension stud. The set screw securing this stud in position can be reached from
below.
5. Threading the
Needle
Because of the high speed of the seamer the smooth possoge of the thread to
the needle is especially importont.
Lead the thread from spool pin 1 up to the top thread guide of the thread
stand and down to thread guide 2. It is recommended to lead the thread first
through the vertical hole from top to bottom and then through the transverse
hole of the guide, as shown in Fig. 4 and 5, in
order
to prevent it from snarl
ing up on the guide and breaking,
Now lead the thread through two or three holes of thread retainer 3, as may
be required,
clockwise
around and between tension discs 4, through thread
check spring 5, under stock threod regulator 6, through thread guide 7, from
right to left through the hole in take-up lever 8, through thread guides 7 and 9
and from left to right through needle eye 10.
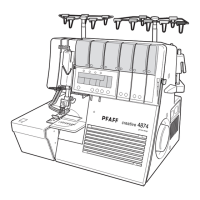
6. Regulating the Stitch Length
The stitch length is regulated by means of stitch length control n
(Fig.
6). The
large diameter of this control
mokes
for an exceedingly fine
stitch
length
regulation. When control n is turned by one tooth, the
stitch
length is increased
by
Vfii".
The stitch length is indicated on the teeth in millimeters.
Fig. 6 R8607