EasyManuals Logo

Pfaff 910 Series User Manual

Pfaff 910 Series
20 pages
To Next Page IconTo Next Page
To Previous Page IconTo Previous Page
Page #11 background imageLoading...
Page #11 background image
Adjustment
2 - 6
37 14 47
24V = 4% ED
2.09 Engaging solenoid
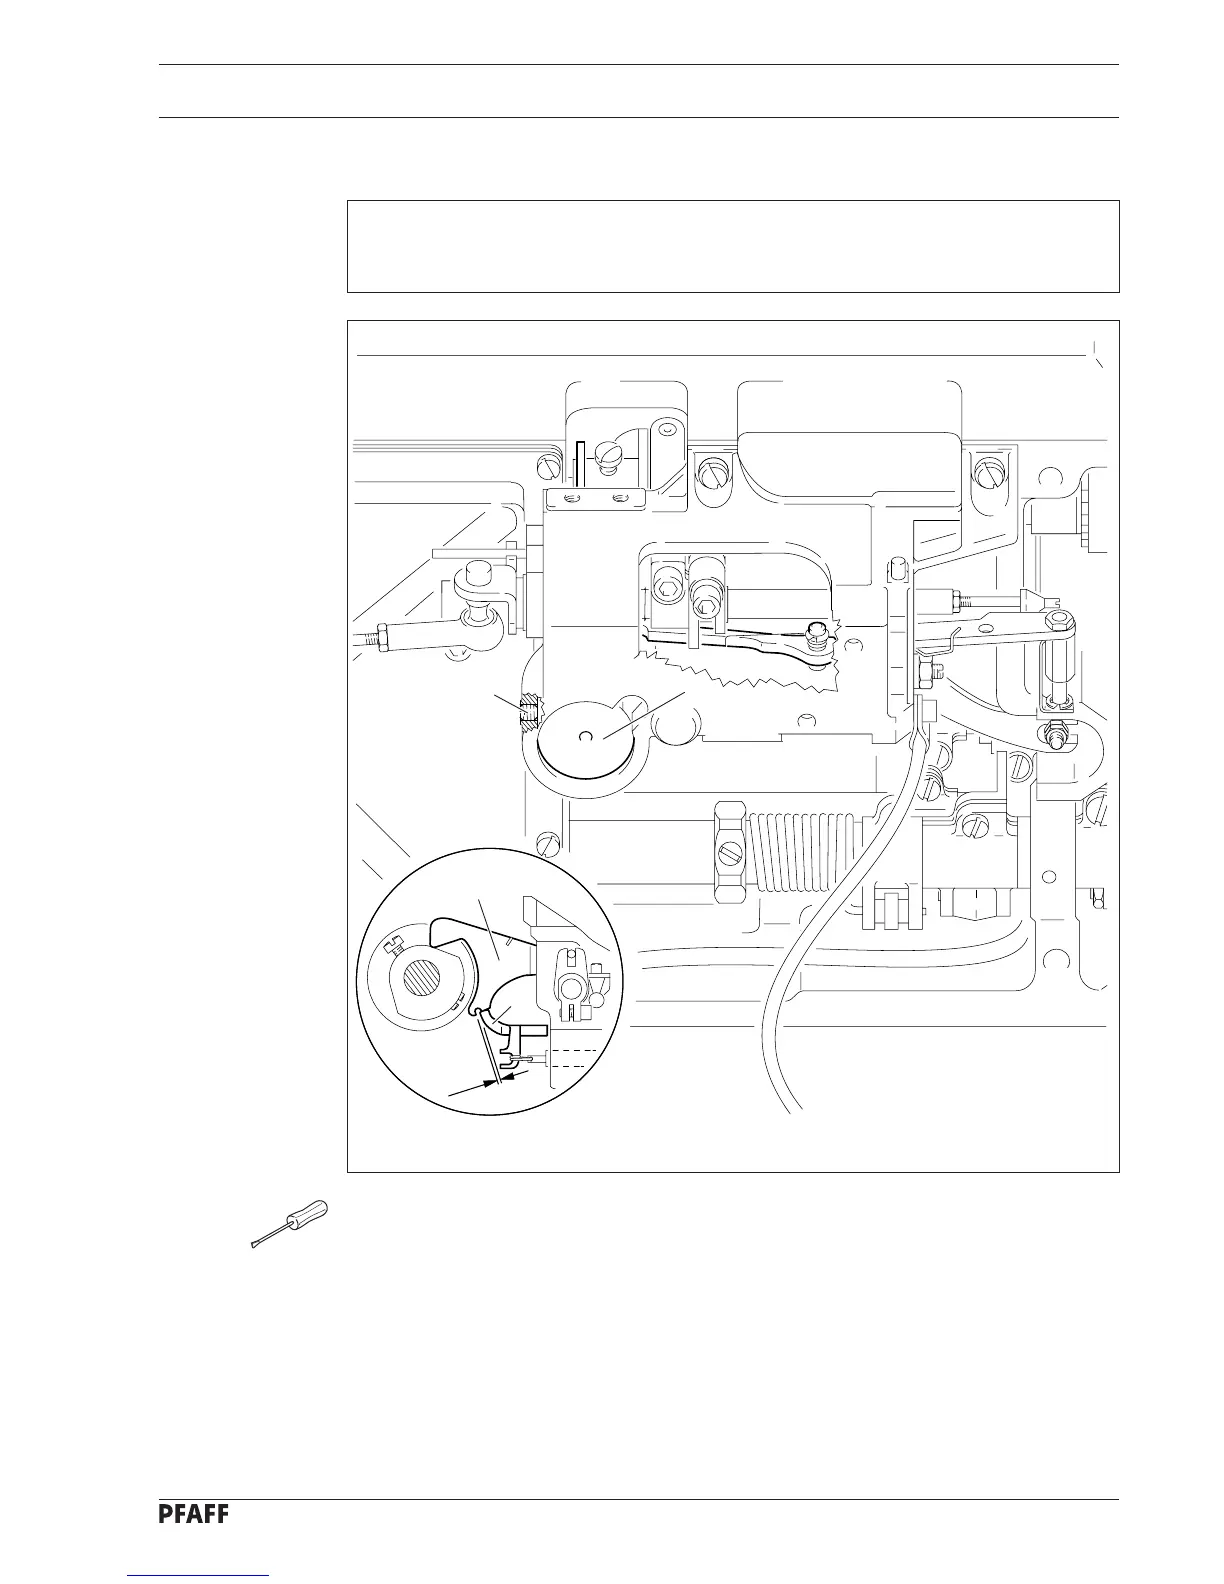
Requirement
With the needle bar 2.0 past bdc (hole 1) there must be a clearance of 0.2 to 0.3 mm
between engaging lever 2 and pawl 1 when the engaging solenoid is active.
Fig. 2 - 05
0.2 -
0.3 mm
2
1
3
4
Position the needle bar 2.0 after bdc (hole 1).
Activate engaging lever 2 manually until pawl 1 drops into place.
Loosen screw 4.
Press the solenoid plunger as far as possible into the solenoid housing 3 and move
solenoid housing 3 and the cutout arm in accordance with the requirement.
Tighten screw 4.

Questions and Answers:

Question and Answer IconNeed help?

Do you have a question about the Pfaff 910 Series and is the answer not in the manual?

Pfaff 910 Series Specifications

General IconGeneral
BrandPfaff
Model910 Series
CategorySewing Machine
LanguageEnglish

Related product manuals