9
1
2
3
When the embroidery is nished, the attachment and
needle will automatically be set into correct position
for removal.
(The presser foot should be raised to “up position” and the
needle raised to its highest.)
How to cut and nish off the ends of the embellish-
ment, see respective tutorial in your machine.
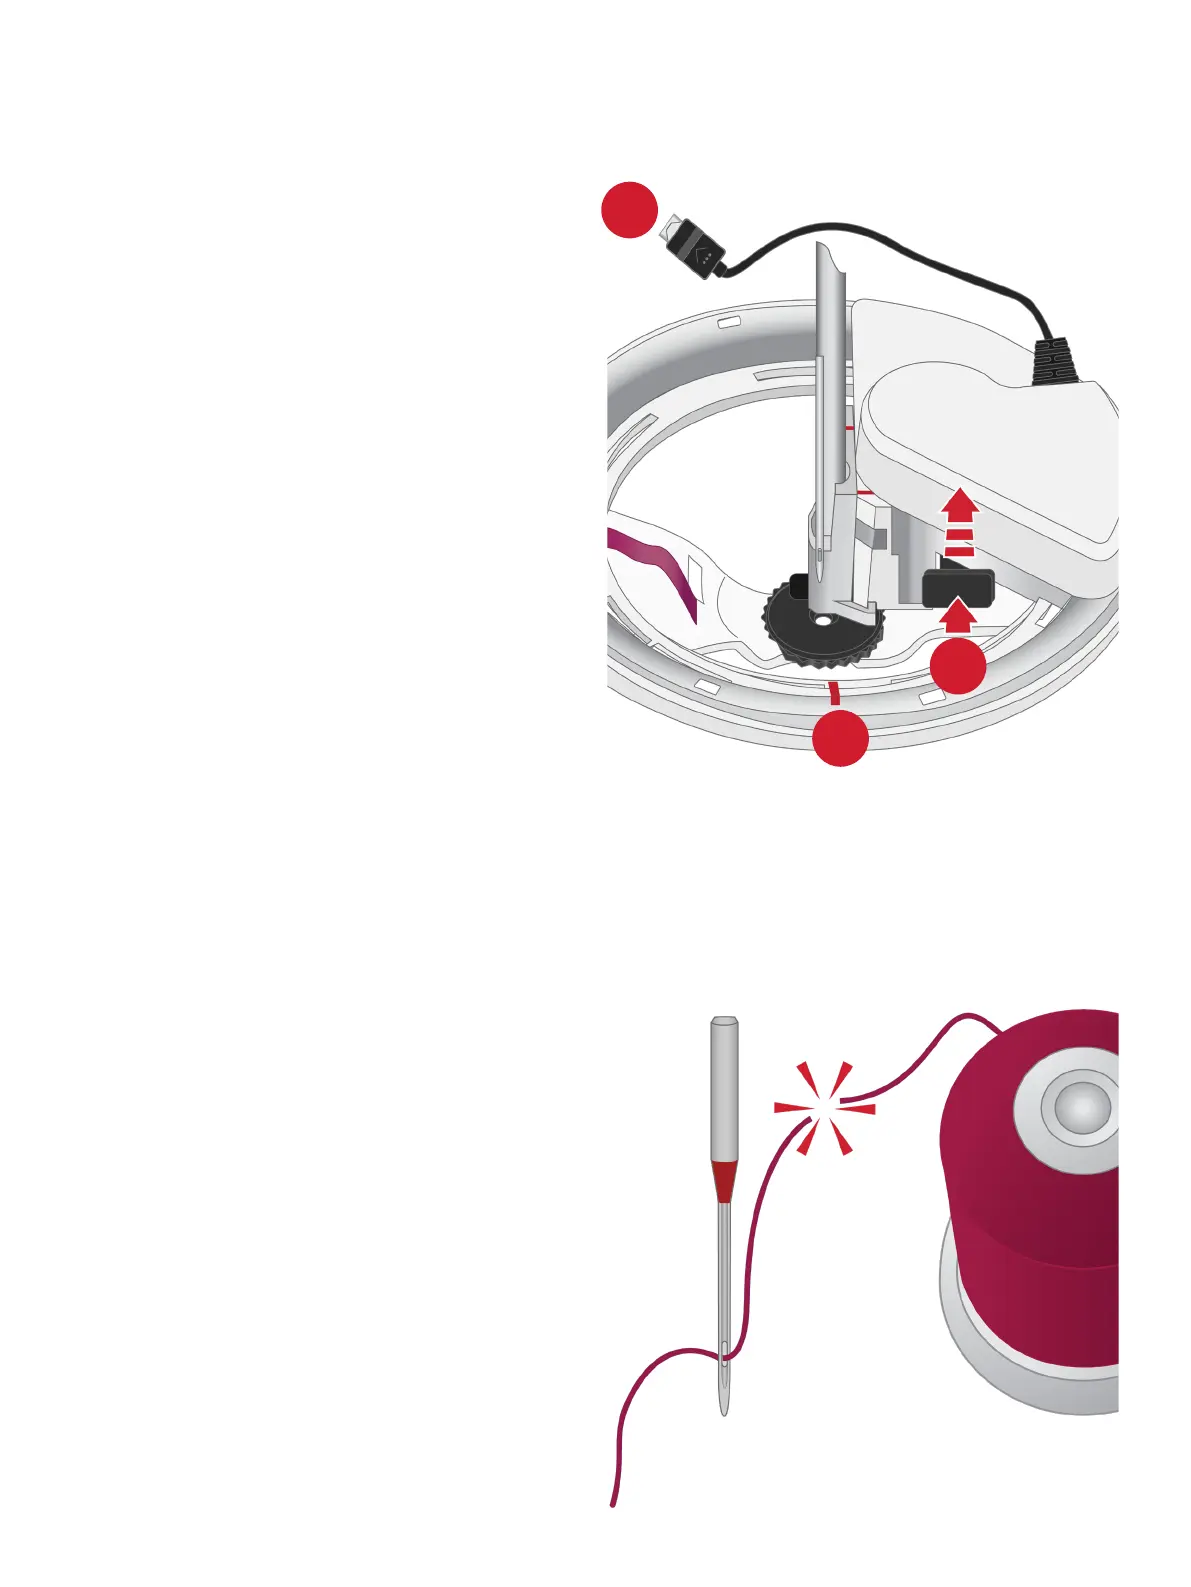
1. Pull out the plug from the accessory socket.
2. Before removing the Embellishment Attachment,
make sure that the red markings are correctly
aligned. Two markings must match; the marking
on the inner guide and the marking on the base
unit.
3. To remove the Embellishment Attachment, push
and hold the release lever while you slide the
attachment backwards until it’s released from the
holder. Tilt the edge of the attachment down so
the red lines t under the needle as you pull it
backwards.
Remove the Embellishment
Attachment
If the thread breaks during an embellishment color
block, you can re-thread using the automatic needle
threader. When the machine senses a thread break,
the Embellishment Attachment is automatically set
in threading position. Thread as usual and press the
automatic needle threader button to thread the needle.
If it’s difcult to reach the needle thread guide and/or
the needle threader, use tweezers.
Move backwards 1–2 stitches and continue embroider-
ing.
If the Thread Breaks