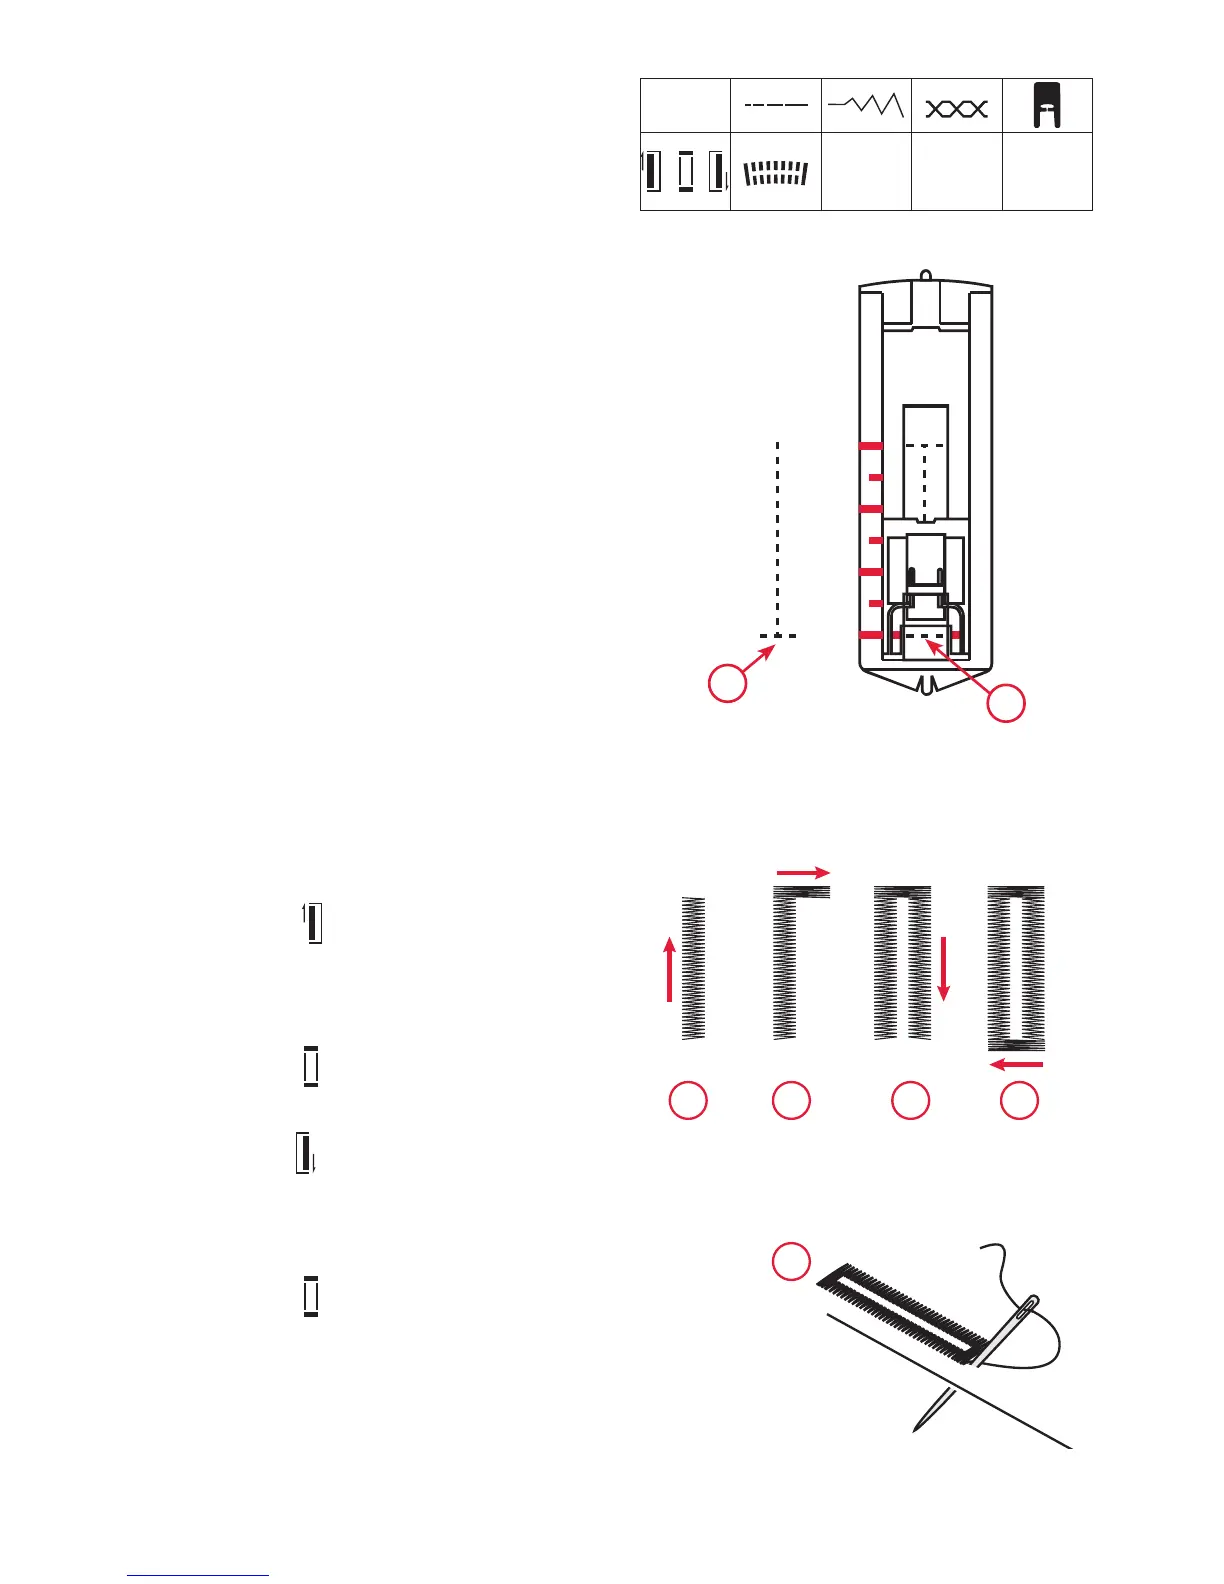
30
Standard Buttonhole
(model 130s/140s)
The fabric should be interfaced and/or stabi-
lized where buttonholes are to be sewn.
Prepare the Buttonhole
Measure diameter and thickness of the but-
WRQDQGDGGPPµIRUEDUWDFNVWRRE-
tain correct buttonhole length. Mark the start
position and buttonhole length on the fabric
$
$WWDFKWKH)RXU6WHS%XWWRQKROH)RRW$
6OLGHWKHIRRWEDFNZDUGVDVIDUDVLWZLOOJR
Note: Before starting to sew any buttonhole, al-
ways push the the buttonhole foot fully back. The
red marks are arranged at an interval of 0.5 cm.
They are a guide when determining the length of
the buttonhole.
Place the fabric under the foot, so that the
PDUNLQJRQWKHEXWWRQKROHIRRW%DOLJQV
ZLWKVWDUWSRVLWLRQ$RQIDEULF/RZHU
the foot, so that the buttonhole center line
marked on the fabric aligns with the center
RIWKHEXWWRQKROHIRRW%
Sew the Buttonhole
6HOHFWVWLWFK
1
and sew the right side of
WKHEXWWRQKROHWRWKHUHTXLUHGOHQJWK
Cut the top thread after a few stitches.
2. Raise the needle to its highest position.
6HOHFWVWLWFK
4
2
and sew a few bartacks.
3. Raise the needle to its highest position.
6HOHFWVWLWFK
3
and sew the left side of the
buttonhole until it matches the previous
side in length.
4. Raise the needle to its highest position.
6HOHFWVWLWFK
4
2
and sew a few bartacks.
5. To secure the buttonhole, thread the top
thread into a needle, pull to the wrong
side and tie the end before cutting excess
thread.
1
Set for buttonhole
2 3 4
B
5
stitch
4
1
2
3
6 3-5 5A
A