510930200
Installation Support • Soporte de instalación • Support d’installation
Installation Videos Available
Videos de instalación a disposición
Vidéos d’installation disponibles
Personal Assistance, Product Specs, &
“How-to” Questions:
Asistencia personal, especificaciones del
producto y preguntas sobre “cómo hacerlo”:
Aide personnelle, spécifications du produit
et questions « pratico-pratiques » :
1800PFAUCET (7328238)
pisterfaucets.com/support
pisterfaucets.com/videos
May 20, 2019
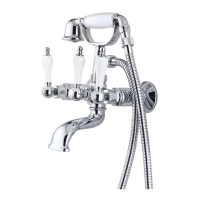
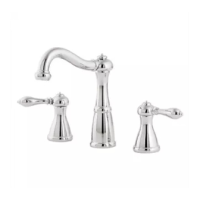
4 Hole Roman Tub Trim Kit
Juego Para La Tina Romana De 4 Agujeros
Baignoire Romaine Kit Garniture De 4 Trous
*sold separately
*se vende por separado
*vendu séparément
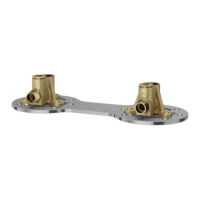
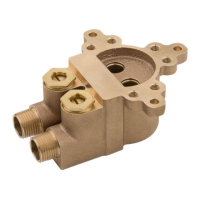
Required Valve*
Válvula requerida*
Valve nécessaire*
0X6440R
Roman Tub Valve
Válvula de bañera romana
Valve de baignoire romaine
Hex Wrenches
Llaves hexagonal
Clés hexagonale
Adjustable Wrench
Llave ajustable
Clé à mollette
Safety Goggles
Gafas de seguridad
Lunettes de sûreté
Plumber’s Putty
Masilla para plomeria
Mastic de plombier
PTFE plumber's tape
Cinta para plomería PTFE
Ruban PTFE de plombier
Flashlight
Linterna
Lampe-torche
Cloth
Paño
Chion
Quick Installation Guide
Guía de instalación rápida
Guide d’installation rapide
LG64GL
Saxton
™
WARNING / AVERTENCIA / AVERTISSEMENT
To reduce the risk of injury or property damage, read all instructions before installing product. Wear safety goggles. Product must be installed in
accordance with all state & local plumbing & building codes. Call a professional if you are uncertain about installing this product.
This product has been designed for use with the Pister™ 0X6- 440R Roman Tub series rough-in. It will not work with any other product. For
optimum performance of your roman tub, a minimum water pressure of 25 PSI (172 kPa) is recommended.
Para disminuir el riesgo de lesiones o daños a la propiedad, lea todas las instrucciones antes de instalar el producto. Utilice gafas de seguridad. El producto
deberá instalarse de acuerdo con la normativa de plomería y construcción estatal y local. Llame a un profesional si no está seguro sobre cómo instalar este
producto. Este producto ha sido diseñado para uso con la tubería empotrada para bañera romana 0X6440R de Pister™. No trabajará con ningún otro
producto. Para un desempeño óptimo de su bañera romana, se recomienda una presión de agua mínima de 25 PSI (172 kPa).
Pour réduire le risque de blessures ou de dommages, lire toutes les instructions avant d’installer l’appareil. Porter des lunettes de sécurité. Il faut installer
l’appareil en respectant tous les codes de construction et de plomberie locaux et d’État. Appelez un professionnel si vous n’êtes pas certain de la façon
d’installer cet appareil. Cet appareil a été conçu pour utiliser avec la plomberie brute Pister série 0X6440R baignoire romaine. Il ne fonctionnera pas avec
un autre appareil. Pour obtenir la performance optimale de votre baignoire romaine, une pression d’eau minimale de 25 PSI (172 kPa) est recommandée.
Parts in the Box
• Piezas en la caja • Contenu de la boîte
Required Tools
Herramientas necesarias
Outils nécessaires
Additional Helpful Tools
Otras herramientas útiles
Outils supplémentaires utiles
Turn O Water Supply • Cierre el suministro de agua • Couper l’alimentation en eau
1
Locate the water supply inlets & shut o the water supply valves. These are usually found near
the water meter.
If you are replacing an existing unit, remove the old unit & clean mounting surface thoroughly.
Ubique las entradas del suministro de agua y cierre las válvulas de suministro. Estas se encuentran
generalmente cerca del medidor de agua. Si reemplaza una unidad existente, retírela y limpie
completamente la supericie de montaje.
Repérez les entrées d’alimentation d’eau et fermez les robinets d’arrêt. Ils sont normalement
trouvés près du compteur d’eau. Si vous remplacez un appareil existant, enlevez le vieil appareil et
nettoyez soigneusement la surface de montage.
Hot
Caliente
Chaud
Cold
Fría
Froid
A (2X)
B
C D
E
F
G
J
H
Copyright © 2019, Pister Inc.
1256821
 Loading...