We recommend wearing clean gloves to prevent geng the lamp dirty before use. Carefully remove from
packaging and follow the guidelines below.
PLEASE NOTE: Do not force the lamp holders closed. This could cause damage to both the lamp and lamp
holders. Do not handle lamp with bare hands. Always wear surgical or cloth gloves whenever possible
when handling lamp to minimize ngerprints and oils le on the lamp. If the lamp needs cleaning aer
installaon, use a so dry coon cloth to wipe o ngerprints/skin oils.
1. Open both lamp holders by sliding them outwards and away from the center of the xture, as shown
in PHOTO A.
Do not apply excessive force when installing lamp.
IMPORTANT: The lamp must be oriented so that the high voltage wire end/lead (the end near the
geer, which is the small square tab aached to the wire loop) is installed in the socket end closest
to the ballast as seen in DIAGRAM A.
NOTE: Lamp shown below is for general reference only; actual lamp (if included) may vary.
Anode
(closest to ballast - High Voltage)
Getter
(absorbs lamp impurities)
Burner Filament
(always position up)
Triple Capacitor
Cathode
(Neutral)
Arc Tube Quartz Outer Jacket
DIAGRAM A (side view)
2. Also be sure that the lamp is oriented so that the burner lament (the long wire that runs along
the full length of the arc tube) is posioned upward, facing the top inside surface of the reector.
OVERVIEW
Thank you for purchasing the Phantom Double-Ended Lighng System. Setup is the same for each
system: Open and Enclosed.
INITIAL SETUP AND INSTALLATION CONSIDERATIONS
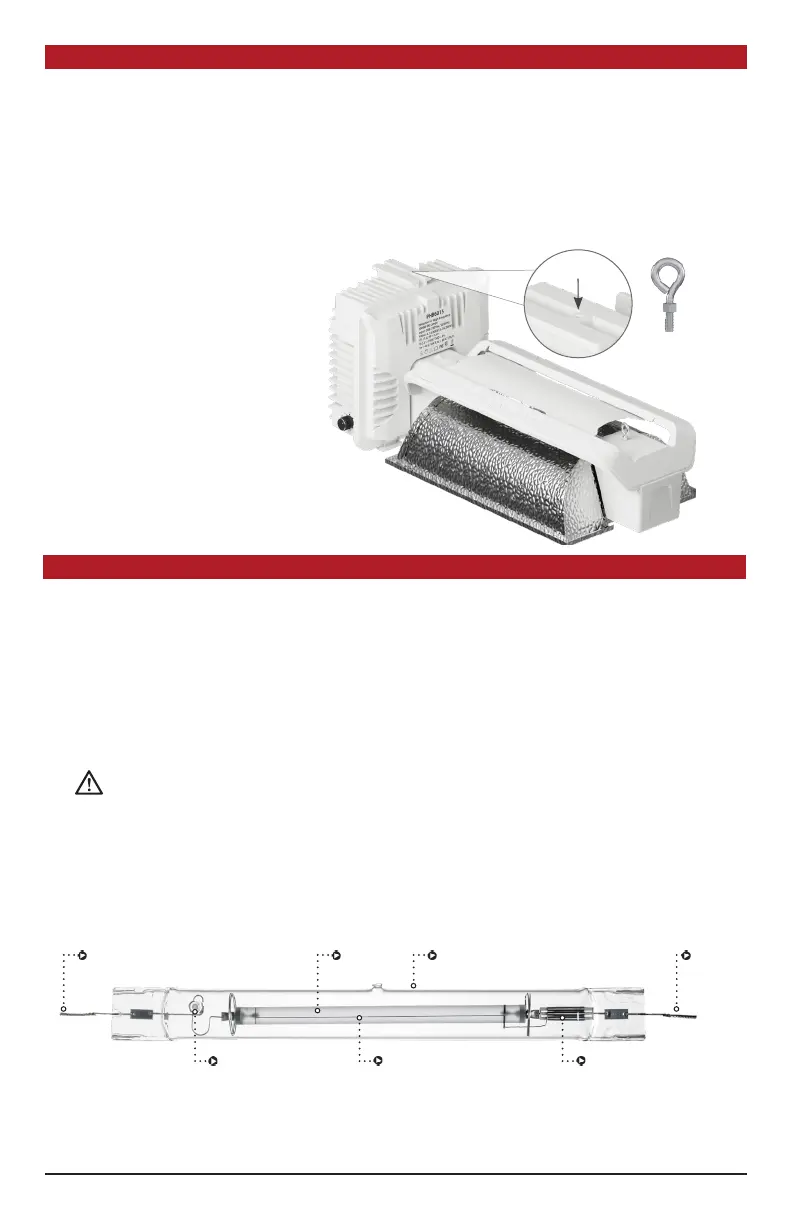
These systems based on the 60 Series ballasts are hard-wired, all-in-one systems. Carefully remove
packaging material and locate power cord and other components. The xture is designed to hang
from eyebolts. One is pre-installed on armature and the other (in a component bag) is designed to be
screwed into threaded hole as shown.
INSTALLING THE LAMP (IF INCLUDED)
1. Make sure your unit is
unplugged.
2. Locate eye bolt in
component bag and screw
securely into threaded hole
on top of ballast enclosure.
Hole
2