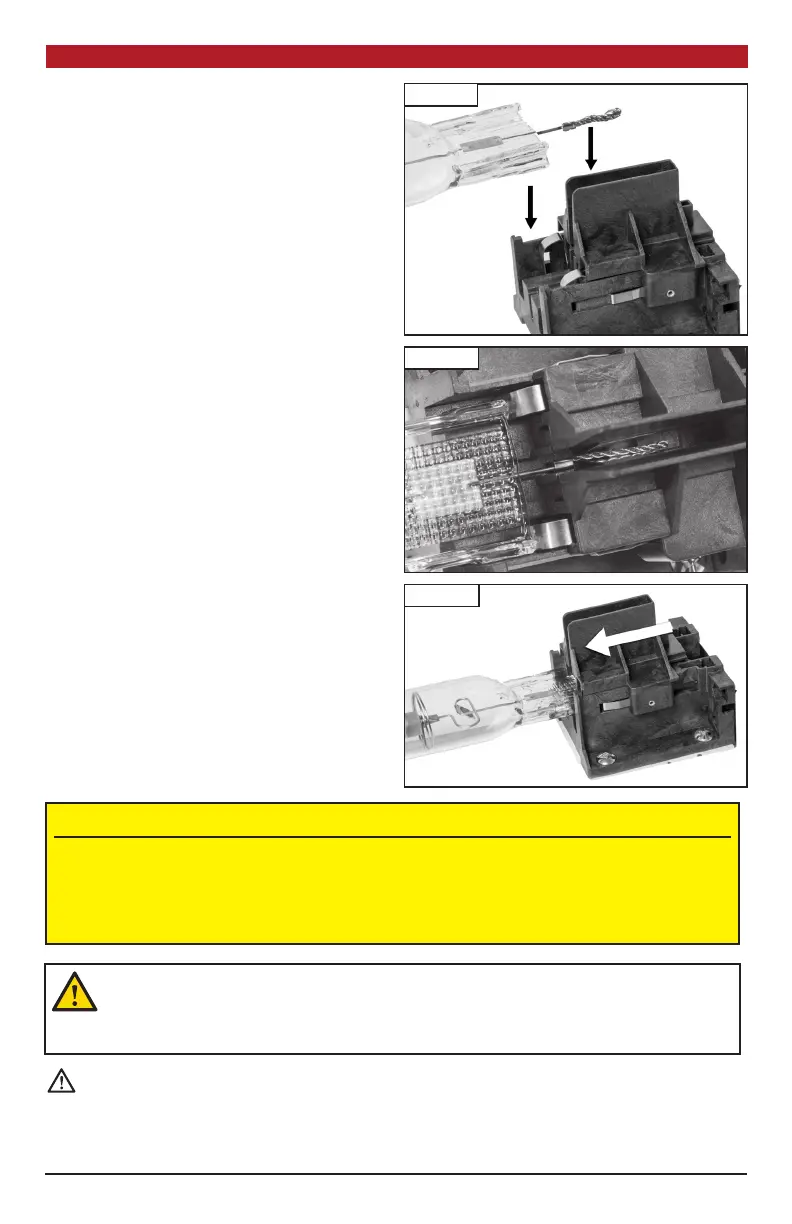
3. Ensure that the wire ends/leads are not
bent or frayed, as this will prevent proper
installaon. Begin by installing the double-
ended lamp within the lamp holders shown
in PHOTO A.
4. The wire ends/leads must be fully seated
as shown (PHOTO B) before sliding each
socket end closed.
5. Aer sliding the socket ends closed, be
certain that there is no gap between the
edge of the sliding secon and the part it
meets at the end of the slide path. Once
lamp is posioned correctly, slide the lamp
holder inward toward the center of the
lamp to secure and lock the lamp in place
as shown in PHOTO C.
INSTALLING THE LAMP
, continued
WARNING – POSSIBLE RISK OF INJURY TO EYES AND SKIN
• Hazardous opcal radiaon may be emied from the light source. Do not stare at operang
lamp. May be harmful to the eyes.
• UV may be emied from the light source. Eye or skin irritaon may result from exposure.
Use appropriate shielding.
• IR may be emied from the light source. Do not stare at operang lamp.
WARNING – WHEN USING METAL HALIDE DOUBLE ENDED LAMPS, 1000W
(100%) OPERATION ONLY. DO NOT DIM/BOOST! USE ONLY OPEN RATED LAMPS
WITH DOUBLE JACKET.
WARNING: FAILURE TO FOLLOW GUIDELINES COULD RESULT IN ELECTRICAL SHOCK.
Do not touch, move, spray, or clean your light xture when it is plugged in. Allow it to cool down before
handling. Recommended mounng clearance for your xture is 8"–12" on all sides. Do not mount
directly to any surface. Make sure to disconnect the power when changing the lamp.
PHOTO B
PHOTO A
PHOTO C
3