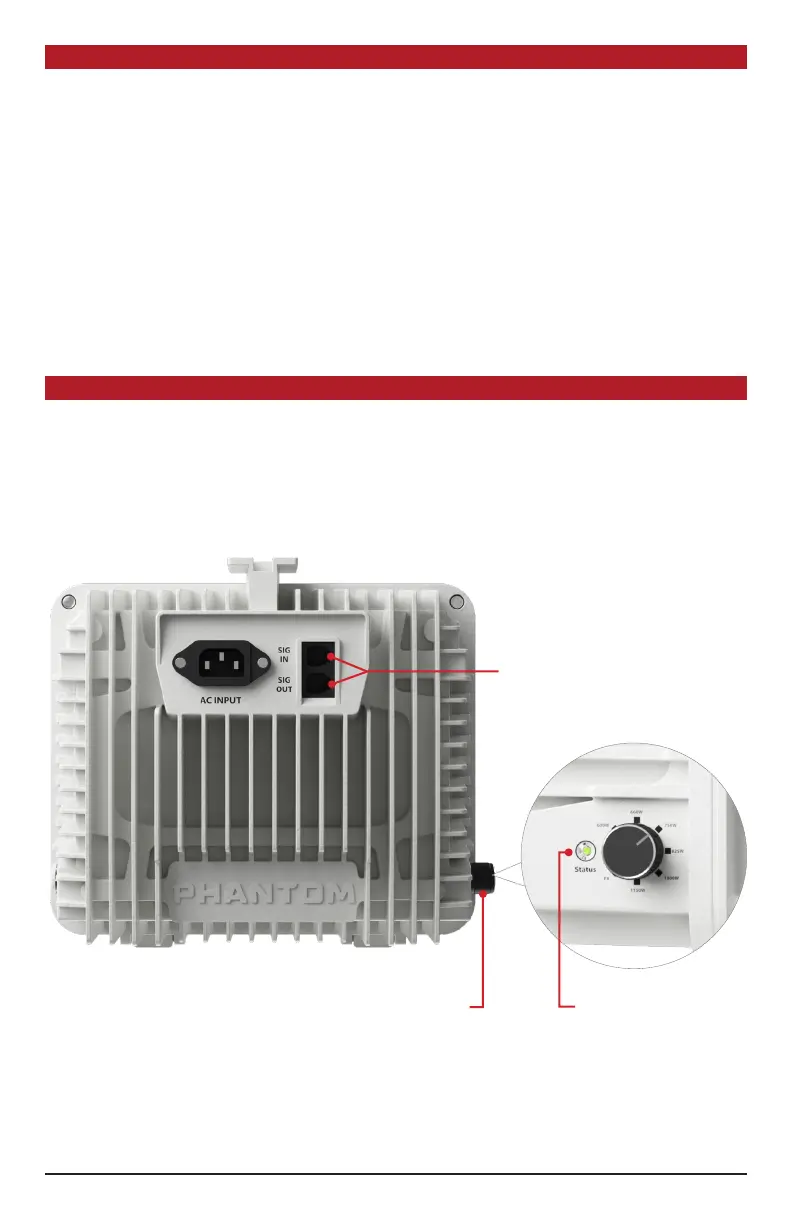
All 60 Series Phantom Ballasts come standard with two RJ control ports on the back enclosure surface
which facilitate communicaon between your Autopilot PX lighng controller or other commercial
greenhouse environmental control system. Use with the PX is oponal—the 60 Series ballasts also
operates with manual control knob when not connected to a PX.
BALLAST OVERVIEW
Two RJ Ports to
integrate with PX
Lighng Controller
Manual control
knob allows for
use without a
lighng controller
HANGING THE FIXTURE
1. Idenfy a suitable locaon for the ballast with sucient cooling and away from any heat source.
2. Plug the power cord into the ballast but DO NOT PLUG SYSTEM IN YET.
3. Determine whether you will be using RJ control method or on board control. If RJ control, proceed
to Ballast overview and Notes on Variable Control and refer to Controller instrucons before
hanging and energizing.
4. Plug the power cord into the power source (electrical outlet).
5. Once the lamp has red, set your desired waage output level. Please note that the ballast
decreases or increases output gradually to protect the lamp, so you might not see an instant
increase upon changing your output percentage.
6. For proper lamp break-in, we recommend that you run the ballast and new lamp at 100% power
for at least 12 straight hours aer inial startup. This will improve lamp life and performance.
LED Status
indicator
4