67
Phantom Flex Manual
66
Phantom Flex Manual
The large frame at the bottom left part of the window when in the Live tab
shows the current image being captured by the camera. The image should
look similar to the image being output over SDI by the camera, but will
always differ somewhat due to the differing natures of video monitors
and computer screens.
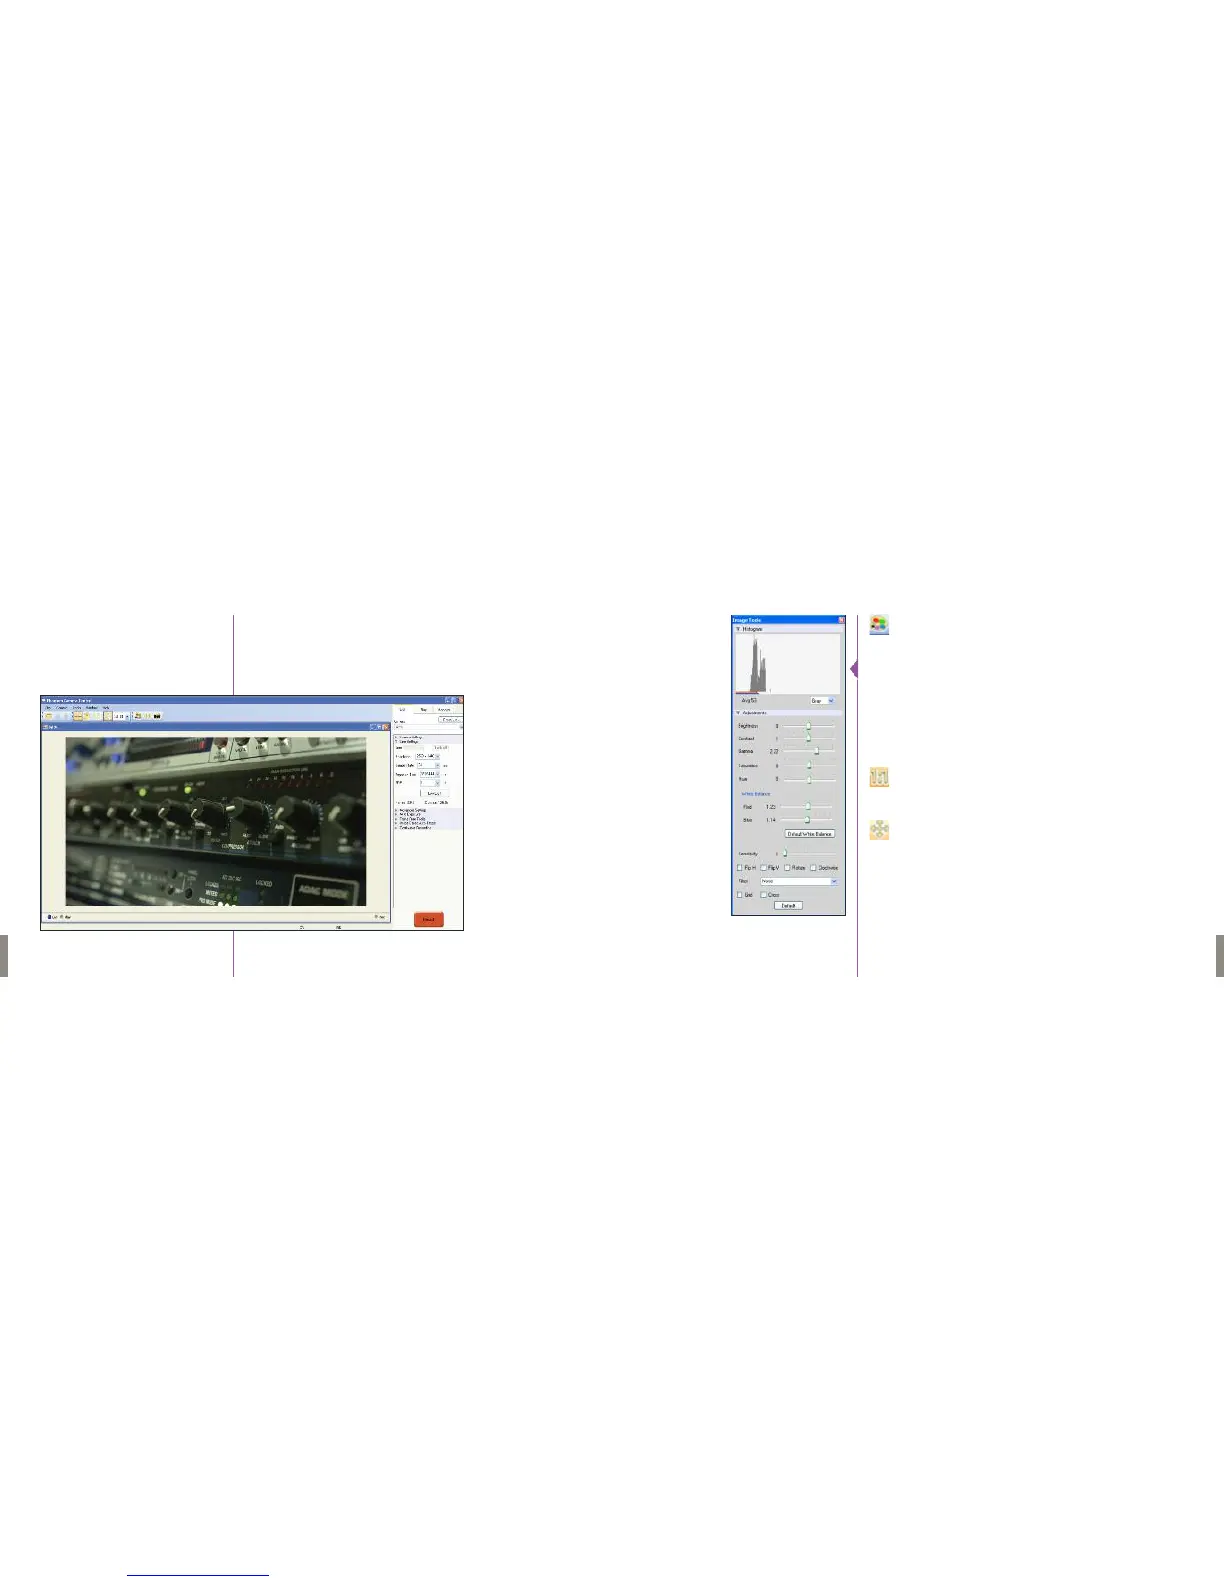
Clicking on the “Image Tools” icon above this frame shows the Image
Processing popup window. From here you can change gain, gamma,
and a few other options. This will affect both the computer display as
well as the video output of the camera. The “Default” button restores
all parameters except white balance to their default values.
The “Default White Balance” restores white balance to the default
(which under most typical lighting will produce a green image.)
Keep in mind that all changes made in the Image Tools window affect
the meta data of the cine file only, not the raw data.
If you are recording the camera’s video output however, it is
important that these be set to values that produce the image you wish
to record.
The “Zoom Actual Size” icon zooms the camera image to pixel-to-
pixel mode.This is a good view for checking focus or otherwise
evaluating image quality.
The “Zoom Fit” icon scales the image to fit the current window size.
This is the best view for checking framing.The image can also be
zoomed to a specific magnification ratio by selecting a number from
the pull-down menu to the right of the Zoom Fit icon.