6CP200/100-10
4-3
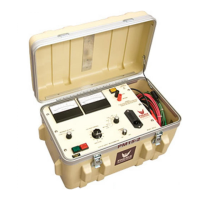
INITIAL SET-UP--ELECTRICAL
NOTE: The external interlock circuit must consist of a closed loop of dead contacts; an open circuit
prevents the high voltage output from being energized. When the control power is on, the external
circuit will be energized with 120 volts AC.
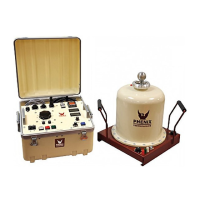
3. Connect divider cable between Control Unit DX1 connector and DX1 connector on the Divider.
4. Connect signal / metering cable between Bottom Module TX1 connector and TX1 connector on the
Controls.
5. Connect the power cable from the Bottom Module to the ‘Output to Transformer’ connection on the
control box.
NOTE: If parallel operation, connect the paralleling cable from Bottom Module ‘To Top Module’
connector to multilamm style connectors at base of Top Module. These connections must match
Voltage Select jumper on Bottom Module base. If series connection, connect the provided short
jumpers between the multilamm connectors on the top header of the Bottom Module and the bottom
header of the Top Module.
6. Connect the test object to the output termination of the high voltage transformer and HV Divider.
Insure that the connection is applicable for test level and type of test and that the connection has
sufficient safety clearances for the voltage rating. Three high voltage output connections are possible:
100kV, 50mA: This output is achieved using a single cylinder. Set the Measurement Divider switch (see
Section 5) to the 100 kV/100mA position when using this output. This sets the metering and overload
properly for the output being used.
100kV, 100mA: This output is achieved by stacking the cylinders and connecting them in parallel using the
supplied paralleling cable. The 100kV output is taken from the output electrodes of both cylinders. Set
the Measurement Divider switch (see Section 5) to the 100 kV/100mA position when using this output.
200kV, 50mA: This output is achieved by stacking the cylinders and connecting them in series. The
200kV output is taken from the top electrode of the top cylinder. Set the Measurement Divider switch
(see Section 5) to the 200 kV/50mA position when using this output.
A wire can be used to make this connection; however, for best results (less corona leakage current), route
a wire down the center of a one-inch diameter pipe (either aluminum or copper), and solidly connect the
ends of the wire to the output tap and the test specimen. The pipe should also be solidly connected at
each end.
7. Connect the input main power cable to the Main Input connection at the control box and then to the
facility power source.
 Loading...