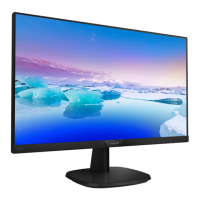
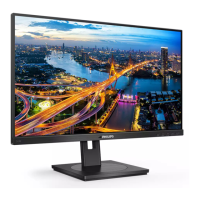
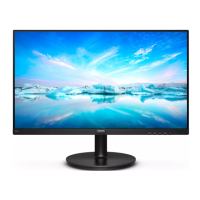
This document describes the Philips V Line 243V7 monitor, a flat panel display designed for general use.
Function Description
The Philips 243V7 monitor is a V Line display designed for optimal performance at its native resolution of 1920 x 1080 @ 60 Hz. It features SmartImage technology, which dynamically adjusts brightness, contrast, color, and sharpness in real-time based on selected content types (EasyRead, Office, Photo, Movie, Game, Economy, LowBlue Mode, and Off). SmartContrast technology automatically optimizes the monitor's contrast ratio for visual clarity and viewing enjoyment by adjusting backlighting. The monitor also includes a LowBlue Mode to reduce harmful shortwave blue light for eye well-being and Flicker-Free technology to minimize eye strain. It is Plug-and-Play compatible with Windows 7, 8, 8.1, 10, and Mac OSX.
Important Technical Specifications
Picture/Display:
- Monitor Panel Type: IPS Technology
- Backlight: W-LED system
- Panel Size: 23.8" W (60.5 cm)
- Aspect Ratio: 16:9
- Pixel Pitch: 0.275 x 0.275 mm
- Contrast Ratio (typ.): 1000:1
- Optimum Resolution: 1920 x 1080 @ 60Hz
- Viewing Angle (typ.): 178° (H) / 178° (V) @ C/R > 10
- Picture Enhancement: SmartImage
- Display Colors: 16.7M
- Vertical Refresh Rate: 50Hz - 76Hz
- Horizontal Frequency: 30kHz - 83kHz
- sRGB: YES
- Flicker Free: YES
- LowBlue Mode: YES
- EasyRead: YES
Connectivity:
- Signal Input/output (243V7QS): VGA (Analog), DVI (Digital)
- Signal Input/output (243V7QHS): VGA (Analog), HDMI 1.4 (Digital)
- Signal Input/output (243V7QDS/243V7QDA): VGA (Analog), DVI (Digital), HDMI (Digital)
- Signal Input/output (243V7QJA): DP 1.2 (Digital), HDMI 1.4 (Digital), VGA (Analog)
- Input Signal: Separate Sync, Sync on Green
- Audio in/out (243V7QDA/243V7QJA): PC audio-in, headphone out
- Audio in/out (243V7QHS/243V7QDS): HDMI audio out
Convenience:
- Built-in speakers (typ.): 2W x 2 (243V7QDA/243V7QJA)
- User Convenience: Power ON/OFF, OSD menu access, OSD adjustment, brightness level adjustment, signal input source change, return to previous OSD level, SmartImage selection.
- OSD Languages: English, French, German, Spanish, Italian, Russian, Simplified Chinese, Portuguese, Turkish, Dutch, Swedish, Finnish, Polish, Czech, Korean, Japanese, Hungarian, Ukraine, Brazil Portuguese, Greek, Traditional Chinese.
- Other Convenience: Kensington Lock, VESA mount (100 x 100 mm)
Stand:
Power:
- Consumption (Normal Operation): 21.29 W (typ.) at 100VAC, 60Hz; 21.39 W (typ.) at 115VAC, 60Hz; 21.49 W (typ.) at 230VAC, 50Hz
- Sleep (Standby mode): 0.5 W
- Off mode: 0.3 W
- Power LED indicator: On mode: White, Standby/Sleep mode: White (blinking)
- Power Supply: Built-in, 100-240V AC, 50-60Hz
Dimension:
- Product with stand (WxHxD): 540 x 415 x 209 mm
- Product without stand (WxHxD): 540 x 325 x 45 mm
- Product with packaging (WxHxD): 588 x 465 x 115 mm
Weight:
- Product with stand: 3.64 kg
- Product without stand: 3.22 kg
- Product with packaging: 5.37 kg
Operating Condition:
- Temperature range (operation): 0°C to 40 °C
- Relative humidity (operation): 20% to 80%
- Atmospheric pressure (operation): 700 to 1060hPa
- Temperature range (Non-operation): -20°C to 60°C
- Relative humidity (Non-operation): 10% to 90%
- Atmospheric pressure (Non-operation): 500 to 1060hPa
Environmental:
- ROHS: YES
- Packaging: 100% recyclable
- Specific Substances: 100% PVC BFR free housing
Cabinet:
- Color: Black/White
- Finish: Texture
Usage Features
Installation:
- Package Contents: Includes the monitor, power cord, and various signal cables (DP, VGA, DVI, HDMI, Audio) depending on the region and model.
- Install Base Stand: Place the monitor face down on a soft surface. Attach/slide the base column until it clicks into position. Firmly insert the base stand into the base column.
- Connecting to PC: Connect the power cord to the monitor and a nearby outlet. Turn off the computer and unplug its power cable. Connect the monitor signal cable to the video connector on the back of the computer. Turn on the computer and monitor.
- VESA Mounting: The monitor supports a 100mm x 100mm VESA-Compliant mounting interface. To remove the base stand for VESA mounting, place the monitor face down, press the locking clips to detach the base stand from the base column, and then press the release button to detach the base column.
Operating the Monitor:
- Front View Product Description: The monitor features buttons for power ON/OFF, OSD menu access, OSD adjustment (up/down), brightness adjustment, signal input source selection, return to previous OSD level, and SmartImage selection.
- On-Screen Display (OSD): A user-friendly interface allows adjustment of screen performance and selection of functions. Navigation is done using the front bezel buttons.
- SmartImage: Access SmartImage presets (EasyRead, Office, Photo, Movie, Game, Economy, LowBlue Mode, Off) via a dedicated button to optimize display settings for different content types.
- EasyRead: Improves reading for text-based applications by increasing contrast and boundary sharpness.
- Office: Enhances text and dampens brightness to reduce eye strain.
- Photo: Combines color saturation, dynamic contrast, and sharpness for vibrant photo display.
- Movie: Ramps up luminance, deepens color saturation, and enhances sharpness for video.
- Game: Optimizes response time, reduces jagged edges, and enhances contrast for gaming.
- Economy: Adjusts brightness and contrast for everyday office applications and lower power consumption.
- LowBlue Mode: Reduces harmful shortwave blue light for eye comfort.
- Off: No SmartImage optimization.
- SmartContrast: Dynamically analyzes displayed content and optimizes contrast ratio for visual clarity and viewing enjoyment.
- Resolution Notification: The monitor is designed for optimal performance at 1920 x 1080 @ 60 Hz. An alert is displayed if a different resolution is used, which can be switched off in the OSD.
- Physical Function: The monitor allows tilt adjustment from -5 to +20 degrees.
Maintenance Features
Safety Precautions:
- Keep the monitor away from direct sunlight, strong lights, and heat sources to prevent discoloration and damage.
- Keep the display away from oil, as it may damage the plastic cover and void the warranty.
- Ensure ventilation holes are not blocked.
- Position the monitor so the power plug and outlet are easily accessible.
- Wait 6 seconds after detaching the power cable before reattaching for normal operation.
- Use only approved power cords provided by Philips.
- Operate under the specified power supply to prevent malfunction, fire, or electric shock.
- Protect cables from pulling, bending, or heavy objects to prevent fire or electric shock.
- Avoid severe vibration or high impact conditions.
- Do not tilt the monitor downward by more than -5 degrees to prevent panel damage.
- Do not knock or drop the monitor during operation or transportation.
General Maintenance:
- Unplug the monitor if not in use for an extensive period or when cleaning.
- Clean the monitor with a slightly damp cloth. The screen can be wiped with a dry cloth when off. Do not use organic solvents (alcohol, ammonia-based liquids).
- Protect the monitor from dust, rain, water, or excessive moisture. If it gets wet, wipe it dry immediately. If foreign substances or water enter, turn off power, disconnect, and send to a maintenance center.
- Store and use the monitor within specified temperature (0-40°C) and humidity (20-80% RH) ranges.
- Activate a moving screen saver program when leaving the monitor unattended.
- Activate a periodic screen refresh application if the monitor displays unchanging static content to prevent "burn-in" or "ghost imaging." Damage from not using these features is not covered under warranty.
- Do not put excessive pressure on the LCD panel. When moving, grasp the frame, not the LCD panel.
- Oil-based cleaning solutions may damage plastic parts and void the warranty.
- The casing should only be opened by qualified service personnel.
- For repair or integration, contact a local service center.
- Do not leave the monitor in a car/trunk under direct sunlight.
Pixel Defect Policy:
- Philips guarantees repair or replacement under warranty if the number of pixel defects exceeds acceptable levels (e.g., no more than 0.0004% of subpixels defective).
- Bright Dot Defects: Pixels or subpixels that are always lit. Tolerances: 3 lit subpixels, 1 adjacent lit subpixel, 0 three adjacent lit subpixels (one white pixel), >15mm distance between two bright dot defects, 3 total bright dot defects.
- Black Dot Defects: Pixels or subpixels that are always dark. Tolerances: 5 dark subpixels, 2 adjacent dark subpixels, 0 three adjacent dark subpixels, >15mm distance between two black dot defects, 5 total black dot defects.
- Total Dot Defects: 5 total bright or black dot defects.
- Proximity of pixel defects is also considered.
Customer Care & Warranty:
- Warranty information and support requirements are available on the Philips website or from a local Customer Care Center.
- Extended warranty service packages are offered via Certified Service Centers.
- Contact Philips Customer Service Representative for more details.
Troubleshooting & FAQs:
- No Picture (Power LED not lit): Check power cord connection and power button.
- No Picture (Power LED is White): Check computer power, signal cable connection, and for bent pins on the monitor cable. Energy Saving feature might be activated.
- "Check cable connection" message: Ensure monitor cable is properly connected and check for bent pins.
- AUTO button doesn't function: Applicable only in VGA-Analog mode. Manual adjustments can be made via OSD.
- Visible signs of smoke or sparks: Disconnect power immediately and contact Philips service representative.
- Image not centered: Use "Auto" function or Phase/Clock in OSD Main Controls (VGA mode only).
- Image vibrates on the screen: Check signal cable connection to graphics board/PC.
- Vertical flicker appears: Adjust image using "Auto" function or eliminate vertical bars using Phase/Clock in OSD Main Controls (VGA mode only).
- Horizontal flicker appears: Adjust image using "Auto" function or eliminate vertical bars using Phase/Clock in OSD Main Controls (VGA mode only).
- Image appears blurred, indistinct or too dark: Adjust contrast and brightness on OSD.
- "After-image," "burn-in," or "ghost image" remains: Activate a moving screen saver and periodic screen refresh application. Damage from not doing so is not covered under warranty.
- Image appears distorted, text fuzzy/blurred: Set PC's display resolution to the monitor's recommended native resolution (1920 x 1080 @ 60 Hz).
- Green, red, blue, dark, and white dots appear: Normal characteristic of liquid crystal technology; refer to pixel policy.
- "Power on" light too strong/disturbing: Adjust using power LED Setup in OSD Main Controls.
- "Cannot display this video mode" message: Set PC resolution to 1920 x 1080 @ 60 Hz.
- Recommended refresh rate: 60 Hz (up to 75 Hz if disturbance occurs).
- .inf and .icm files: Driver files for the monitor, installed automatically.
- Adjusting resolution: Via Windows® Control Panel "Display properties."
- Lost in OSD adjustments: Press OK and select 'Reset' to recall factory settings.
- LCD screen resistant to scratches: Generally, avoid excessive shocks, sharp/blunt objects, and pressure on the panel surface.
- Cleaning LCD surface: Use a clean, soft cloth. For extensive cleaning, use isopropyl alcohol. Avoid other solvents.
- Changing color setting: Via OSD control (Color Temperature, sRGB, User Define).
- Connecting to PC, workstation, or Mac: Fully compatible; a cable adapter may be needed for Mac.
- Plug-and-Play: Yes, compatible with Windows 7/8/8.1/10, Mac OSX.
- Unlocking/locking hot key: Press /OK for 10 seconds.
- Important Information manual: Downloadable from Philips website support page.