6
3
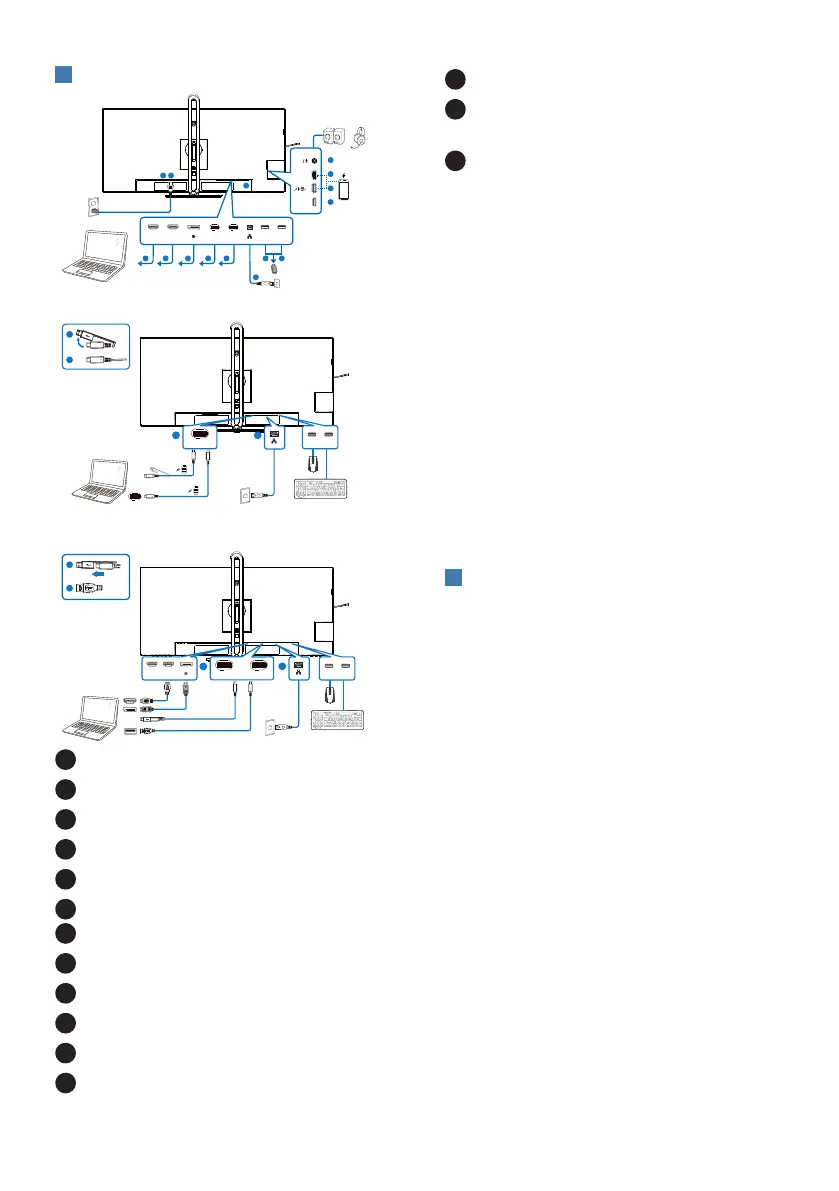
Connecting to your PC
1 2
7
8
9 10
11
12
13
14
15
3 4 5 6
Fast Charger
or
RJ45
HDMI 1 HDMI 2 USB C1
(96W)
USB C2
(DATA)
USB C3
(15W)
USB USB
USB
AUDIO
OUT
USB docking (USB C-C)
OR
a
b
USB Type-C
a-1
a-2
USB hub (USB A-C)
b
USB Type-A
a-1
a-2
OR
a
OR
USB C1
(96W)
USB C2
(DATA)
USB USB
USB USB
USB C1
(96W)
HDMI 1 HDMI 2
1
Power Switch
2
AC power input
3
HDMI 1 input
4
HDMI 2 input
5
DisplayPort input
6
USBC1
7
USBC2(DATA)
8
RJ45 input
9
USB downstream
10
USB downstream
11
USB downstream
12
USB downstream/USB fast charger
13
USB C3(PD 15W, downstream)
14
Audio out / microphone in combo
jack
15
Kensington anti-theft lock
Connect to PC
1. Connect the power cord to the back
of the display rmly.
2. Turn o your computer and unplug
its power cable.
3. Connect the monitor signal cable to
the video connector on the back of
your computer.
4. Plug the power cord of your
computer and your monitor into a
nearby outlet.
5. Turn on your computer and monitor.
If the monitor displays an image,
installation is complete.
4
RJ45 driver installation
You can find the “LAN Drivers” from
Philips website support page.
Please follow the steps for the
installation:
1. Install the LAN driver that matches
your system.
2. Double click driver to install, and
follow Window’s instructions to
proceed with installation.
3. It will show “success” when the
installation is nished.
4. You must reboot your computer
after the installation has completed.
5. Now you will be able to see “Realtek
USB Ethernet Network Adapter”
from your program installed list.
6. We recommend to periodically visit
the above web link to check for the
availability of the most updated
driver.