3 Getting started
Installing the lters
Note
• Make sure the air purier is
unplugged from the electrical outlet
before installing the lters.
• Make sure the side of the lter with
the tag is pointing towards you.
1 Pull the bottom part of the front
panel and gently lift to remove it
from the air purier (Fig. c).
2 Press the clip down (1) and pull the
pre-lter towards you (2) (Fig. d).
3 Remove all lters (Fig. e).
4 Remove all packaging materials
from the lters (Fig. f).
5 Place the thick lter (FY1410) into
the air purier and then the thin
active carbon lter (FY1413) (Fig. g).
The model numbers are shown on
each lter.
6 Attach the pre-lter back into the
air purier (Fig. h).
Note
• Make sure the side with the clip is
pointing towards you, and that all
hooks of the pre-lter are properly
attached to the purier.
7 Reattach the front panel by pressing
the top part of the panel onto the
top of the air purier (1). Then, gently
push the panel against the body of
the air purier (2) (Fig. i).
8 Wash your hands thoroughly after
installing lters.
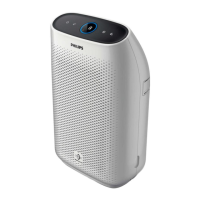
2 Your air purifier
Congratulations on your purchase, and
welcome to Philips!
To fully benet from the support that
Philips oers, register your product at
www.philips.com/welcome.
Product overview
(Fig. a)
A Control panel
B Air quality light
C Air outlet
D Air quality sensor
E
NanoProtect lter HEPA Series 3
(FY1410)
F
NanoProtect lter Active Carbon
(FY1413)
G Pre-lter
H Air inlet
I Front panel
Controls overview
(Fig. b)
J On/O button
K Night sensing mode button
L Display screen
M Fan speed button
N Child lock button
5EN

 Loading...