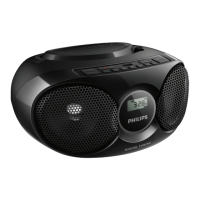
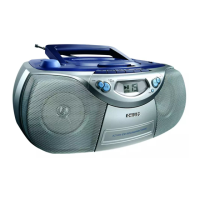
This document is the user manual for the Philips AZ318 CD Soundmachine, a portable audio device designed for playing music from various sources and listening to FM radio.
Function Description
The Philips AZ318 CD Soundmachine is a versatile audio player that allows users to enjoy music from compact discs (CDs), USB devices, and external audio sources. It also features an integrated FM radio tuner for listening to radio stations. The device is designed for ease of use, offering straightforward controls for playback, tuning, and volume adjustment. It can be powered by either AC power or batteries, making it suitable for both home and portable use.
Usage Features
Power Management:
The sound machine can be turned on by pressing the power button. It features an automatic standby mode to conserve energy:
- If no audio is detected for over 15 minutes, the unit will automatically switch to standby.
- If playback is stopped in CD mode for over 15 minutes, the unit will also enter standby.
To wake the unit from standby, users can press the power button or the SOURCE button. To turn off the device completely, the power button should be pressed again.
Connecting Power:
The AZ318 can operate on AC power or batteries.
- AC Power: To use AC power, the user must first adjust the voltage selector on the bottom of the unit to match the local power voltage. Then, the supplied AC power cord should be connected to the AC socket on the unit and a wall outlet. It's crucial to ensure the power supply voltage matches the unit's requirements to prevent product damage. When disconnecting, always pull the plug from the socket, not the cord.
- Battery Power: The device requires 6 R14/UM2/C CELL batteries. To install them, open the battery compartment, insert the batteries with the correct polarity (+/-) as indicated, and then close the compartment. Batteries are not supplied with the accessories. Users are cautioned to keep batteries away from heat, sunshine, or fire, and to dispose of them properly as they contain chemical substances. Batteries should be removed if the unit is not used for a long time.
Playing Discs:
- Select the CD source by repeatedly pressing the SOURCE button.
- Lift the disc compartment lid to open it.
- Insert a disc with the printed side facing up and close the compartment.
- Press the play/pause button to start playback.
- To pause or resume playback, press the play/pause button.
- To stop playback, press the stop button.
- For MP3 tracks, users can select an album using the ALB/PRE-/ALB/PRE+ buttons.
- To select a specific track, use the skip forward/backward buttons.
- To search within a track, press and hold the skip forward/backward buttons, then release to resume normal play.
Playing from USB Devices:
- Ensure the USB device contains playable audio content.
- Repeatedly press the SOURCE button to select the USB source.
- Insert the USB device into the USB socket. Playback should start automatically. If not, press the play/pause button.
Listening to FM Radio:
- Position the FM antenna as far as possible from TVs or other radiation sources, and fully extend and adjust its position for better reception.
- Repeatedly press the SOURCE button to select the FM source.
- Press the tune up/down buttons to tune to a radio station.
- To automatically tune to a station with strong reception, press and hold the tune up/down buttons for more than two seconds.
Storing Radio Stations:
- Automatically: In tuner mode, press and hold the PROG button for 2 seconds. "[AUTO]" will be displayed, and the sound machine will store all available FM/AM radio stations (up to 20 presets). The first stored station will broadcast automatically.
- Manually:
- Tune to the desired radio station.
- Press PROG to activate program mode. "PXX" (where XX is 01-20) will be displayed.
- Press ALB/PRE-/ALB/PRE+ to select a preset number (1-20) for the station, then press PROG to confirm. The preset number and frequency will be displayed.
- Repeat these steps to program more stations.
Playing from an External Device:
- Repeatedly press the SOURCE button to select the audio source. "[AU]" will be displayed.
- Connect an audio-in cable (not supplied) from the headphone socket of the external device to the AUDIO IN socket on the CD sound machine.
- Play the external device according to its user manual. Note that the AUDIO IN socket is not for headphones.
Adjusting Volume:
During playback, press the VOL -/VOL + buttons to adjust the volume.
Dynamic Bass Boost (DBB):
Press the DBB button repeatedly to turn dynamic bass enhancement on or off, allowing users to customize the bass output.
Control Playback (CD/USB Mode):
- Fast-forward/Fast-reverse: Press and hold the skip forward/backward buttons during playback, then release to resume play.
- Skip Album (MP3): Use ALB/PRE-/ALB/PRE+ to skip to the previous or next MP3 album.
- Start/Pause Play: Press the play/pause button.
- Stop Play: Press the stop button.
- Repeat Mode (MODE button):
- [REP]: Repeats the current track.
- [REP ALL]: Repeats all tracks.
- [REP ALB]: Repeats all tracks in the current album (for MP3).
- [SHUF]: Plays tracks randomly.
- To return to normal play, press MODE repeatedly until the repeat icons disappear.
Program Tracks:
Users can program a maximum of 20 tracks.
- Press the stop button to stop playback.
- Press PROG to activate programming mode. "[P01]" will be displayed.
- For MP3 tracks, select an album using ALB/PRE-/ALB/PRE+.
- Select a track using the skip forward/backward buttons, then press PROG to confirm.
- Repeat steps 3 and 4 to program more tracks.
- Press the play/pause button to play the programmed tracks.
- To erase the program, press the stop button when playback is stopped.
Note: Only [REP] and [REP ALL] can be selected when playing programmed tracks.
Troubleshooting:
The manual provides a troubleshooting section to help users resolve common issues before seeking service.
- No power: Check if the Mains cord is securely connected, if there is power at the AC Mains, and if batteries are inserted correctly.
- No sound or poor sound: Adjust the volume.
- No response from the unit: Disconnect and reconnect the AC power plug, then turn the system on again. The unit may have switched off automatically after 15 minutes of inactivity as a power-saving feature.
- No disc detected: Insert a disc, check if it's inserted upside down, wait for moisture condensation to clear from the lens, replace or clean the disc, or use a finalized CD or correct format disc.
- Poor radio reception: Increase the distance between the unit and other radiation sources (like a TV) and fully extend the FM antenna.
Users are advised not to remove the casing or attempt repairs themselves to maintain warranty validity. For unresolved issues, they should visit the Philips support website.
Maintenance Features
Cleaning the Cabinet:
- Use a soft cloth slightly moistened with a mild detergent solution.
- Avoid using solutions containing alcohol, spirits, ammonia, or abrasives.
Cleaning Discs:
- If a disc becomes dirty, clean it with a cleaning cloth.
- Wipe the disc from the center outwards.
- Do not use solvents such as benzene, thinner, commercially available cleaners, or antistatic sprays intended for analogue records.
Cleaning the Disc Lens:
- Over time, dirt or dust may accumulate on the disc lens, affecting play quality.
- To ensure good play quality, clean the disc lens with a Philips CD lens cleaner or any commercially available cleaner.
- Follow the instructions provided with the cleaner.
The manual emphasizes safety warnings, including the risk of electric shock and laser exposure, and advises against opening the apparatus, lubricating any parts, or looking into the laser beam. It also provides environmental information regarding product disposal and recycling.