6-10
PHILIPS MEDICAL SYSTEMS
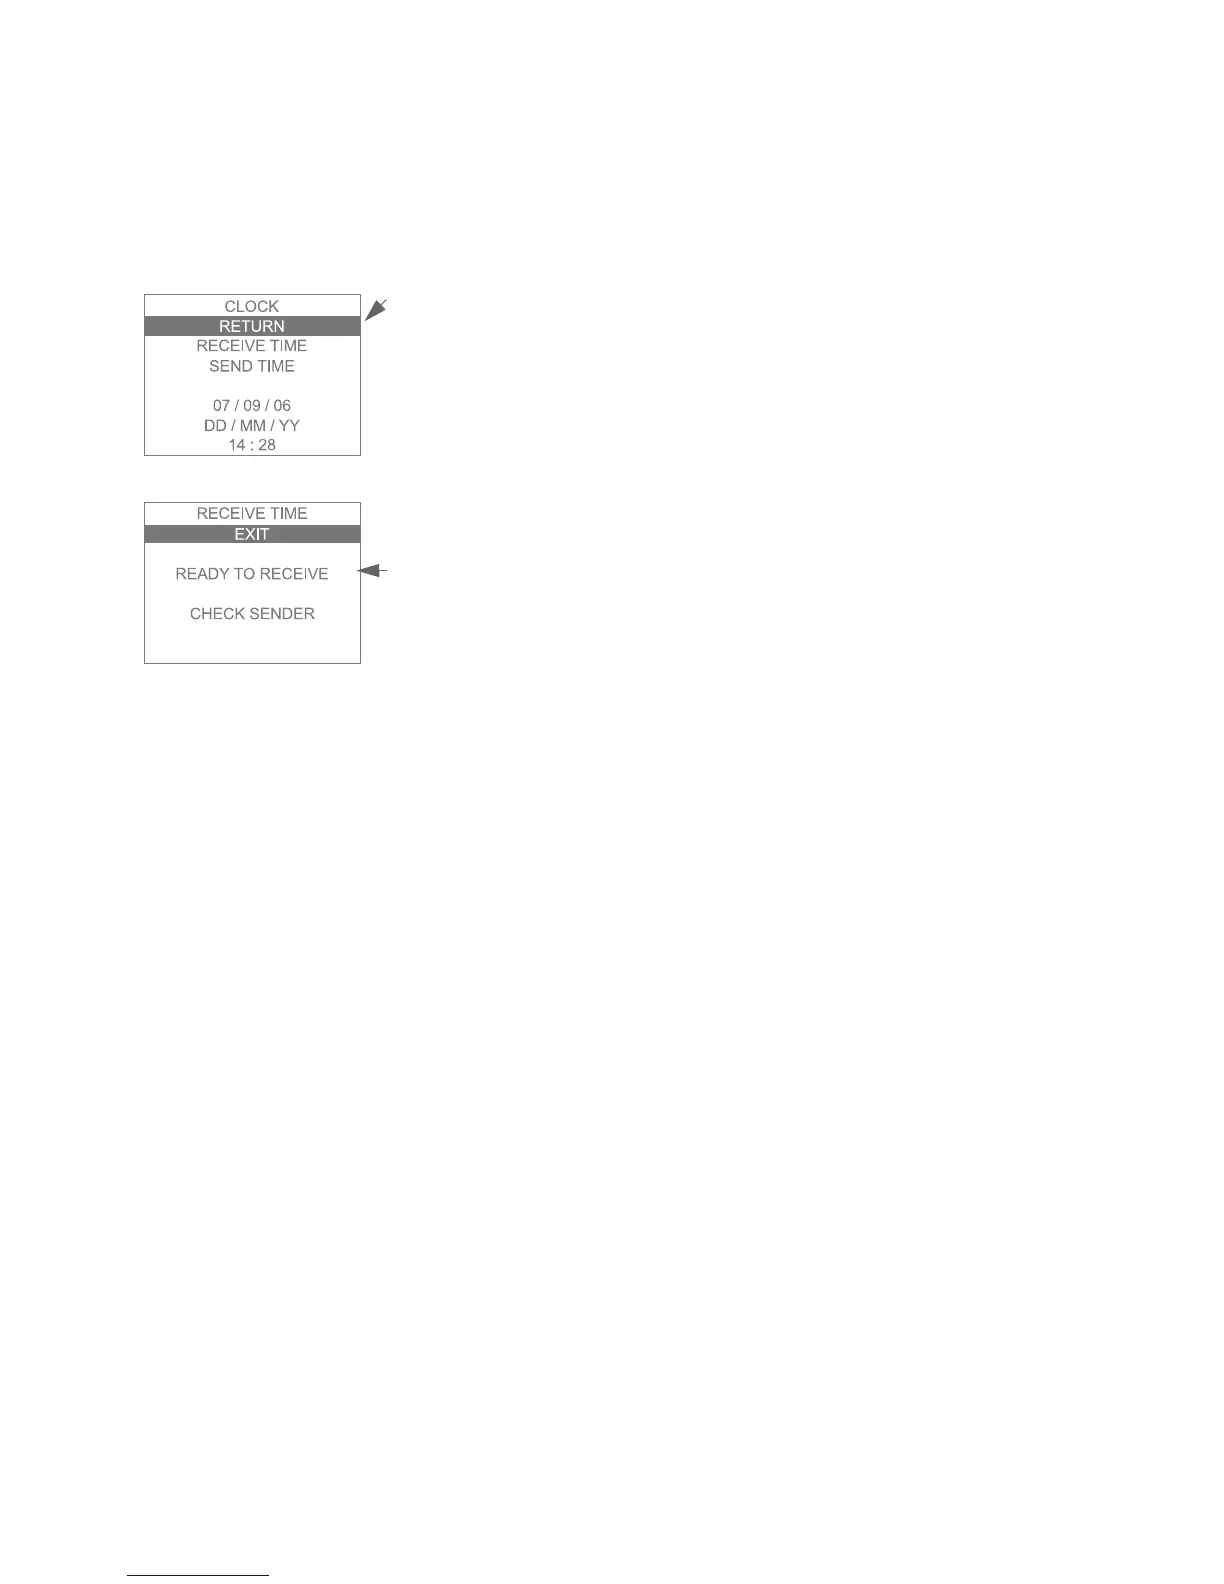
3. Select CLOCK from the second menu screen. The CLOCK screen then
comes up.
4. Locate the infrared communications port on each FR2+ and line them up
with one another, so that the infrared “eye” in each one has an
uninterrupted view of the “eye” in the other. (See the diagram on the inside
front cover.) The two devices should be no more than 1 meter apart.
5. Select SEND TIME from the CLOCK screen on the “sending”
HeartStart FR2+.
6. Select RECEIVE TIME from the CLOCK screen of the “receiving” FR2+.
7. A new screen comes up. Until the two FR2+ devices are properly
positioned, the screen on the receiving FR2+ displays READY TO RECEIVE
and prompts you to check the sending FR2+. The screen on the sending
FR2+ displays READY TO SEND and prompts you to check the
receiving FR2+.
8. Clock settings are automatically transferred as soon as the infrared ports
are correctly aligned.
USING ADVANCED MODE FEATURES
The HeartStart FR2+ provides an advanced mode that allows responders who
are appropriately trained to override the programmed FR2+ protocol and take
responsibility for certain aspects of the operating sequence used by the FR2+ to
treat the patient.
As described earlier in this chapter, the factory default setup of the FR2+ must
be modified to provide access to advanced mode features. This requires use of
the administration function of the M3864A Training & Administration Pack.
If you are an expert user authorized by your Medical Director to modify setup,
hold down both the Option buttons while installing the Training &
Administration Pack in the FR2+, then select SETUP. Then select