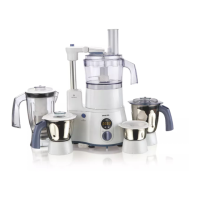
3.0 Product features
Intelli Control: (HL1651, HL1659) This Intelli
Control/Timer comes with an Intelli Lock
feedback that provides safety for the entire
appliance. Intelli Shutoff, ensures that once you
set the timer, it will complete the operation
and automatically close down, even in your
absence.
This function also enables you to select the
Auto or Manual mode. (Fig. 1)
Intelli Arm: The Intelli Arm with Intelli Lock
gives you the freedom to move, while your
appliance is still working. It also acts like
a safety mechanism and avoids spillage of
ingredients. (Fig. 2)
While an appliance is not in use, you can
fold down the arm. This arm can also be
rotated anticlockwise only for ease of fi xing
accessories.
Big chute: ( HL1654) This juicer has an extra
large feeding tube, which means that you
do not have to pre cut or chop the fruit or
vegetables before hand. (Fig. 3)
Super Vacuugrip: This unique grip ensures that
the appliance stays fi xed in its position, while it
is being used. It provides you complete peace
of mind and liberty to do other tasks. (Fig. 4)
Super Silent 750W motor: It comes with a
Super Silent Motor, with 750W and ensures
that everything gets well grounded, with
minimal noise. (Fig. 5)
Super Grind: It has reverse Quadra Flow jars
along with lift and grind blades that ensure
that grinding is done, just the way you want it.
(Fig. 6)
4.0 Before fi rst use
We suggest that you thoroughly clean the
parts that come in contact with food, before
using the appliance for the fi rst time. (Fig. 7)
5.0 Preparing for use
• Let the hot ingredients cool down, before
putting them in the jars (Fig. 8)
• Cut large ingredients into pieces of
approximately 2 cm. before processing
them (Fig. 9)
• Assemble the appliance properly, before
putting the plug into the socket
6.0 Using the appliance
6.1 Mixer grinder without timer (HL 1650)
Follow these simple steps to use the
appliance easily:
1. Connect the main plug to the wall
socket (Fig. 10)
2. Fix the jar on the motor unit, with the
help of arrow on the jar collar and
motor unit (Fig. 11)
3. Switch on the main supply (Fig. 12)
4. A neon lamp will light up to indicate
the power supply is on (Fig. 13)
3
 Loading...