Mechanical Instructions
EN 12 LC7.1E LA4.
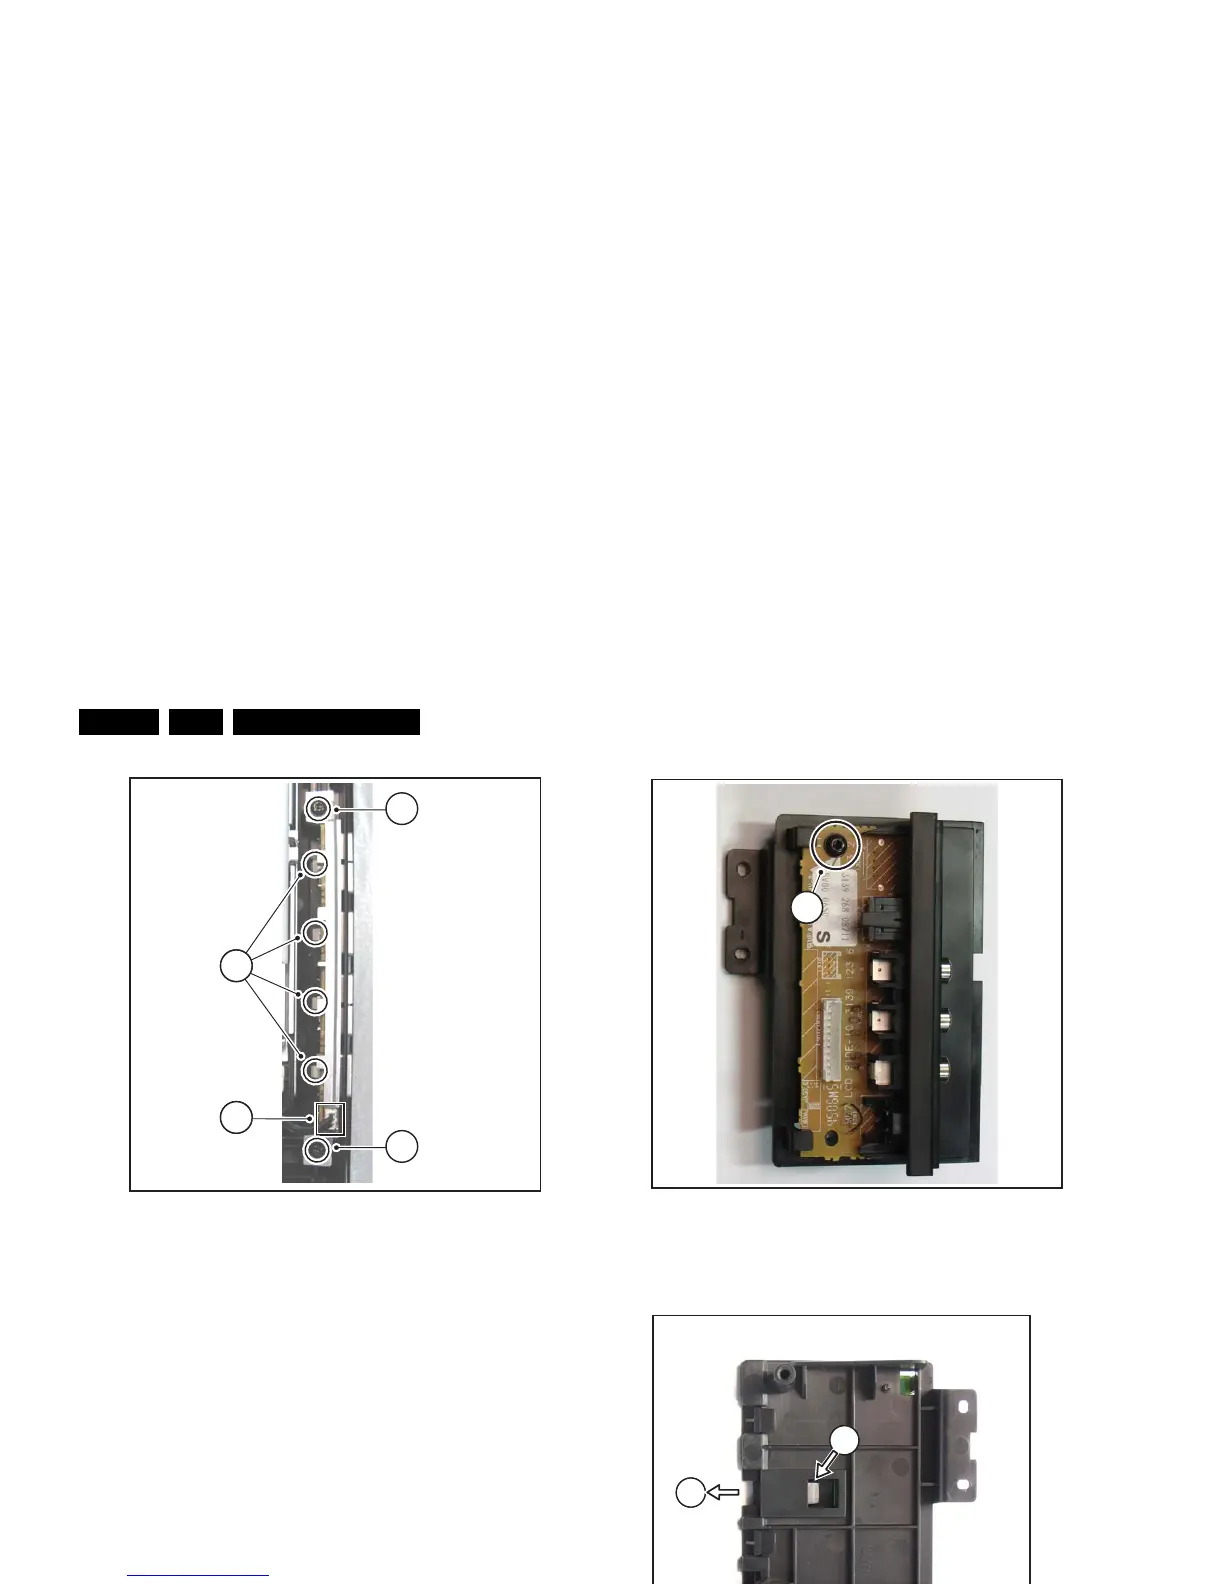
Figure 4-5 Keyboard control panel
4.3.3 Side I/O Panel
1. Remove the rear cover, as described earlier.
2. Unplug connector [a].
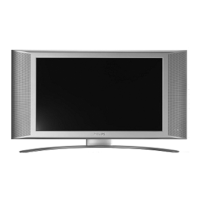
3. Remove screws [b] and remove the complete module. One
of the screws is T10 tapping, the other one is T10 parker.
See fig. “Side I/O module”.
4. Remove T10 parker screw [c]. See fig. “Side I/O panel 1”.
5. Push catch [d] (located at the underside of the bracket) and
slide the unit to the right from its bracket [e]. See fig. “Side
I/O panel 2”.
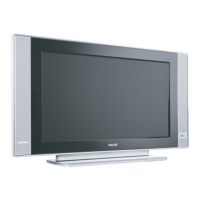
6. To remove the PWB from its bracket, you have to lift the
catch [f] loacted on top of the headphone connector. At the
same time, slide the PWB out of its bracket [g]. See fig.
“Side I/O panel 3”.
When defective, replace the whole unit.
Figure 4-6 Side I/O module
Figure 4-7 Side I/O panel [1/3] top side
Figure 4-8 Side I/O panel [2/3] bottom side
G_16850_007.eps
090207
1
1
2
3
G_16860_066.ep