PDS-150e Product Guide6
Position and Mount the PDS-150e
MakesurethedeviceispoweredOFFbeforemountingandconnecting.
1. IfyouareusinganEthernetnetworkandyourinstallationrequiresmultiple
PDS-150edevices,recordtheIPaddressesinalayoutgrid(typicallyaspreadsheet
orlist)foreasyreference.
2. Assigneachdevicetoapositioninthelayoutorlightingdesignplan.
3. Toaccommodatecablesorconduit,removetheknockoutsfromtheopenings
priortomounting.
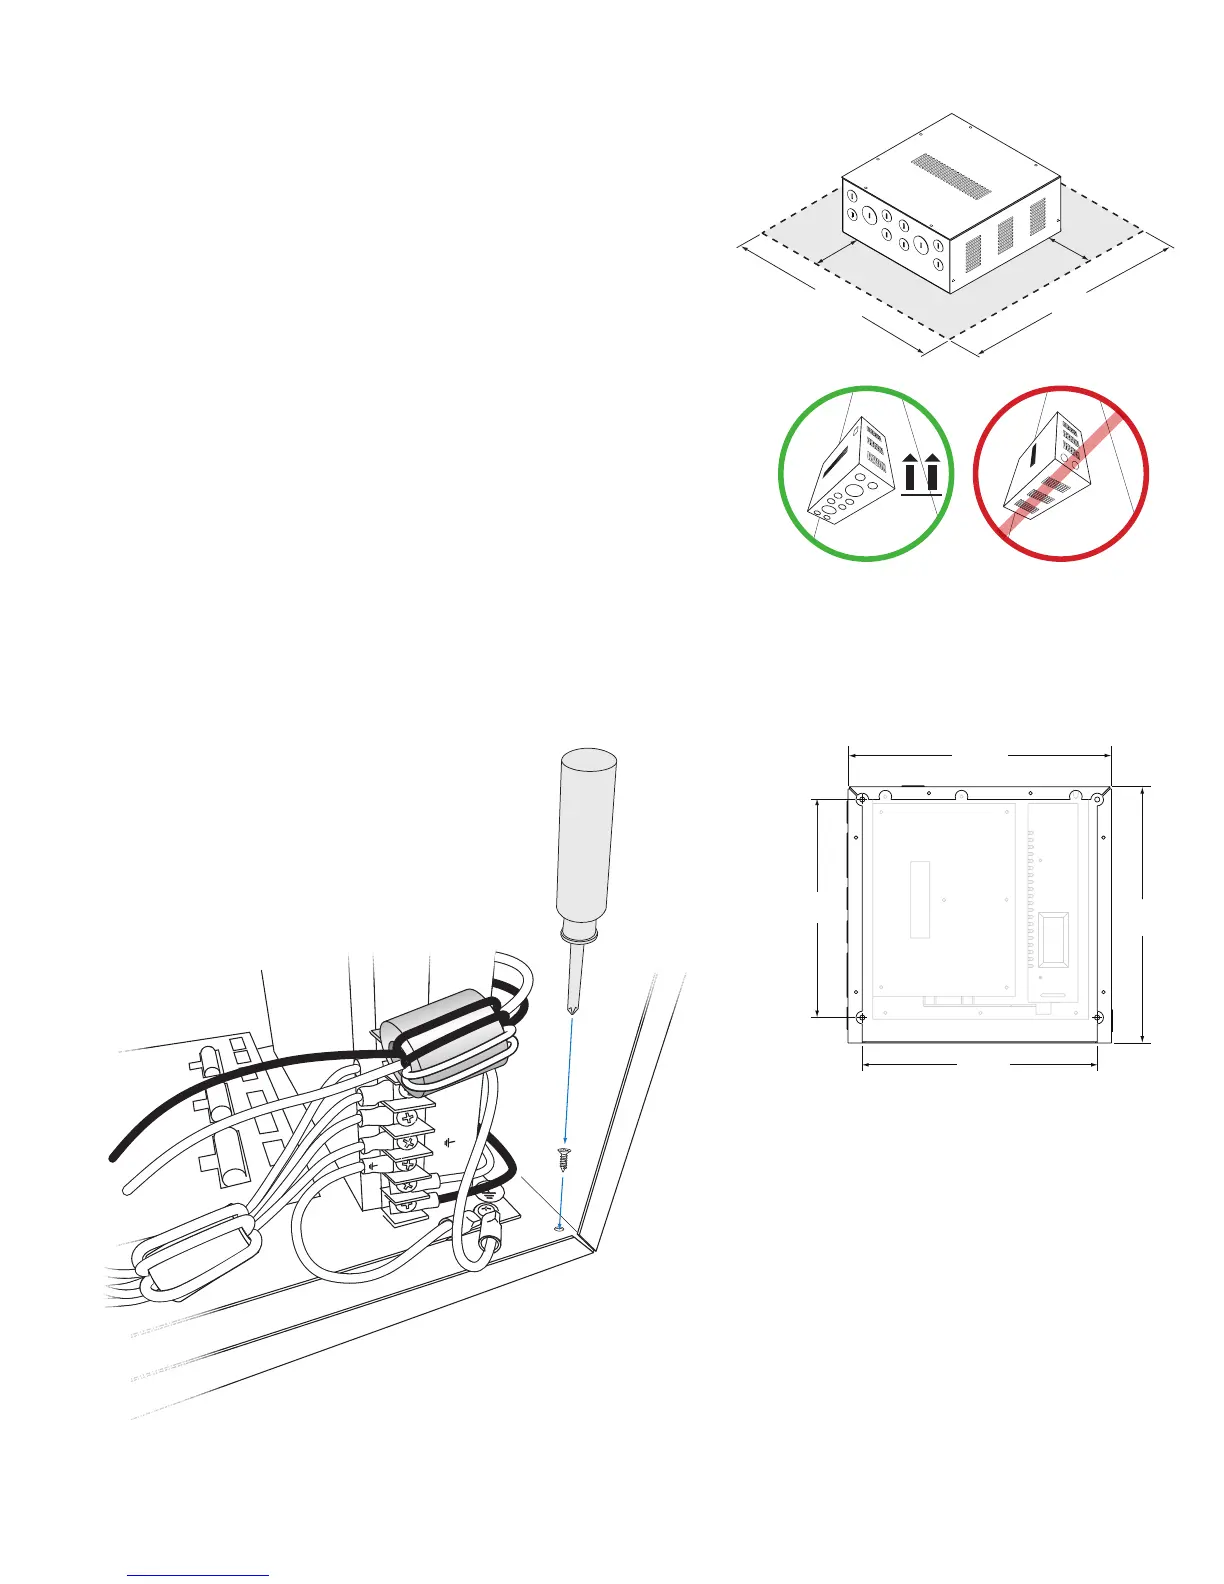
4. PositioneachPDS-150edeviceinitsdesignatedmountinglocation.Makesurethe
mountingsurfaceisat,suitableforthemountinghardware,andclearofdebris
andotherobstructions.
TheoveralldimensionsofeachPDS-150edeviceare10.4in(264mm)x10.1in
(257mm)widex4.4in(112mm)high.Makesurethemountinglocationallowsa
minimumof4in(102mm)aroundthehousing,sothataircanmovefreelyaround
thedevice.BecarefulnottoobstructtheventsonthetoporsidesofthePDS-
150ehousing.Ifthedeviceistobemountedonawall,besurethatthevented
sidesofthedevicearefacinguportotheside,neverdown.(Thisallowsrising
heattoescapefromthetopandsidesoftheunit.)
5. UsefoursuitablemountingscrewstosecurePDS-150etothemountinglocation.
+V
+V
+V
–V
–V
–V
L
L
N
18 in
457 mm
4 in
102 mm
4 in
102 mm
18 in
457 mm
8.6 in
(218 mm)
(264 mm)
9.25 in
(235 mm)
10.1 in
(257 mm)
1.75 in
(45 mm)
.88 in
(22 mm)
18 in
457 mm
4 in
102 mm
4 in
102 mm
18 in
457 mm
PDS-150e
PDS-150e
PDS-150e
18 in
457 mm
4 in
102 mm
4 in
102 mm
18 in
457 mm
PDS-150e
PDS-150e
PDS-150e
E When mounting PDS-150e on a wall, be
sure to position the device with the conduit
side facing the oor. This allows rising heat
to escape from the housing’s top and side
vents.
 Loading...