Do you have a question about the Philips Perfect Draft HD3620/20 and is the answer not in the manual?
| Brand | Philips |
|---|---|
| Model | Perfect Draft HD3620/20 |
| Category | Kitchen Appliances |
| Language | English |
Instructions to remove the back cover by unscrewing four screws located at the upper/lower right and left side.
Steps to replace the lever connector assembly by removing a front screw and hose from the pump unit.
Procedure to replace the complete left door including display and flat cable, involving back cover removal and PCB disconnection.
Guide to replace the fan assembly by unscrewing four screws and disconnecting the connector, ensuring correct airflow.
Steps to replace the Peltier element, including removing back cover, fan, heat sink, and applying heat sink paste.
Instructions to replace the pump unit by disconnecting hoses, removing three screws from the pump bracket.
Guidance for checking the electrical circuit when the appliance is not working.
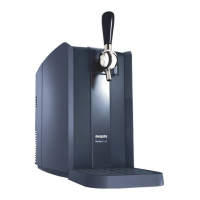
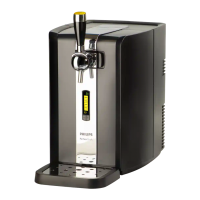
Explanation of how the appliance works, including beer storage, pressurization, and dispensing.
Procedure to read the software version by disconnecting from mains and pressing the '+' button.
Steps to enter display test mode by disconnecting from mains and pressing '+' and '-' buttons.
Procedure to enter service test mode by pressing KEG present switch and connecting to mains.
How to navigate through service routines by pressing the KEG present switch.
Procedure to test the temperature sensor (NTC) by simulating resistance values and checking display output.
Procedure to test the pressure sensor by simulating voltage values and checking display output.
Tests for fan motor low and high levels, checking fan operation and display status.
Tests for Peltier medium and high cooling levels, checking Peltier operation and display status.
Procedure to test the pump operation by checking if the pump starts and display status.
Test for the freshness indicator and +/- buttons, checking if the day counter can be changed.
Procedure to check the Peltier element's cool down performance by measuring temperature change.
Analysis of display errors like 'no tap unit', 'leakage', and 'no KEG/standby' with troubleshooting checks.
Troubleshooting when temperature display reading is not reliable, checking NTC and service test routines.
Procedure to check for internal and external air leakage causing blinking display or frequent pump activation.
Diagnosing slow cool down or unit not cooling issues, checking environment, fan, Peltier, and NTC sensor.
Troubleshooting inaccurate temperature display readings by comparing external meter with appliance display.
Identifying and fixing beer leakage issues at the spout side or on top of the Keg.
Checking for condensation water leakage, potentially caused by doors not closed properly or drip tray placement.
Addressing volume indication problems like resetting to 100% or inaccurate readings due to air leakage.
Conditions to check for no foam on beer, including beer temperature, glass cleanliness, and tube connector.
Conditions to check for too much foam on beer, including beer temperature, air leakage, and keg emptiness.