Do you have a question about the Philips Q Series and is the answer not in the manual?
Lists all items provided with the display, such as LCD, remote, cables, and adapters.
Illustrates the various input and output ports available on the rear of the display unit for connectivity.
Demonstrates the process of connecting different types of cables to the display's input ports.
Specifies VESA mounting patterns and screw size requirements for wall mounting the display.
Shows how to orient the display physically, including a 90-degree rotation.
Provides key physical dimensions (X and Y) for the display models for installation purposes.
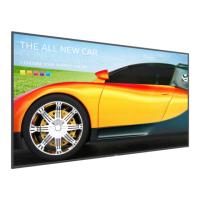
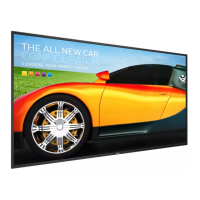
This document provides a comprehensive guide for setting up and maintaining a professional display solution, specifically for the Philips Q Line models: 65BDL3511Q, 75BDL3511Q, and 86BDL3511Q. It covers everything from unboxing and initial assembly to connectivity options and wall mounting instructions, ensuring users can effectively deploy and manage their display.
The Philips Q Line displays are designed for professional signage applications, offering high-quality visual output suitable for various commercial environments. These displays are intended for continuous operation, making them ideal for digital signage, information kiosks, and other public display needs. They support a wide range of input sources, allowing for flexible content delivery and integration into existing AV systems. The displays are engineered for reliability and ease of use, providing a robust platform for displaying dynamic content.
Unboxing and Initial Setup: The manual begins by detailing the contents of the package, which include the LCD display, a remote control with AAA batteries, a quick start guide, a power cord, an RS232 cable, an RS232 daisy chain cable, an IR sensor cable, an HDMI cable, a Philips logo plate, a USB cover, an AC switch cover, and three cable clips. It's important to note that the exact accessories and display design may vary by region.
Display Orientation: The displays can be oriented in both landscape and portrait modes, offering flexibility in content presentation. The manual illustrates how to rotate the display by 90 degrees for portrait orientation, ensuring proper alignment and stability.
Connectivity Options: The displays offer a rich set of connectivity options to accommodate various input sources and control methods:
Remote Control and On-Screen Display (OSD): The included remote control allows users to navigate the display's menu, adjust settings, switch input sources, and control power. The OSD provides a user-friendly interface for configuring display parameters, including brightness, contrast, color, and network settings.
Wall Mounting: The manual provides clear instructions for wall mounting the display, including the VESA mounting hole patterns and recommended screw specifications. The VESA patterns are:
Cable Management: The inclusion of cable clips helps in organizing and securing cables, contributing to a neat and professional installation. This is particularly useful in public environments where aesthetics and safety are important.
Philips Logo Plate: The Philips logo plate can be attached to the display, reinforcing brand identity. The manual illustrates how to correctly position and attach this plate.
Firmware Updates: The USB service port allows for easy firmware updates, ensuring the display's software remains current and benefits from the latest features and bug fixes. This is a crucial aspect of long-term device maintenance and performance optimization.
Troubleshooting and Support: While not explicitly detailed in the provided snippets, the quick start guide typically directs users to a website for more product information and support. This online resource, www.philips.com/signagesolutions-support, serves as a central hub for troubleshooting, FAQs, and additional documentation, enabling users to resolve common issues and access comprehensive support.
Cleaning and Care: Although not directly mentioned, professional displays generally require regular cleaning of the screen and casing to maintain optimal visual quality and extend the lifespan of the device. Users are usually advised to use soft, lint-free cloths and appropriate cleaning solutions to avoid damaging the screen surface.
Component Replacement: The modular design of professional displays often allows for easier replacement of certain components, such as power supplies or input boards, by authorized service personnel. This can extend the life of the display and reduce downtime.
Environmental Considerations: The displays are designed for professional use, implying robustness and durability for various indoor environments. Proper ventilation and adherence to operating temperature guidelines are important for maintaining performance and preventing overheating.
In summary, the Philips Q Line professional displays are designed for versatility, reliability, and ease of integration into diverse commercial settings. The provided manual facilitates a smooth setup process, highlights extensive connectivity options, and offers guidance for secure installation and ongoing maintenance.
| Panel Type | IPS |
|---|---|
| Refresh Rate | 75 Hz |
| Response Time | 4 ms (GtG) |
| Connectivity | HDMI, DisplayPort, VGA |
| Features | LowBlue Mode, Flicker-Free |
| Screen Size | 27 inches |
| Contrast Ratio | 1000:1 |
| Built-in Speakers | Yes |
| VESA Mount Compatible | Yes (100 x 100 mm) |



 Loading...