Do you have a question about the Phomemo M120 and is the answer not in the manual?
Details the functions of the printer's buttons, including power and feed, with operating instructions.
Lists options for language, print density, print speed, paper gap type, and auto power off settings.
Describes screen messages like 'Printing...', 'No Paper...', and their corresponding states.
Overview of shortcut keys for common editing functions like delete, enlarge, shrink, undo, and redo.
Details functions for text, icons, borders, pictures, time, barcodes, lines, shapes, and table import.
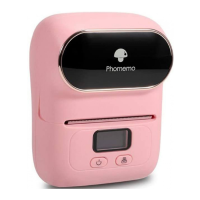
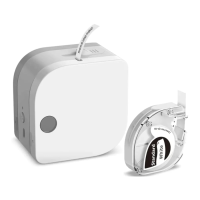
The Phomemo M120 is a portable label printer designed for various labeling needs. It is primarily used for printing labels from a mobile device via a dedicated app, "Print Master."
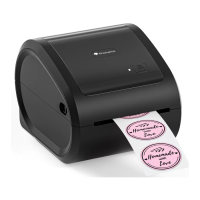
The M120 printer is a thermal printing device, meaning it does not require ink cartridges, using heat to produce images on special thermal paper. It supports different types of consumables, including pre-cut paper, black mark paper, and continuous paper, allowing for flexibility in label creation. The printer is capable of generating both 1D and 2D barcodes, making it suitable for inventory management, shipping, and retail applications.
The device features a simple interface with a screen, a power button, and a feed button. The power button serves to turn the device on/off with a long press (3 seconds) and to switch between home menu options with a continuous click. The feed button has multiple functions depending on the type of paper being used. For pre-cut or black mark paper, a single click will take a label, position it, and adjust it to the beginning of the next label. For continuous paper, a single click will feed the paper, and releasing the button will stop the feed. A long press of the feed button will automatically return the user to the main menu interface. Continuous clicking of the feed button allows switching between sub-menus.
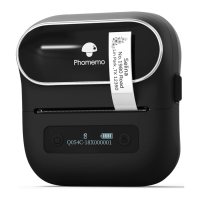
The M120 also includes a reset hole and a USB port for charging and data transfer. The paper exit is located at the top of the device, and a rope hole is provided for portability.
Paper Roll Installation: Installing a paper roll in the M120 is a straightforward process. First, the device is powered on by long-pressing the power button for 3 seconds. The paper compartment cover is then opened by holding both sides of the cover near the paper outlet and lifting it upwards. The label paper mounting bracket is removed from the compartment. The left baffle of the bracket is removed, the label paper roll is inserted with the printing side down, and the baffle is pushed back to the right to secure the roll. The installed label roll holder is then aligned with the card slots on both sides of the paper compartment and placed inside. Finally, approximately 15mm of paper is pulled out above the paper exit, and the paper compartment cover is closed. The printer will automatically feed the paper to position the gap of the label paper, indicating that the installation is complete. It's important to note that after the first operation or whenever consumables are replaced, the printer will automatically feed the paper to ensure proper label positioning and prevent incomplete, missing, or non-aligned prints.
App Download and Connection: The M120 operates in conjunction with the "Print Master" app, which can be downloaded by scanning a QR code provided in the manual or by searching for "Print Master" in app stores (Google Play or App Store). To connect the printer to the app, users must first ensure that GPS is turned on for Android mobile phones due to system requirements for geographic location access during connection. The app is then opened, and the user clicks to search for the device. Once found, the connection can be established immediately. It is crucial that the printer is turned on and Bluetooth is enabled on the mobile phone during the connection process.
Label Creation and Printing: The app offers two main methods for printing labels: creating a new label or selecting an existing template.
Editing Functions within the App: The "Print Master" app provides a comprehensive suite of editing tools to customize labels:
Troubleshooting Common Problems: The manual provides guidance for common issues users might encounter:
Warranty Information: The M120 comes with a one-year warranty from the date of purchase, offering replacement/return support. Users are advised to keep the warranty card in a safe place for future reference. The manual itself is carefully checked, but for any printing errors or misunderstandings, customer service should be consulted. Updates to the supporting software will be compiled into new versions of the manual without prior notice.
| Type | Thermal Label Printer |
|---|---|
| Print Technology | Thermal |
| Connectivity | Bluetooth |
| Resolution | 203 DPI |
| Print Speed | 20mm/s |
| Charging Time | 2 hours |
| Compatible Paper Width | 20mm |
| Battery | Lithium Battery |
| Standby Time | 1 month |