This document is an instruction manual for the M200 multi-function label printer. It provides details on the product's features, specifications, usage, and troubleshooting.
Function Description
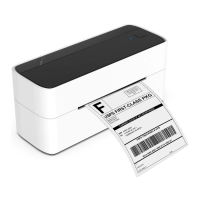
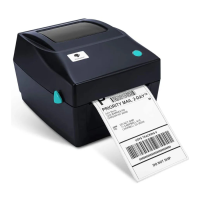
The M200 is a direct thermal multi-function label printer designed for various labeling needs. It supports different types of labels, including thermosensitive labels and thermosensitive continuous paper. The printer can be connected via Bluetooth 4.0 and is compatible with Windows 7/8/10, Android, and iOS operating systems. It uses ESC/POS instruction set and supports both 1D and 2D bar codes.
Important Technical Specifications
Hardware:
- Model: M200
- Print technology: Direct thermal
- Maximum print width: 20-75mm
- Types of tape: Thermosensitive label, thermosensitive continuous paper
- Label size: 80mm Xφ50mm (Max width X Max diameter)
- Print speed: 35-50mm/s (switchable, level 1-5)
- Print concentration: Switchable, level 1-15
- Print resolution: 203 dpi
- Life of print head: 50KM
- Connection type: Bluetooth 4.0
- Printer size: 4.7 X 6.9 X 2.3in.
- Input: 5V 2A
- Power supply mode: Lithium battery
- Operating system: Windows 7/8/10, Android, iOS
- Instruction set: ESC/POS
- Bar code: 1D bar code & 2D bar code
Operating Information:
- Operating temperature: 5°C - 50°C
- Storage temperature: -20°C - 60°C
- Operating humidity: 20% - 85%
- Storage humidity: 5% - 95% (Non condensation)
Usage Features
Inside the Box:
The M200 package includes:
- Printer *1
- User manual *1
- USB data wire *1
- Adjustable plate *1
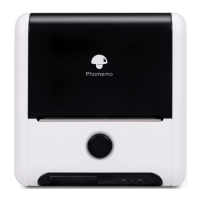
Product Description (Physical Components):
- Opening Button: Used to open the paper bin.
- Screen: Displays information and settings.
- Power Button: Turns the printer on/off and navigates menus.
- Feed Button: Feeds paper.
- Paper Exit: Where printed labels emerge.
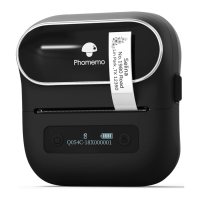
- Dust proof rubber cover: Protects internal components.
- Reset Hole: For manual reset.
- USB: USB port for data transfer and charging.
- Rope Hole: For attaching a lanyard.
Turn On/Off:
- To turn on: Press the Power Button for 1.5 seconds.
- To turn off: Press the Power Button for 1.5 seconds.
Feed Function:
- Label paper/Black mark label: Press the Feed Button to feed the tape to the proper place for printing the next tape.
- Continuous paper: Press and hold the Feed Button to keep paper feeding; it stops when the button is released.
System Setting:
- Enter setting interface: Press the Power Button for 1 second.
- Scroll options and select: Press the Feed Button for 1 second to scroll, then press the Power Button to select.
- Return to main page: Press the Power Button for 1.5 seconds.
Restore Setting:
- Enter setting interface: Press the Power Button for 1 second.
- Scroll options and select: Press the Feed Button for 1 second to scroll, then press the Power Button to select.
- Return to main page: Press the Power Button for 2 seconds.
- Restore factory settings: Navigate to the home page, select "restore factory settings," and press the paper key.
Screen Information (Logo Guidance):
- Bluetooth logo: Lights up when connected to Bluetooth, flashes during data transfer.
- Setting/Transfer logo: Shows as a USB icon when using a USB wire. Switches to a gear icon in Setting Mode after a short press of the Power Button.
- Cover Opening logo: Indicates the paper cover is open or not closed correctly, accompanied by a message.
- Paper Condition logo: Lights up if the paper roll is not installed correctly or if there is insufficient paper, accompanied by a "no paper" message. Confirms when paper is detected.
- Print Condition logo: Lights up while the printer is printing or feeding.
- External Electricity logo: Lights up when connected to a power source.
- Charging Battery logo: Flashes when the battery needs charging.
Screen Setting Options:
- Language: English, Chinese
- Print density: 1 (Lightest) to 15 (Thickest)
- Print speed: 1 (Slowest) to 5 (Fastest)
- Paper type: Interstitial paper, continuous paper, Black mark label
- Automatic shutdown: 5min, 15min, 30min, 1h, 2h, 4h, 8h, 24h, No shutdown
- Restore settings: Restore to factory default settings.
- Firmware version: Displays firmware version.
- Device address: Displays device address.
Screen Hint Messages:
- Shutdown...: Battery lower than 1%.
- Printing...: Printing regularly.
- Feeding...: Press Feed button.
- Overheated, please wait...: Print head is overheated.
- No paper detected...: No paper in the bin or paper is installed incorrectly.
- Cover opened...: The paper cover is opened.
Installing the Paper Roll:
- Gently press the "open" button to open the paper bin.
- Take out the adjustable plate and remove the left panel.
- Put in the paper roll (print side down) and push it to the right, ensuring the dividing ruler is above the roll.
- Aim the adjustable plate at both slots and slowly insert it into the paper bin.
- Pull out approximately 15mm of paper from the paper bin and close the paper cover.
- Press the Power button for 2 seconds to turn on the printer, then press the Feed button to push one piece of plate. Connect to the App to start using.
APP Connection Guidelines:
- Download the "Print master" app from Google Play or App Store, or scan the provided QR code.
- Open the APP.
- Choose "M200Series M200" as the printer model.
- Click the "Unconnected" button to connect via Bluetooth.
Maintenance Features
Troubleshooting:
- Paper not detected: Check if paper is correctly placed, pull paper slightly from the outlet to ensure it's between sensors, and close the bin cover.
- No response from power key: Printer may be in power failure; charge for half an hour and restart.
- Automatic shutdown: Check APP settings for auto-shutdown time or if battery is low.
- Printer refuses to charge:
- Charge for at least half an hour.
- Perform a manual reset by pressing the reset hole with a pin for 1-2 seconds.
- Check if charger is 5V-1A or 5V-2A.
- Replace charger or try another outlet.
- Contact dealer if issues persist.
- Printer crashes:
- Press power key to cancel.
- Perform a manual reset by pressing the reset hole with a pin for 1-2 seconds.
- Blank paper after printing:
- Paper roll may be installed reversely; arrange paper with the correct printing side facing down and to the right.
- Check if "label paper" is correctly selected in the printer display menu.
- Fuzzy printed content:
- Check if label roll is within its storage period or if there are foreign matters; clean or replace the roll.
- Wipe the printing area with an alcohol swab to ensure no dirt on the print head.
- Indirect skip or incomplete printing content:
- Clean the printer thermistor and paper outlet.
- Reinstall the paper roll bracket and manually press the paper feeding key once to recognize the paper gap position.
- Check if paper size and software print template match.
- Printer not running smoothly or feeding failure:
- Paper roll bracket may be too tight or stuck. Ensure about 1mm gap between the roll and baffles for smooth feeding.
- Wipe printing and paper outlet areas with an alcohol swab to check for stickiness.
- Multiple mobile phones connected simultaneously: A printer can only connect to one mobile phone at a time. Disconnect the currently connected phone before connecting another.
Product Warranty:
- One-year warranty period from the date of purchase for "replacement/return" support.
- Keep the warranty card in a safe place.
FCC Caution:
The device complies with part 15 of the FCC Rules. It must accept interference and not cause harmful interference. Any changes not approved by the responsible party could void user authority. The device has been tested and found to comply with Class B digital device limits. If interference occurs, measures include reorienting/relocating the antenna, increasing separation, connecting to a different circuit, or consulting a technician. The device meets general RF exposure requirements and can be used in portable exposure conditions without restriction.