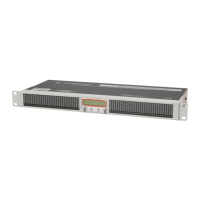
1i7600
English
INTRODUCTION
Thank you for choosing a Phonic professional audio
product. The i7600 i SupraCurve is an innovative
product that combines a digital graphic equalizer with
a full-feature real-time spectrum analyzer (RTA) in a
slender one-rack-space body. What sets the i7600
apart from the crowd is its ability to perform the RTA
tasks without interrupting the EQ operations.
For a system as complex as the i7600, the controls
are surprisingly simple and intuitive. All operations
are performed on just two knobs and two buttons,
conveniently located at the center of the front
panel.
This manual is designed to be both concise and
comprehensive. It is concise enough to help you
get a quick start on using your new i
SupraCurve. It is comprehensive enough to help
you gain a full understanding of the ne product you
have purchased. We hope you will soon discover
that you have made a wise investment in buying a
Phonic product.
FEATURES
Rack mountable with a one-rack-space (1U)
chassis
Total of 780 bright LED
Dual-channel, 30-band, 1/3-octave digital
graphic equalizer
Dual-channel 29-band real-time spectrum
analyzer (RTA)
24-bit AD/DA converters and 32-bit digital
signal processor (DSP)
+/- 12 dB boost/cut
Channel-link function
Stores up to 60 programs: 30 factory-set, 30
user-dened
Selectable unit of measurement for RTA line
signal: dBu or dBV
6 viewing range options for band-level
measurement
6 response time options:
35 ms, 125 ms, 250 ms, 500 ms, 1 sec.,
and 2 sec.
Peak-hold options: permanent and none
3 weighting options: A weighting, C weighting,
and at
Pink noise generator outputs balanced test
signals at 0 dB
Bypass function
Variable low-pass lter (LPF) and high-
pass lter (HPF)
Balanced XLR and 1/4" TRS connectors
Operating levels of +4 dBu and -10 dBV
independently selectable for input and output
User controlled key-lock function
Automatic save of settings after 10 seconds of
inactivity
HOOKING IT UP
1. Use the supplied power cord to connect the
i7600 to an AC power outlet of a suitable
voltage.
2. Connect the left and right main outputs of your
mixer to the CH 1 and CH 2 ANALOG IN of
the i7600. See Figure 1 for an illustration of
the rear panel.
3. Connect the CH 1 and CH 2 ANALOG OUT of
the i7600 to a pair of speakers.
4. Depress or release the OPERATING LEVEL
toggle buttons so that the operating level of
ANALOG IN matches that of your mixer, and
the operating level of ANALOG OUT matches
that of your speakers.
5. Turn on the POWER switch of i7600.