7MX300 XE
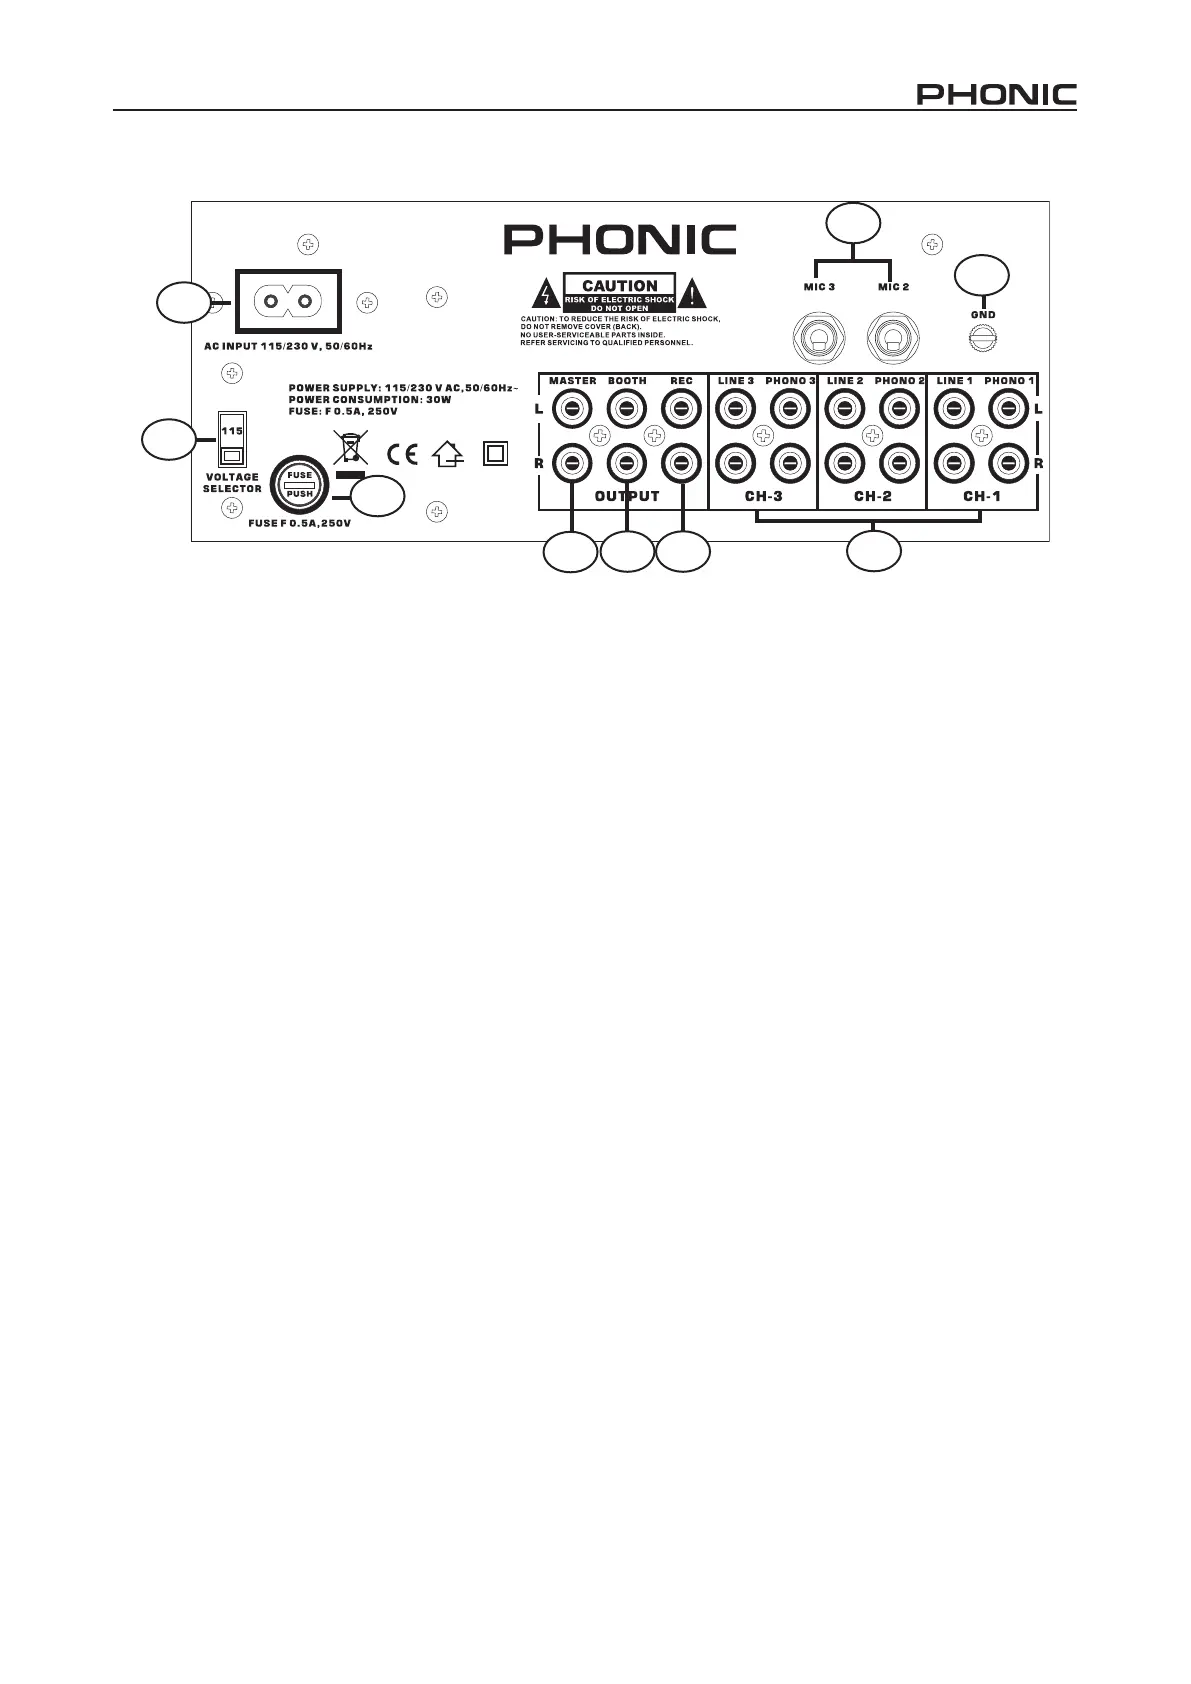
BACK PANEL
25
23
24
26
27 28
29
31
23. AC Connection
Used to plug the power cord in.
24. AC Voltage Selector
Make sure that the selector is properly set according
to your current local power supply company.
25. Fuse Holder
Only operate the fuse when the device is
disconnected from mains. Only use fuses of the
same rating and power.
26. Master Output
Master output connects to the main amplier (DJ
nal mix after crossfader section), accepts RCA
jacks.
27. Booth Output
Connect your monitor system here.
28. REC OUT Output
To connect your recording unit. These jacks are
RCA types, which are suitable for connection of a
recording device. Its level is not inuenced by the
master control.
29. Phono / Line Inputs Sockets
These inputs, for ch-1~3, accept RCA-plug
connectors. Use phono input socket for phonograph
turntables. Use line socket for CD players, cassette
players. Line level musical instruments with stereo
outputs such as rhythm machines or samplers
should also be connected with the line input socket.
30. MIC Sockets
Connect your microphone with 1/4” jack plug here.
The signals of Mic 3 can be controlled via ch-3,
if phono 3/line 3/mic 3 switch is set to mic 3. The
signals of Mic 2 can be controlled via ch-2, if phono
2/line 2/mic 2 switch is set to mic 2.
31. GND
Connect the earth cable from the turntables. This
helps to reduce humming and pop noise.