3
En
INSTRUCTION MANUAL
Please note:
These instruction assume:
1. Both the ash and camera are switched on.
2. The ash and camera are set to the same settings as this manual.
3. Camera menu and ash custom functions menu are set to default values.
4. The ash is being used with a compatible Canon DSLR.
Installing batteries
1. Press the battery cover in while pushing it towards the bottom of the ash.
The battery cover will open and raise.
2. Insert AA batteries as shown by the diagram inside the battery compartment.
3. Lower the battery cover and push back towards the top of the ash, locking
it in place.
Please note:
- Please use four standard high-quality batteries of the same brand. Make
sure all batteries are at similar powers levels.
- Batteries can get hot when the ash is being used. Use caution when chang-
ing batteries.
- If you do not use the ash for an extended period of time, store with bat-
teries removed.
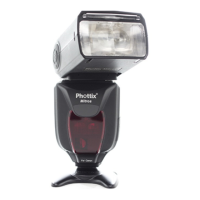
Attaching the ash to a camera
Turn o both the camera and ash
1. Align the ash hot shoe with the camera hot shoe.
2. Slide the ash into the camera hot shoe until fully inserted.
3. Lock the ash in position by pushing the locking lever to the right until the
lock engages with a click.
4. To Unlock, press the locking release button on the locking lever and slide to
the left.
Turning the Flash On / O
1. To power on the ash move the power switch to the on position.
2. To power o the ash move the power switch to the o position.
Battery Level Indicator
The Battery Level Indicator on the LCD (see below) will display an approximate
indication of how much power remains in the batteries in the ash. Use this as
a rough guide as to when a battery change is needed. If ash recycling time has
become very long (30 seconds) change the batteries.
Raising and Rotating the Flash Head
1. The ash head will elevate from -7 to 90 degrees with stops at -7, 0, 45, 60, 75
and 90 degrees. Gently raise or lower the ash head into the required position.
2. The ash head will rotate 180 degrees in either direction with stops at 60, 75,
90, 120, 150 and 180 degrees. Gently rotate the ash head into the required
position.
3. When the ash head is raised or rotated from the 0 degree standard forward
position the ash zoom will set itself to 50mm. “- -” will be displayed on the
LCD. Flash zoom when the head is raised or rotated can be changed in MZoom
mode (see below).
4. At -7 degrees the ash zoom will act the same as 0 degree – it will not change
any settings.
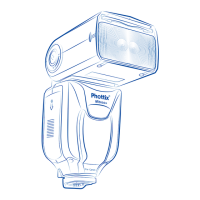
Using the Bounce Card or Wide Angle Diuser
The Phottix Mitros Flash comes equipped with a white bounce card and wide
angle diuser panel in the ash head.
1. The wide angle diuser panel will cause the ash to spread light to a 14mm
equivalent.
2. The white bounce card can be used when the ash head is in a raised position
to bounce light forward to assist with catch lights in a subject’s eyes.
To use:
1. Gently pull the diuser panel and bounce card from the ash head using
the ridge on the bottom of the diuser panel.
2. If using the diuser panel it will drop into position over the ash head. Gen-
tly push the bounce card back into the ash head if not needed.
3. If using the bounce card only gently push the diuser panel back into the
ash head.
Using the Flash Head Diuser
The Phottix Mitros TTL Flash comes with an attachable diuser that can be add-
ed to the front of the ash head when needed. It is good for softening light,
reducing hot spots and shadows and better coverage for macro photography.
To use:
1. Align the diuser with the ash head, with the “UP” mark on the diuser
facing up.
2. Snap one side of the diuser mount into the corresponding ash head
mount.
3. Repeat step 2 on the other side of the diuser.
 Loading...