-11-
PKI-0041-5-E
【6】Beforestartingtheworkprocedures...
※Thefollowingworkproceduresshownbelowareforthe
"RF6"modelbutthesameprocedurescanalsobeused
forunits"RF10"and"RF18".
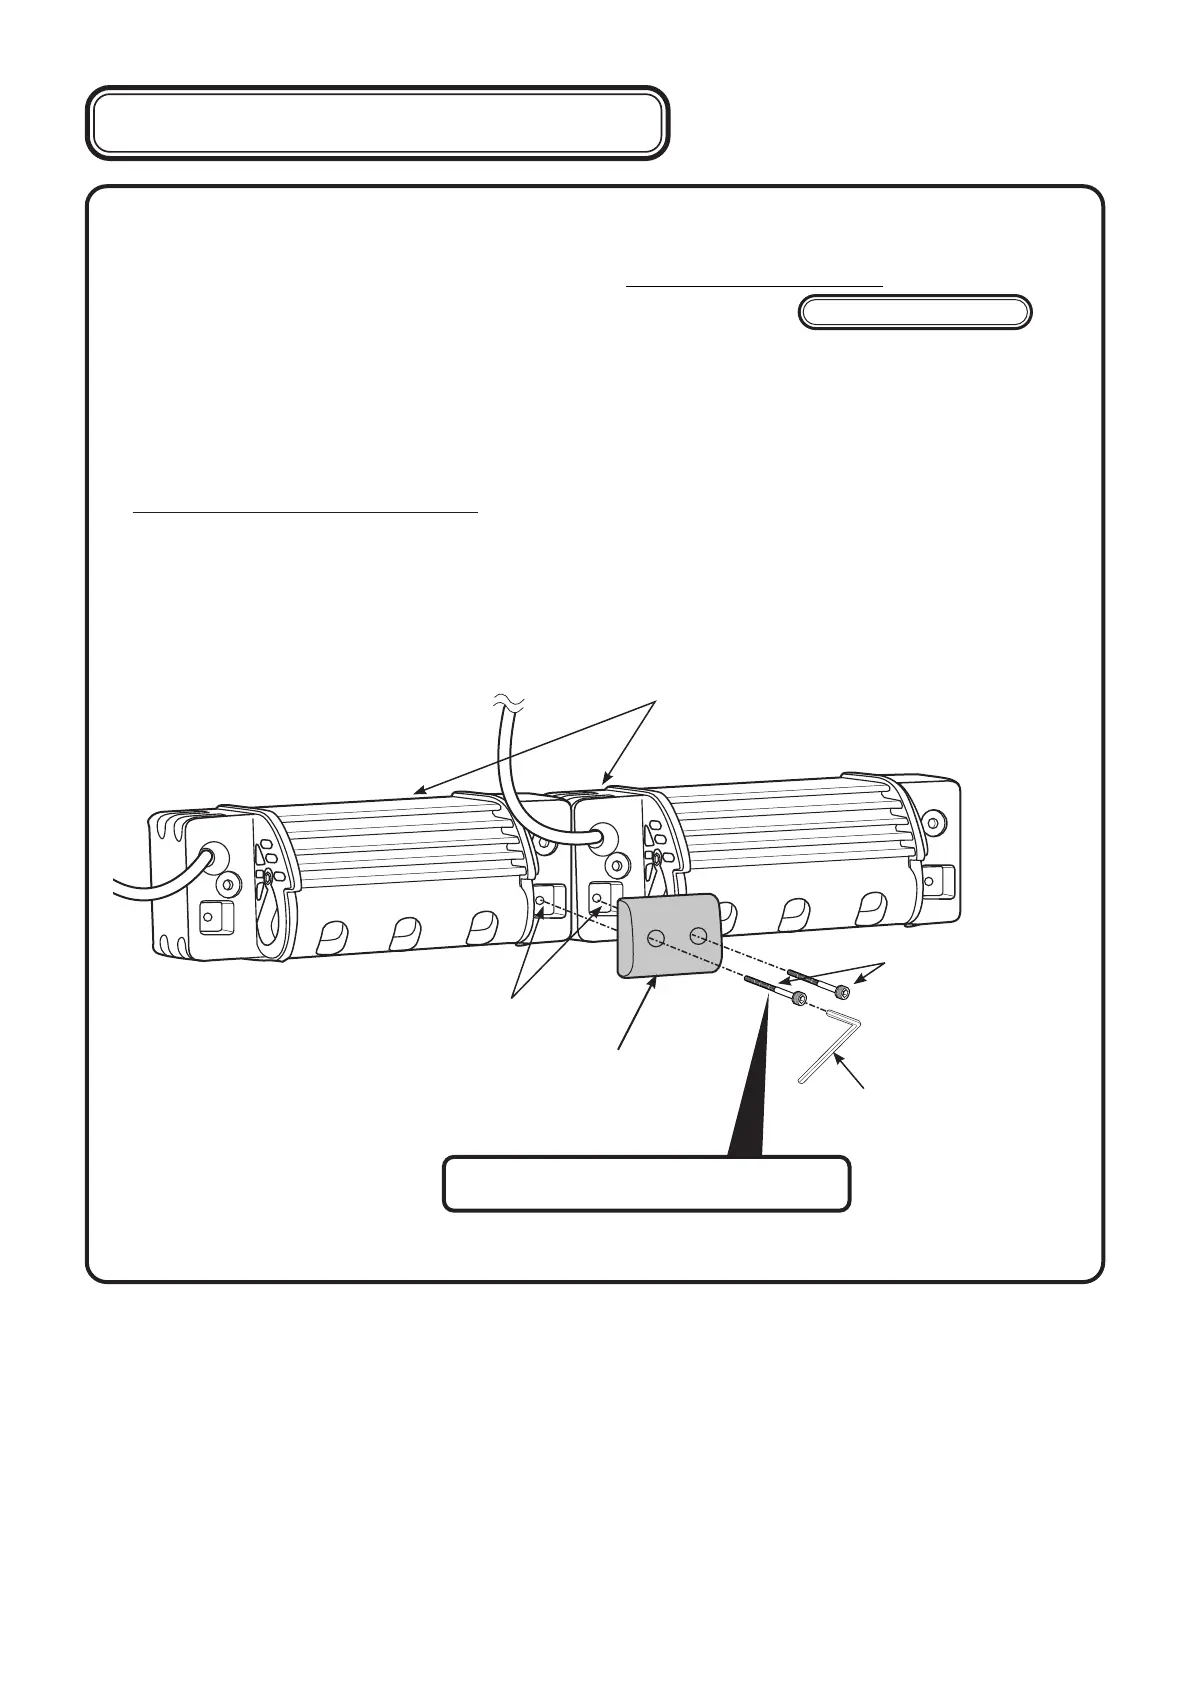
ByusingtheConnectionbracket(Item ⑲ )2mainlampunits(Item ① )canbeconnected.
Wheninstallingandusingthemainlampunit,followthe■Lampconnectionproceduresindicatedbelow.
Ifnotinstallingthemainlampunitusingthisprocedurecontinueontopage9,[4]Installationpreparations
andfollowtheinstructionsindicatedthere.Inaddition,ifnotconnectingthelamps,theConnectionbrackets
(Item ⑲ )andtheHexagonsocketheadbolt(M4/Item⑳ )willnotbeused.Therefore,pleasestorethem
properlyforsafekeeping.
InstalltheConnectionbracket(Item⑲ )tothenutonthelampmainunitasshowninthefigure.Usethe
Hexagonsocketheadbolt(M4/Item⑳ )tosecureitfirmlyinplace.
Lampmainunit(Item①)
Nutsections
Connectionbracket
(Item ⑲)
Hexagonsocket
headbolt(M4)
(Item⑳)
Hexagonalwrench(M4)
(Item ㉛ )
Tighteningtorque:2.2ft・Ibs(3N・m)
■Lampconnectionprocedures