ELECTRICAL COMPONENTS: FE400 ENGINE Fuel Gauge/Hour Meter
2003 Pioneer 1200/1200SE Gasoline Vehicle Maintenance and Service Manual Page 12-21
12
FUEL GAUGE/HOUR METER
See General Warning, Section 1, Page 1-1.
Testing the Fuel Gauge/Hour Meter
See Test Procedure 26, Section 11, Page 11-44. Also see Test Procedure 27 – Hour Meter on
page 11-44.
With the key switch in the OFF position, the fuel gauge/hour meter fields are blank. When the key switch is
turned to ON, both fields activate. The fuel gauge initially registers full before indicating the actual fuel level.
The hour meter displays the number of hours of use in increments of .1 (one tenth) hour, but does not record
additional time unless the key switch is in the ON position. When recording, the hourglass icon on the left
blinks slowly.
Fuel Gauge/Hour Meter Removal
1. Turn the key switch OFF and remove the key. Place the Forward/Reverse handle in NEUTRAL. Chock
the wheels.
2. Disconnect the battery cables as instructed (Figure 12-1, Page 12-1). See WARNING "To avoid unin-
tentionally starting..." in General Warning, Section 1, Page 1-2.
3. Remove the dash panel. See Key Switch Removal on page 12-14.
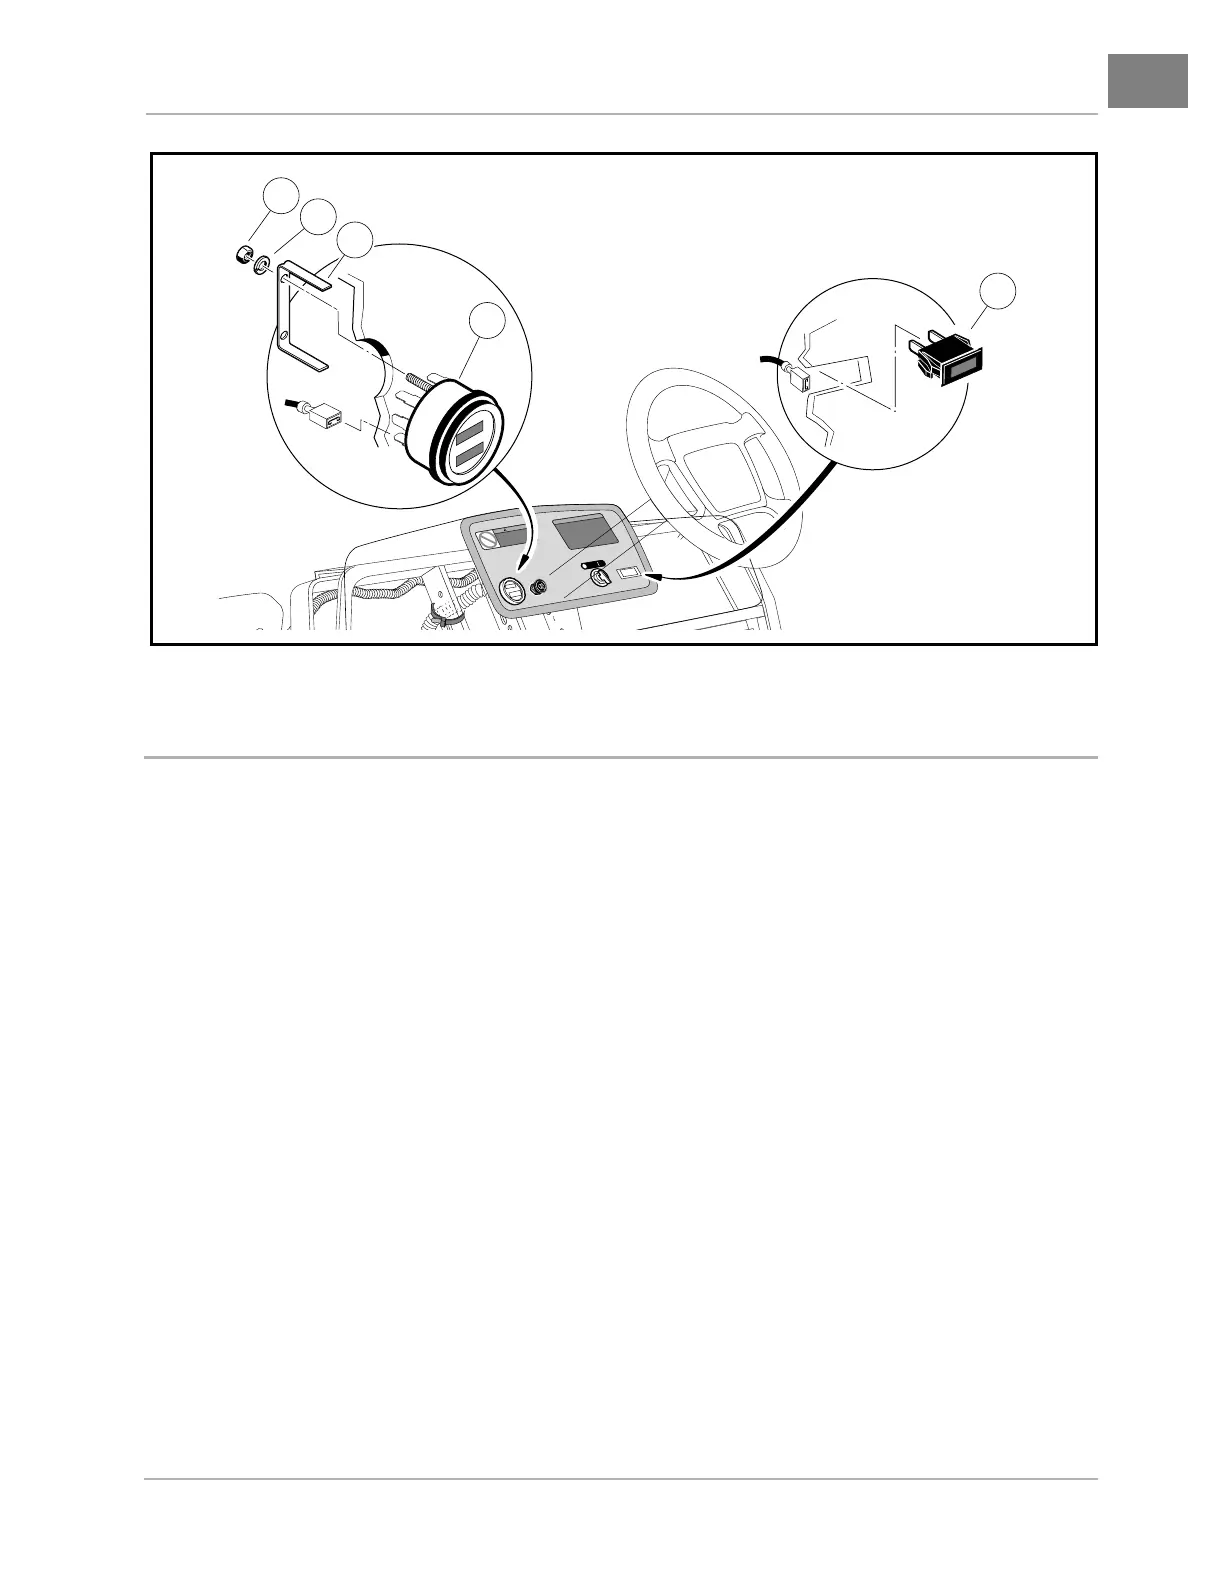
4. Disconnect the wires from the fuel gauge/hour meter (2) (Figure 12-24, Page 12-21). Do not allow wires
to touch.
5. Remove the two hex nuts (3) and lock washers (4) from the threaded studs on the back of the gauge.
Remove the mounting bracket (5) from the back side of the gauge/meter and remove from the dash.
Fuel Gauge/Hour Meter Installation
1. Install a new gauge/meter into hole in dash until flange seats against dash (Figure 12-24, Page 12-21).
2. Slide the mounting bracket onto the two threaded studs on the gauge/meter and secure with two lock
washers and two hex nuts. Tighten to 2.5 in-lb (.28 N·m). Place one drop of Loctite™ on each hex nut.
Do not allow Loctite to come into contact with the gauge/meter casing.
Figure 12-24 Fuel Gauge/Hour Meter and Low Oil Warning Light Installation
UNDER
16
WARNING
OFF
ON
1
5
2
3
4
 Loading...