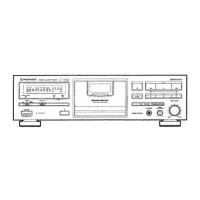
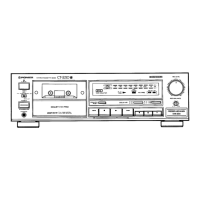
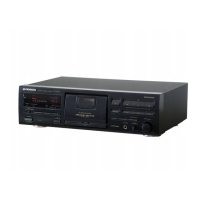
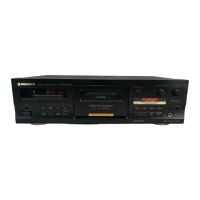
The Pioneer CT-S430S and CT-S330 are stereo cassette decks designed for high-quality audio recording and playback. This manual provides comprehensive instructions for operating and maintaining these units, ensuring optimal performance and longevity.
Function Description
The cassette deck features a 4-track, 2-channel stereo system, utilizing "Hard Permalloy" recording/playback heads and a "Ferrite" erasing head, driven by a DC servo motor. It supports various tape types, including TYPE IV (Metal), TYPE II (High/CrO2), and TYPE I (Normal), automatically adjusting recording bias and equalization through its automatic tape selector function.
Key functions include:
- Recording: The deck allows for recording from various audio sources. It features a recording level control (REC LEVEL) to adjust input sensitivity and a recording balance control (REC BALANCE) to fine-tune the left and right channel levels, compensating for imbalances in the source material.
- Playback: Users can play back prerecorded tapes. The deck includes a DOLBY NR system (OFF/B/C/S for CT-S430S, OFF/B/C for CT-S330) to reduce tape hiss and improve dynamic range. The FLEX (1/f) System is also available to enhance high-frequency sound during playback of tapes with poor recordings.
- Music Search: This function allows users to quickly locate desired selections on a tape by detecting blanks (longer than 4 seconds) between tracks. It can skip up to 15 selections forward or backward.
- Recording Mute: This feature creates approximately 4-second blank spaces on the tape, useful for proper operation of the music search function. Holding the recording mute button down allows for longer blank spaces.
- SUPER AUTO BLE Tuning System: This advanced system automatically adjusts bias, level, and equalizer settings for each tape, ensuring optimal recording characteristics and reproducing the source material accurately. This eliminates the need for manual fine-tuning, which can be difficult and time-consuming.
- CD DECK SYNCHRO Recording: When connected to a compatible Pioneer CD player, this function enables synchronized recording, where the cassette deck automatically starts recording when the CD player begins playback. It also creates 4-second blank spaces between tracks when the CD player changes discs in twin-tray or multi-play models.
- Last Memory Feature: The unit incorporates non-erasable, non-volatile semiconductor memory to store various settings for approximately 10 years, even when the power cord is disconnected. These include BLE data, FLEX (1/f) System mode (On/Off), Meter range data, Dolby NR system settings, STANDBY ON/OFF status, and tape counter number data. However, counter mode and time counter data are erased upon power disconnection.
- Wake-Up Playback: This feature allows the unit to automatically start playback at a specified time when connected to an audio timer. The counter display will flash "PLAY" for 4 seconds before returning to normal mode and initiating playback.
Usage Features
The deck is designed for user-friendly operation with clear indicators and controls:
- Function Display: A comprehensive display shows various operational statuses, including CD SYNC, FLEX indicator, DOLBY NR B/C/S indicator, Counter indicator (tape number or time), Level meter with peak hold function, and BLE indicator.
- Two Modes Counter: The counter can display either the normal tape counter (showing tape position) or the time counter (showing elapsed recording or playback time). The DISP OFF/COUNTER MODE button allows switching between these modes or turning the display off.
- Level Meter Range Selector: The METER RANGE button allows users to select between wide or expanded ranges on the level meter for precise monitoring.
- Operation Buttons: Standard transport controls include Rewind/Music Search, Stop, Playback, Fast Forward/Music Search, Recording, Pause, and Recording Mute.
- Eject Button: This button opens the cassette door. Users are advised to press the stop button before ejecting if the tape is in motion.
- Headphones Jack: A dedicated jack for private listening.
Maintenance Features
Regular maintenance is crucial for preserving the performance and sound quality of the cassette deck:
- Cleaning the Heads, Pinch Roller, and Capstan: These components can accumulate dirt, which can impair high-frequency reproduction and stereo balance. Regular cleaning with a cleaning swab and fluid is recommended. The process involves setting the POWER switch to STANDBY, opening the cassette door, and carefully wiping the heads, capstans, and pinch rollers. It's important to allow the cleaning fluid to dry completely before loading a tape.
- Demagnetizing the Heads: Over time, the heads can become magnetized, leading to a loss of high-frequency sounds and interference noise during recording and playback. Regular demagnetization with a head demagnetizer (available at audio stores) is recommended. When demagnetizing, the POWER switch should be ON, but the amplifier's volume control should be at its lowest, and headphones disconnected.
- Cleaning the Front Panel: The front panel should be cleaned regularly with a soft cloth. For soiled areas, a weak solution of neutral detergent (diluted in five to six parts water) can be used. Volatile cleaners like thinners, benzine, or alcohol should be avoided as they can damage the panel finish.
- Handling Cassette Tapes: Proper tape handling prevents damage and ensures correct operation. This includes taking up tape slack with a pencil before loading, ensuring accidental erasure prevention tabs are intact (or covered with adhesive tape for re-recording), and avoiding blocking sensor holes on TYPE IV (Metal) or TYPE II (High/CrO2) tapes. Tapes should be stored in their cases, away from magnetism, dust, dirt, oil, heat, and humidity. C-120 tapes are not recommended due to their thinness and susceptibility to jamming. Irregularly wound tapes should be fast-forwarded or rewound completely to ensure even winding.
- Installation Guidelines: To prevent malfunctions and damage, the deck should be installed in a location with adequate ventilation, away from direct sunlight, space heaters, excessive humidity, dust, oily smoke, and strong magnetic fields (like those from a television set or amplifier). If condensation occurs due to temperature changes, allow the unit to adjust to room temperature for about an hour before use.