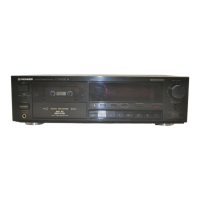
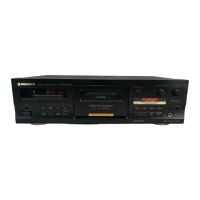
Do you have a question about the Pioneer CT-S910 and is the answer not in the manual?
Introduces the manual, models supported, and language options.
Explains how to activate and cancel the deck's demonstration function for display features.
Provides critical warnings about fire, shock hazards, rain, and moisture exposure.
Covers reading instructions, retaining them, heeding warnings, and following all operating steps.
Details safe installation practices related to location, ventilation, heat, power sources, and avoiding water/moisture.
Explains power cord protection, polarization, and outdoor antenna grounding requirements.
Advises on cleaning, damage requiring service, and user servicing limitations.
Addresses FCC compliance and potential radio/TV interference issues for U.S. models.
Guides users on setting safe listening levels to prevent hearing damage from excessive volume.
Provides advice on choosing a suitable location, avoiding heat, humidity, and dust for proper installation.
Explains how to handle condensation that may form when moving the unit between different temperature environments.
Illustrates methods for managing tape slack and handling cassette parts.
Lists essential checks for cassette tapes before loading, including tape slack and erasure prevention tabs.
Describes the function that automatically detects tape type for optimal recording settings.
Offers practical tips for using cassette tapes, including leader tape, storage, and avoiding C-120 tapes.
Guides on cleaning heads, pinch rollers, and capstans for optimal sound reproduction.
Explains the importance and procedure for demagnetizing tape heads to prevent sound quality degradation.
Provides instructions on how to clean the unit's front panel safely and effectively.
Details how to connect the cassette deck to other audio components like amplifiers and CD players.
Presents a visual guide illustrating the various connection points and cables used.
Explains how to connect the tape deck's audio input/output jacks to an amplifier's line jacks.
Describes the purpose of the MPX filter switch for FM stereo broadcasts and its effect on recording quality.
Details the connection and procedure for synchronizing recording from a Pioneer CD player.
Explains how to connect and use the Pioneer system remote control for operating multiple components.
Provides instructions for connecting the power cord and crucial safety precautions to prevent hazards.
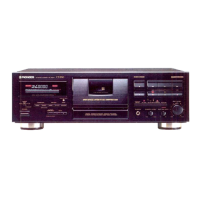
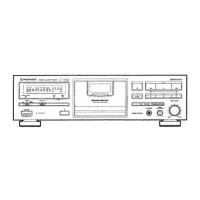
Identifies and describes the main buttons and switches on the front panel of the cassette deck.
Explains the various indicators and their meanings shown on the front panel display.
Details the function buttons for stop, playback, rewind, fast forward, recording, pause, and mute.
Explains the use of bias buttons for recording adjustment and Dolby NR system controls for noise reduction.
Describes the Automatic Tape Loose Canceller and Line Straight function for enhanced recording clarity.
Explains the automatic bias, level, and equalizer adjustment system for optimal tape recording characteristics.
Details indicators related to bias adjustment, AUTO BLE completion, and tape type identification.
Explains indicators for tape counters, monitor source selection, and CD synchro recording.
Describes the level meter scales, reference levels, and how they display signal strength.
Explains the Peak Hold indicator function and various messages displayed by the counter.
Details how to cycle through and select between tape counter, time counter, and remaining time counter modes.
Explains the functionality and use of the tape counter and time counter for tracking recordings.
Guides on setting the remaining time counter based on tape capacity and length for accurate display.
Provides step-by-step instructions for loading a tape and playing it back, including Dolby NR settings.
Explains how to set the deck for repeat playback of a cassette tape, including its limitations.
Describes how the music search function finds blank spaces between tracks to skip to desired selections.
Explains how to count selections when initiating a search from the middle of a track or from stop mode.
Outlines the process of inserting tape, setting controls, and starting the recording process.
Details the steps for using the SUPER AUTO BLE system to optimize recording settings for a specific tape.
Guides on adjusting the REC LEVEL control while observing the level meter for best recording quality.
Provides specific target levels for Type I/II and Type IV tapes to achieve optimal recording.
Explains how the system displays peak levels to help set accurate recording levels.
Details how to use the REC LEVEL control in conjunction with peak indicators for precise recording adjustments.
Shows the display changes during AUTO BLE tuning for bias, level, and equalizer adjustments.
Explains how the unit stores and recalls the last used AUTO BLE settings and other control positions.
Discusses continuing recording with similar tapes and re-tuning for optimal results.
Advises on re-tuning the SUPER AUTO BLE system when switching to different tape brands or types.
Explains how the BIAS buttons adjust tape bias levels and affect frequency response and distortion.
Details methods for making more precise bias adjustments using the METER RANGE button.
Describes the Recording Mute function for creating blanks and the Tape Return feature for quick tape positioning.
Explains how to set up and perform synchronized recording from a CD player.
Covers the steps for CD synchro recording, handling disc changes, and tape end scenarios.
Provides important notes and remarks regarding the CD Deck Synchro function and compatibility.
Guides on preparing the deck and audio source for automatic recording using an audio timer.
Includes important notes on timer operation, erasure prevention tabs, and using the Last Memory function with timer recording.
Explains how to set up the unit for automatic playback at a scheduled time using an audio timer.
Provides important notes regarding audio timer operations and the repeat playback mode used for wake-up playback.
Lists detailed technical specifications for heads, motors, frequency response, SNR, distortion, and input/output levels.
Enumerates the various subfunctions and features of the cassette deck, such as AUTO BLE, Dolby NR, and search capabilities.
Covers power requirements, dimensions, weight, and included accessories.
Explains the principles and effectiveness of Dolby B, C, and S-type noise reduction systems.
Describes the Dolby HX PRO system's function in extending headroom during recording for improved sound quality.
| Brand | Pioneer |
|---|---|
| Model | CT-S910 |
| Category | Cassette Player |
| Language | English |