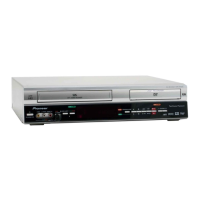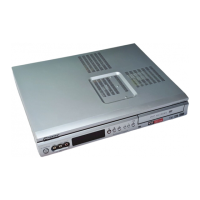


C
Christina EdwardsSep 9, 2025
Why does nothing appear in the display window of my Pioneer DVR-RT501-S?
- JJennifer StaffordSep 9, 2025
If nothing appears in the display window of your Pioneer DVD Recorder, check the DIMMER setting in the SETUP menu.
Why does nothing appear in the display window of my Pioneer DVR-RT501-S?
If nothing appears in the display window of your Pioneer DVD Recorder, check the DIMMER setting in the SETUP menu.
What to do if my Pioneer DVD Recorder has no picture?
If your Pioneer DVD Recorder is not showing a picture, ensure the antenna connection is correct and the cable is securely connected. Verify that the unit is connected correctly to your TV. Also, make sure the video input selector on your TV is set to VIDEO (or the appropriate equivalent). Finally, check that the channel is set to the external mode.
Why is there no sound coming from my Pioneer DVR-RT501-S DVD Recorder?
If your Pioneer DVD Recorder isn't producing any sound, first ensure the unit is connected to your audio system correctly. Check that the input selector on your amplifier is set properly. Also, verify that the unit is not in a special playback mode, as this can sometimes affect audio output.
How to troubleshoot a Pioneer DVR-RT501-S that does not operate?
If your Pioneer DVD Recorder or VCR isn't operating, ensure the power cord is properly plugged in. Try a different AC outlet to rule out power issues. Check your fuse or circuit breaker to make sure power is available. You can also try unplugging the unit and then plugging it back in. Finally, make sure you've selected the DVD or VCR mode before attempting to use it.
What to do if my Pioneer DVR-RT501-S DVD Recorder playback doesn’t start?
If your Pioneer DVD Recorder is not starting playback, make sure a disc is inserted. If a disc is already inserted, it might be dirty; try cleaning it. Keep in mind that the unit cannot play DVD-ROMs. Ensure the disc is not a DVD-RAM, DVD+R/RW, dual disc (DVD/CD hybrid disc), or another incompatible format.
What to do if my Pioneer DVR-RT501-S DVD Recorder has no function in DVD mode?
If your Pioneer DVD Recorder doesn't function in DVD mode, the unit may have stopped working due to a soiled or damaged disc, or another unforeseen issue. Try resetting the unit by holding down the STANDBY/ON button for 10 seconds or longer. Note that the unit may also automatically reset itself if it detects a problem.
Why can't I change the subtitles on my Pioneer DVD Recorder?
If you can't change the subtitles on your Pioneer DVD Recorder, it may be because subtitles on a DivX® file cannot be changed.
Why is the display not shown in my language on Pioneer DVR-RT501-S?
If the display is not shown in your language on your Pioneer DVD Recorder, it may be because your preferred language is not available on the disc.
How to turn on on-screen display on Pioneer DVR-RT501-S DVD Recorder?
If there is no on-screen display on your Pioneer DVD Recorder, make sure that you select Display “ON” in the settings.
How to fix noise bars on my Pioneer DVR-RT501-S DVD Recorder screen?
If you're seeing noise bars on the screen of your Pioneer DVD Recorder, it could be due to tracking adjustment being beyond the range of the automatic tracking circuit; try manual tracking adjustment. Dirty video heads can also cause this; consider cleaning them. Lastly, the tape itself might be worn or damaged.
Warnings about water, moisture, opening the unit, and electrical hazards.
Caution regarding Class 1 laser product with Class 3B laser diode inside.
Do not place naked flames, ensure proper ventilation, avoid extreme temperatures.
Handle plug carefully, do not pull cord, route safely, check for damage.
Covers cleaning, accessories, water hazards, placement, overloading, and servicing.
Conditions under which to refer servicing to qualified personnel.
Lists compatible discs and discs that cannot be played back.
Explains region codes for DVD playback compatibility.
Details DVD-RW and DVD-R discs for video recording.
Explains VR and Video modes for recording and their compatibility.
Diagram for connecting VCR/DVD to TV and aerial using SCART/coaxial.
Configuration for recording from a satellite receiver.
Connecting to TV with component video for progressive scan.
Connecting to stereo/AV amplifiers for audio output.
Procedure for automatic channel search and clock setting.
Step-by-step guide to loading, playing, and stopping discs.
Enabling progressive scan for higher quality picture output.
Information on DVD-RW and DVD-R discs for recording.
Details on recording modes (XP, SP, LP, EP) and their quality/time.
Steps to select mode, channel, and start recording a TV program.
How to stop or pause recording and resume later.
Information on auto rewind and potential recording errors.
Simple method to make timed recordings using the remote.
Introduction to the VIDEO Plus+ programming system.
Ensuring correct channel mapping for VIDEO Plus+ system.
Steps to enter PlusCode and select recording type (Once, Daily, Weekly).
Setting date, start/end times, channel, record destination, and mode.
Explains title menus, original titles, and playlists.
Shows editable items for VR mode vs. Video mode discs.
Steps for dubbing content from a video tape to a disc.
Steps for dubbing content from a disc to a video tape.
Options to dub only selected titles, playlists, or scenes.
List of error messages and their possible solutions.
Common issues like no picture, no sound, remote not working.
Problems with playback, recording, and disc compatibility.
Instructions for cleaning video heads to improve picture quality.
Procedure to reset the unit to its default factory settings.
| Type | DVD Recorder |
|---|---|
| Tuner | NTSC |
| Video Recording Modes | XP, SP, LP, EP |
| Audio Recording Format | Dolby Digital |
| Video D/A Converter | 10-bit / 27MHz |
| Audio D/A Converter | 24-bit/96kHz |
| Media Type | DVD-R, DVD-RW |
| Playback Format | DVD-Video, DVD-R, DVD-RW, DVD+R, DVD+RW, CD-DA, CD-R, CD-RW, MP3, JPEG |
| Connectors (Rear) | Composite Video Output, S-Video Output, Component Video Output, RF Input, RF Output |
| Connectors (Front) | Composite Video Input, S-Video Input |
| Inputs | Composite Video, S-Video, RF |
| Outputs | Composite Video, S-Video, Component Video, RF |