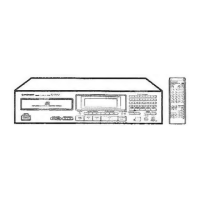
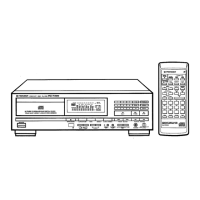
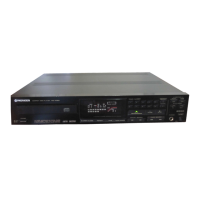
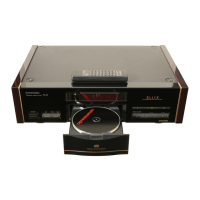
The Pioneer PD-7500 and PD-6500 are compact disc players designed for high-fidelity audio playback. These devices are equipped with a range of features for versatile operation, including various playback modes, programming capabilities, and sound adjustment options.
Function Description
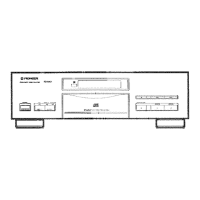
Both models serve as compact disc players, capable of playing standard audio CDs. The PD-7500 offers additional features such as AUTO FADER buttons and INDEX SEARCH buttons, which are not present on the PD-6500 (except for U.S. and Canadian models where the PD-6500 also has these features). Both models support optical digital output, allowing for high-quality digital audio connections to compatible amplifiers.
The core function involves loading a compact disc into the disc tray and initiating playback. The player automatically starts playing from track 1 when powered on with a disc already loaded, a feature useful for timer-controlled playback. Users can stop, pause, and resume playback using dedicated buttons on both the front panel and the remote control unit.
Usage Features
- Basic Playback: To play a disc, simply turn on the power, press the OPEN/CLOSE button to open the disc tray, place a compact disc on the tray (label side up), close the tray, and press the PLAY button. Playback can be temporarily interrupted with the PAUSE button and stopped with the STOP button.
- Display Brightness: The DIMMER button on the front panel allows users to adjust the brightness of the display, cycling through bright, dimmer, and dimmest settings.
- Track Navigation: Users can easily navigate between tracks using the TRACK SEARCH buttons (forward and reverse) on both the front panel and the remote control. For more precise control, MANUAL SEARCH buttons allow for fast forward and fast reverse during playback.
- Direct Track Selection: Tracks can be selected directly by pressing the corresponding number buttons (1-20, or >20 for tracks 21 and above).
- Index Search (PD-7500 only): The PD-7500 (and specific PD-6500 models) includes INDEX SEARCH buttons to advance or return to specific index numbers within a track. This is useful for discs with pre-recorded index signals, which further subdivide tracks.
- HI-LITE Scan: This feature plays ten seconds of each track on the disc in order, with a fade-in and fade-out function for smooth transitions. It can be initiated from the beginning of each track or from a specific point within a track (e.g., one minute after the track beginning).
- Repeat Playback: The REPEAT button allows for repeating a single track or all tracks on the disc. This function also applies to programmed play, random play, and HI-LITE scan modes.
- Random Playback: The RANDOM PLAY button shuffles the playback order of all tracks on the disc. If specific tracks are programmed, only those programmed tracks will be played in random order.
- Auto Space: When recording to cassette tape, the AUTO SPACE button inserts a three-second silent interval between tracks, ensuring correct operation of music search functions on the cassette deck. This feature can be used with repeat play, random play, and programmed play.
- Sound Volume Adjustment: The OUTPUT LEVEL buttons on the remote control allow for adjusting the sound volume within a range of 0dB to -25dB.
- Program Playback: Users can program up to 24 tracks to be played in a specific order. This involves pressing the PGM button, selecting desired track numbers, and then pressing PLAY. The programmed tracks remain stored in memory even after stopping playback.
- Pause Program Function: A "PAUSE" can be programmed in place of a disc track, useful for recording both sides of a cassette tape by automatically interrupting playback to allow for tape turning.
- Program Editing: Programmed tracks can be checked, erased individually, or the entire program memory can be cleared. Individual programmed tracks can also be changed by selecting the track number to be modified and inputting a new track number.
- CD-to-Cassette Tape Matching (Auto/Compu Program Edit):
- Auto Program Edit: This function automatically programs the maximum number of CD tracks (starting from the first track) that fit within a user-defined tape length.
- Compu Program Edit: This function rearranges the order of tracks to achieve the closest possible match to a desired tape length.
- Both functions allow users to specify a starting track and the desired tape length, facilitating efficient recording onto cassette tapes.
- Time Fade Edit: This feature allows users to set a desired playback time, after which the audio automatically fades out and the player enters pause mode. This is useful for filling a tape side as completely as possible with music.
- Digital Fade-in/Fade-out (PD-7500 only): The PD-7500 (and specific PD-6500 models) includes AUTO FADER IN/OUT buttons for performing fade-in and fade-out at any desired location during normal play, program play, or random play. Fade-in gradually raises the sound level from imperceptible to the set volume, while fade-out gradually lowers it to imperceptible.
- Variable Fade Time: The length of fade-in/fade-out time (between 0 and 9 seconds) can be adjusted using the number buttons when in stop mode and after pressing AUTO FADER IN or OUT. The default fade time is 5 seconds.
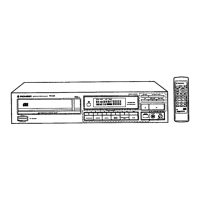
- Remote Control Operation: A comprehensive remote control unit provides access to most functions, including power, disc tray control, track selection, playback modes, and programming. For certain models, connecting a control cord to a compatible Pioneer amplifier allows the amplifier's remote control unit to operate basic CD player functions (PLAY, PAUSE, STOP, TRACK).
Maintenance Features
- Location: The player should be installed in a well-ventilated area, away from direct sunlight, heat sources (radiators, stoves, amplifiers), and damp or dusty environments to prevent malfunction and ensure proper ventilation. Avoid placing it on soft surfaces that might block ventilation openings.
- Interference: To prevent noise or picture degradation, the player should be installed as far as possible from tuners and TV sets. Using an outdoor antenna or turning off the CD player's power can help mitigate interference.
- Condensation: If the player is moved from a cold to a warm room, or if the room temperature suddenly increases, condensation may occur inside the unit. In such cases, allow the unit to stand for about an hour or gradually raise the room temperature to restore full performance.
- Disc Handling: Always hold discs by their edges or one edge and the center hole to avoid touching the signal surfaces. Do not affix tape or seals to the label surface, and prevent scratching. Avoid playing cracked or severely warped discs, as they can damage the player.
- Disc Cleaning: Discs should be cleaned gently with a soft cloth, wiping from the inner edge toward the outer perimeter. For very dirty discs, a soft cloth dampened with water (wrung out well) can be used, followed by a dry cloth. Never use record cleaning sprays, anti-static agents, benzene, thinner, or other volatile solvents, as these can damage the disc surface.
- Disc Storage: Store discs vertically in their cases, away from high heat, humidity, or extremely low temperatures, and out of direct sunlight (e.g., in a car).
- Player Cleaning: The front panel and unit housing can be cleaned with a soft, dry cloth. For stubborn dirt, use a soft cloth dampened with a mild detergent solution, wrung out well, and then wipe dry with another soft cloth. Avoid furniture wax, benzene, insecticides, or other volatile liquids, as they can corrode the cabinet.
- Power Cord: Handle the power cord by the plug, avoiding pulling the cord itself or touching it with wet hands. Ensure the cord is not pinched, knotted, or stepped on. Regularly check for damage and replace if necessary through an authorized service center.
- Optical Fiber Cable (if used): When connecting an optical fiber cable (sold separately), avoid bending it at sharp angles or scratching the plug. Insert the plug fully. For storage, coil it with a diameter of 5-15/16 inches (15 cm) or larger. If not connected, keep the dust cap on the optical terminal.
- Battery Replacement: For the remote control unit, replace batteries when they expire. Ensure correct polarity (+/-) alignment. Remove batteries if the remote control will not be used for an extended period (one month or more) to prevent leakage. Do not mix old and new batteries or different types of batteries.
- Troubleshooting: The manual provides a troubleshooting guide for common issues, such as the disc tray not opening, playback stopping, no sound, distorted sound, or remote control malfunction. It advises checking power connections, disc loading, cable connections, amplifier settings, and battery status before seeking professional service.