Do you have a question about the Pioneer PL-707 and is the answer not in the manual?
Details voltage selector switch for HE, HB, and HP models.
Details voltage selector switch for S and S/G models.
Covers safety points like water, location, ventilation, heat, power, cord protection, cleaning, and nonuse.
Outlines conditions requiring professional servicing and user servicing limits.
Details grounding requirements for outdoor antennas to prevent surges.
Explains warning symbols for high voltage and electric shock hazards.
Provides voltage setting info for UK/Australia and mains lead wiring.
Covers removing the headshell and connecting leads to the cartridge.
Details attaching the cartridge and adjusting its mounting position.
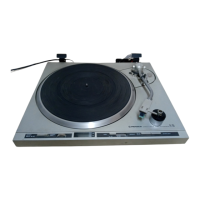
Describes the Power Switch and Speed Switch functions.
Details Record Size, Repeat, Arm Elevation, and Start/Stop controls.
Explains the function of various status indicators on the panel.
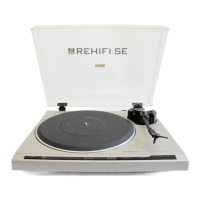
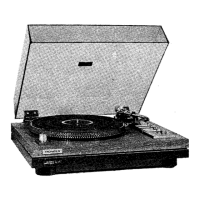
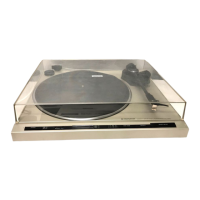
Identifies main components like tonearm, platter, and accessories.
Covers initial steps for assembling the turntable.
Includes removing dust cover and checking accessories and parts.
Details mounting the platter, rubber mat, and attaching the tracking force weight.
Guides on adjusting tracking force and anti-skating.
Covers setting anti-skate, connecting power, checking indicators, and achieving balance.
Details setting the tracking force scale to zero and anchoring the tonearm.
Instructions for fine-tuning tracking force and anti-skating.
Procedure for connecting the turntable to the amplifier.
Covers connecting ground, output, and power cords.
Guidance on properly installing the turntable.
Provides recommendations for choosing a suitable installation location.
Covers horizontal adjustment and post-setup checks.
Details on adjusting the cabinet level using the base insulators.
Verifies adjustments and connections, and addresses common issues.
Guides through the process of playing a record using auto play.
Covers amplifier setup, power on, and preparing the record.
Details starting playback, adjusting volume, and powering off.
Covers Repeat Play and Manual Play modes.
Instructions for activating, using, and deactivating repeat play.
Details circumstances and steps for manual play operation.
Guides on stopping and temporarily suspending playback.
Covers stopping mid-record and temporarily suspending playback.
Important notes regarding tonearm movement and auto-return functions.
Procedure for adjusting the stylus descent position during auto play.
Step-by-step guide to check and adjust stylus descent.
Information and procedure for replacing the turntable stylus.
Covers stylus life, replacement guidelines, and the replacement procedure.
Guidelines for cleaning and caring for the turntable cabinet.
Details on cleaning cabinet surfaces, removing stains, and restrictions.
Covers maintaining stylus, records, and precautions against condensation.
Details cartridge compatibility, replacement, and necessary adjustments.
Procedure for adjusting the tonearm height for proper record tracking.
Step-by-step guide to check and adjust tonearm height.
Covers adjustments for the arm rest and arm sheet.
Provides comprehensive technical details for the turntable and its components.
Addresses various problems like no sound, noise, distorted sound, and improper operation.
The Pioneer PL-707 is a stereo turntable designed for high-fidelity audio playback. It features a direct-drive system with a Quartz PLL Hall motor, ensuring stable and accurate platter rotation. The turntable is housed in a rosewood and grain vinyl cabinet, providing a classic aesthetic.
The primary function of the PL-707 is to play vinyl records at either 33-1/3 or 45 revolutions per minute (rpm). It incorporates several automatic features to enhance user convenience, including auto lead-in, auto return, and auto cut. These features allow the tonearm to automatically position itself at the beginning of a record, return to the arm rest at the end of play, and stop rotation. A repeat play function is also available, enabling continuous playback of one side of a record.
The turntable is equipped with a static-balance type, straight pipe tonearm, designed for precise tracking of record grooves. It includes a tracking force adjustment weight and an anti-skate control, both crucial for optimizing playback performance and minimizing record wear. The tonearm also features an arm elevation switch, allowing users to manually raise or lower the stylus, which is useful for cueing specific tracks or temporarily suspending playback.
A line voltage selector switch is provided on the top of the cabinet for models HE, HB, HP, S, and S/G, allowing the turntable to be adapted to different power requirements (110 V, 120 V, 220 V, or 240 V). KUT and KCT models are factory-set for 120 V and do not include this switch.
| Speeds | 33 1/3, 45 RPM |
|---|---|
| Overhang | 15 mm |
| Type | Belt Drive |
| Platter | Aluminium |
| Wow and Flutter | 0.025% (WRMS) |
| Tonearm | S-shaped Tonearm |
| Signal to Noise Ratio | 78 dB (DIN-B) |