Home
Pioneer
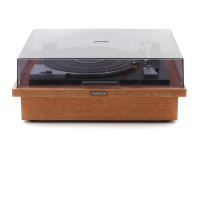
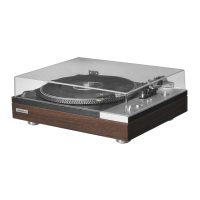
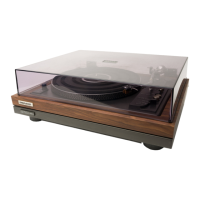
Turntable
RX-510
Pioneer RX-510 - User Manual
20 pages
Manual
Specs
Ask a question
Save Page as PDF
To Next Page
To Next Page
Loading...
Operating
Instructions
STEREO
CASSETTE
TAPE
DECK
RECEIVER
RX=-510/RX=710
STEREO
TURNTABLE
PL=-21IO0AZ/PL-2102/
PL-31I0Z
The
Models
PL-210Z
and
PL-310Z
are
not
solid
in
the
U.S.A.
and
Canada.
Thank
you
for
buying
this
Pioneer
product.
Please
read
through
these
operating
instructions
so
you
will
know
how
to
operate
your
model
properly.
After
you
have
finished
reading
the
instructions,
put
them
away
in
a
safe
place
for
future
reference.
In
some
countries
or
regions,
the
shape
of
the
power
plug
and
power
outlet
may
sometimes
differ
from
that
shown
in
the
explanatory
drawings.
However,
the
method
of
con-
necting
and
operating
the
unit
is
the
same.
WARNING:
To
prevENT
FIRE
OR
SHOCK
HAZARD,
DO
NOT
EXPOSE
THIS
APPLIANCE
TO
RAIN
OR
MOISTURE.
IMPORTANT
NOTICE
{For
U.S.
and
Canadian
models]
The
serial
number
for
this
equipment
is
located
on
the
rear
panel.
Please
write
this
serial
number
on
your
en-
closed
warranty
card
and
keep
it
in
a
secure
area.
This
is
for
your
security.
[For
Canadian
model]
CAUTION:
1o
prevent
ELECTRIC
SHOCK
DO
NOT
USE
THIS
(POLARIZED)
PLUG
WITH
AN
EXTENSION
CORD,
RECEPT-
ACLE
OR
OTHER
OUTLET
UNLESS
THE
BLADES
CAN
BE
FULLY
INSERTED
TO
PREVENT
BLADE
EXPOSURE.
ATTENTION:
pour
preveniR
LES
CHOCS
ELEC-
TRIQUES
NE
PAS
UTILISER
CETTE
FICHE
POLARISEE
AVEC
UN
PROLONGATEUR
UNE
PRISE
DE
COURANT
OU
UNE
AUTRE
SORTIE
DE
COURANT,
SAUF
SI
LES
LAMES
PEUVENT
ETRE
IN-
SEREES
A
FOND
SANS
EN
LAISSER
AUCUNE
PARTIE
A
DEC-
OUVERT.
TWO
VOLTAGE
SELECTOR
SWITCHES
Only
multi-voltage
models
are
provided
with
these
switches.
U.S.
and
Canadian
models
are
not
provided
with
these
switches.
Mains
voltages
in
Saudi
Arabia
are
127
V
and
220
V
only.
Never
use
this
model
with
110
V
setting
in
Saudi
Arabia.
FEATURES
CHECKING
ACCESSORY
ITEMS
.
BEFORE
OPERATION
...
ANTENNA
CONNECTIONS
CONNECTIONS
.....
PANEL
FACILITIES
REMOTE
CONTROL
UNIT
FACILITIES
TURNTABLE
FACILITIES
(OPTIONAL)
HOW
TO
HANDLE
CASSETTE
TAPES
GRAPHIC
EQUALIZER
CONTROLS
....
CONTENTS
1
The
line
voltage
selector
switches
are
on
the
rear
panel.
Be-
fore
your
model
is
shipped
from
the
factory,
these
switches
are
set
to
the
power
requirements
of
the
destination.
Check
they
are
set
properly
before
plugging
the
power
cord
into
the
household
wall
socket.
If
the
voltage
is
not
properly
set
or
if
you
move
to
an
area
where
the
voltage
requirements
differ,
adjust
the
selector
switches
as
follows.
1.
Use
a
medium-size
screwdriver,
2.
First,
insert
a
screwdriver
into
the
groove
of
the
voltage
selector
at
the
top,
and
adjust
so
that
the
tip
of
the
groove
points
to
the
voltage
value
of
your
area.
3.
Next,
insert
a
screwdriver
into
the
groove
of
the
voltage
selector
at
the
bottom
and
adjust
until
the
voltage
is
the
same
as
at
the
top.
Both
switches
must
be
in
the
same
switch
setting.
CHANNEL
STEP
SWITCH
Only
multi-voltage
models
are
provided
with
this
switch.
U.S.
and
Canadian
models
are
not
provided
with
this
switch.
(This
switch
is
on
the
rear
panel.)
The
unit
has
been
factory
preset
to
the
channel
allocation
for
the
area
in
which
it
is
to
be
sold.
If
the
value
is
set
incor-
rectly,
the
frequency
display
may
stop
at
the
wrong
fre-
quency,
or
sound
may
be
distorted,
resulting
in
an
inability
to
reproduce
reception
signals
at
their
proper
sound
quality.
For
this
reason,
be
sure
to
confirm
that
the
value
is
set
cor-
rectly
before
first
using
the
unit.
(100
kHz/10
kHz]
position:
Set
to
this
position
for
areas
with
FM
reception
step
of
100
kHz,
AM
CHANNEL
STEP
10
kHz.
FM/AM
[50
kHz/S
kHz]
position:
S0/eKH:
Set
to
this
position,
for
areas
with
LOQ/1O-
RHE
FM
reception
step
of
50
kHz,
AM
9
kHz.
When
unsure
about
the
channel
allocation
for
your
area,
consult
your
dealer
for
correct
information.
PRELIMINARY
OPERATIONS
BASIC
OPERATIONS
13]
TAPE
COPYING:
sascsecoiiestuseiseutsssnesviceseviscisteachsassdsssdsin
RECORDING
AND
PLAYBACK
USING
THE
OPTIONAL
AUDIO
TIMER
0...
cee
16
MIC
MIXING
{excluding
U.S.
and
Canadian
models)
MAINTENANCE
TROUBLESHOOTING
SPECIFICATIONS
YQ
PIONEER’
The
future
of
sound
and
vision.
2
Table of Contents
Main Page
Safety Instructions
2
Before Operation
3
Remote Control Unit
3
Connecting the Power Cord
5
Ac Outlet Switched 100W Max
6
Panel Facilities
6
How to Handle Cassette Tapes
11
Preliminary Operations
12
Basic Operations
12
Record Play
12
Presetting Stations
13
Tape Playback
14
Tape Copying
15
Maintenance
17
Troubleshooting
18
Specifications
20
Need help?
Do you have a question about the Pioneer RX-510 and is the answer not in the manual?
Ask a question
Pioneer RX-510 Specifications
Print Specification
General
Tonearm Type
Static Balance Type
Signal to noise ratio
78dB
Tonearm
Static-balance type
Speeds
33 and 45rpm
Output Level
2.5 mV
Related product manuals
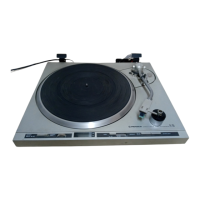
Pioneer RX-310
20 pages
Pioneer PL-50
13 pages
Pioneer PL-61
13 pages
Pioneer PL-200
30 pages
Pioneer PL-12D
10 pages
Pioneer PL-560
28 pages
Pioneer PL-530
48 pages
Pioneer PL-990
24 pages
Pioneer PL-A35
11 pages
Pioneer PL-112D
15 pages
Pioneer PL-510A
40 pages
Pioneer PL-55DX
11 pages