Diagnosis
Diagnosis
4
CN6009
CN6006 CN6007
CN502
CN2001
CN7602
CN3800 CN3801
CN6810
CN6820
CN8711
CN6008
CN5002
CN5003
CN7041
CN7042
CN601
CN7031
CN7032
CN7704
CN7710
CN5001
CN7502
CN6004
27P FFC
(GGD1588)
5
19P FFC
(GGD1589)
5
21P FFC
(GGD1590)
5
16P FFC
(GGD1591)
5
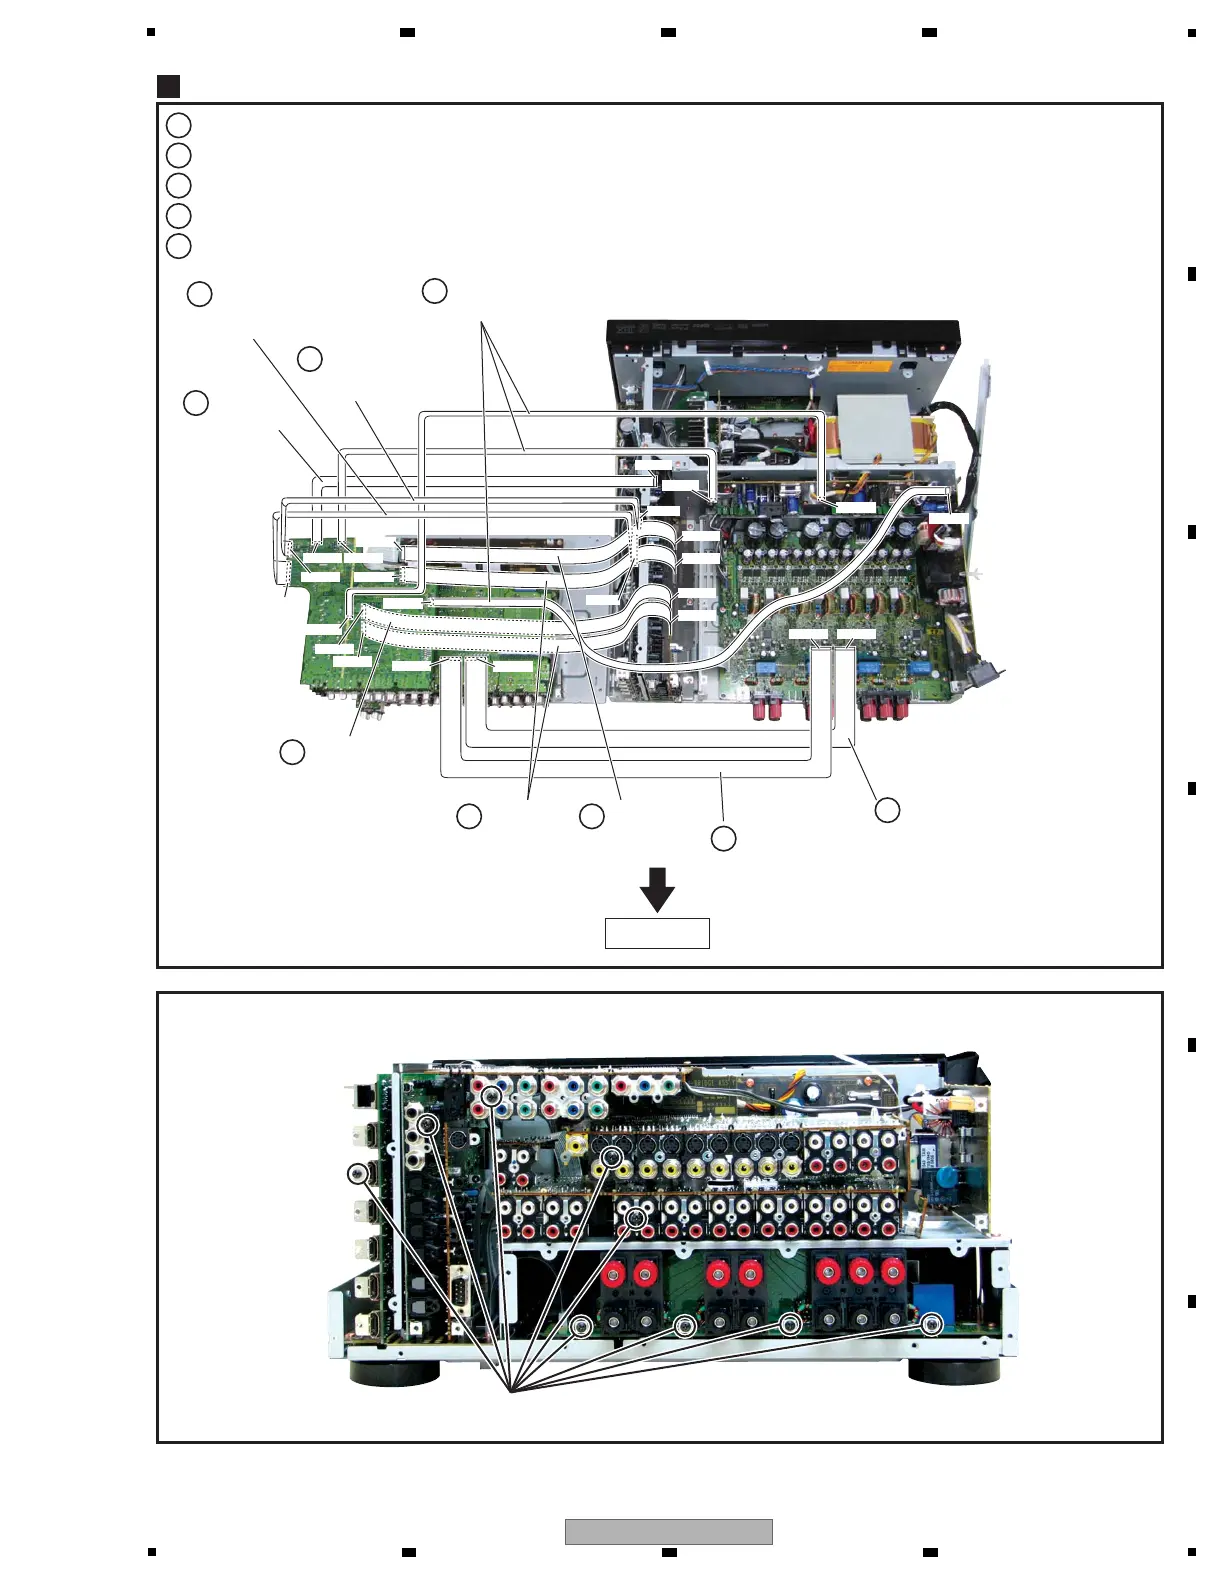
Reassembling the PRIMARY Assy.
2
1
Reassembling the AUDIO Assy, COMPOSITE S Assy, V-BRIDGE Assy and ZOUT Assy on the Ice Cover 81.
3
Reassembling the COMPONENT Assy on the V-BRIDGE Assy.
4
Connect the twelve extension jig cables.
5
Arrange the unit as shown in the photo below.
30P board to board
extension jig cable
(GGD1592)
5
13P board to board
extension jig cable
(GGD1592)
5
5P PH HOUSING
ASSY (GGD1594)
5
17P board to board
extension jig cable
(GGD1593)
5
19P board to board
extension jig cable
(GGD1593)
5
Note : As mentioned below, detach the rear panel, re-fasten the screws at the corresponding points, and connect the
chassis to the ground.
Points to be connected to the chassis

 Loading...