Page 6 For technical questions, please call 1-888-866-5797. 70262
CAUTION! Keep your fingers clear of the
spool when releasing the Ratchet; it will
rotate as the strap is released.
6. When the Strap is loose, pull the end free. Remove
the Strap from its position around the transmission.
Have an assistant stabilize the transmission safely.
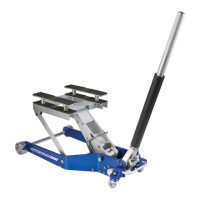
Replacing a Transmission
1. Check that the transmission is balanced on the
Saddle and that the Ratchet Tie-down is securing the
load on the Jack. Check that the Wing Nuts are tight.
2. Move the Jack to line up the transmission properly
with its connection points. Have an assistance
stabilize the load while moving the Jack.
3. Use a 1/2" Drive Ratchet or Breaker Bar (neither one
included) to turn the Screw Rod clockwise.
Slowly and gradually raise the Jack,
while guiding it into place.
4. Secure the transmission into
place using its hardware.
5. Double-check all work to be sure the
transmission is securely installed.
6. Release the Ratchet Tie-down and remove it.
7. Clear the area near the Jack. Turn the Screw Rod
counterclockwise to lower the Jack.
8. Move the Jack clear of the vehicle.
Maintenance
Procedures not specifically explained in this manual must
be performed only by a qualified technician.
TO PREVENT SERIOUS INJURY FROM TOOL FAILURE:
Do not use damaged equipment. If abnormal noise or vibration occurs,
have the problem corrected before further use.
1. BEFORE EACH USE, inspect the general
condition of the equipment. Check for:
• loose hardware,
• misalignment or binding of moving parts,
• visibly leaking hydraulic fluid,
• cracked or broken parts, and
• any other condition that may
affect its safe operation.
2. Before each use and after the inspection,
thoroughly test the Jack for proper
operation prior to its actual use.
3. Occasionally lubricate the mechanical parts of the
Jack, such as the Screw Rod and hinge pins of
the Adjustable Frame with heavy oil or grease.
4. Wipe dry with a clean cloth. Then, store the
Jack in a safe, dry location out of reach of
children and other non-authorized people.
PLEASE READ THE FOLLOWING CAREFULLY
THE MANUFACTURER AND/OR DISTRIBUTOR HAS PROVIDED THE PARTS LIST AND ASSEMBLY DIAGRAM
IN THIS MANUAL AS A REFERENCE TOOL ONLY. NEITHER THE MANUFACTURER OR DISTRIBUTOR
MAKES ANY REPRESENTATION OR WARRANTY OF ANY KIND TO THE BUYER THAT HE OR SHE IS
QUALIFIED TO MAKE ANY REPAIRS TO THE PRODUCT, OR THAT HE OR SHE IS QUALIFIED TO REPLACE
ANY PARTS OF THE PRODUCT. IN FACT, THE MANUFACTURER AND/OR DISTRIBUTOR EXPRESSLY
STATES THAT ALL REPAIRS AND PARTS REPLACEMENTS SHOULD BE UNDERTAKEN BY CERTIFIED AND
LICENSED TECHNICIANS, AND NOT BY THE BUYER. THE BUYER ASSUMES ALL RISK AND LIABILITY
ARISING OUT OF HIS OR HER REPAIRS TO THE ORIGINAL PRODUCT OR REPLACEMENT PARTS
THERETO, OR ARISING OUT OF HIS OR HER INSTALLATION OF REPLACEMENT PARTS THERETO.
Record Product’s Serial Number Here:
Note: If product has no serial number, record month and year of purchase instead.
Note: Some parts are listed and shown for illustration purposes only, and are not available
individually as replacement parts. Specify UPC 193175495082 when ordering parts.
 Loading...