Page 6Item 93884 For technical questions, please call 1-888-866-5797
Maintenance
1. Wipe the Level clean with a lint free cloth when needed.
2. Store the Level in a dry location where it will not freeze or overheat.
3. Before each use, inspect the Level to make sure nothing is cracked or broken. Do not use
the Level if anything is cracked or broken. Have it repaired by a qualified service technician.
Changing or Installing Batteries
1.
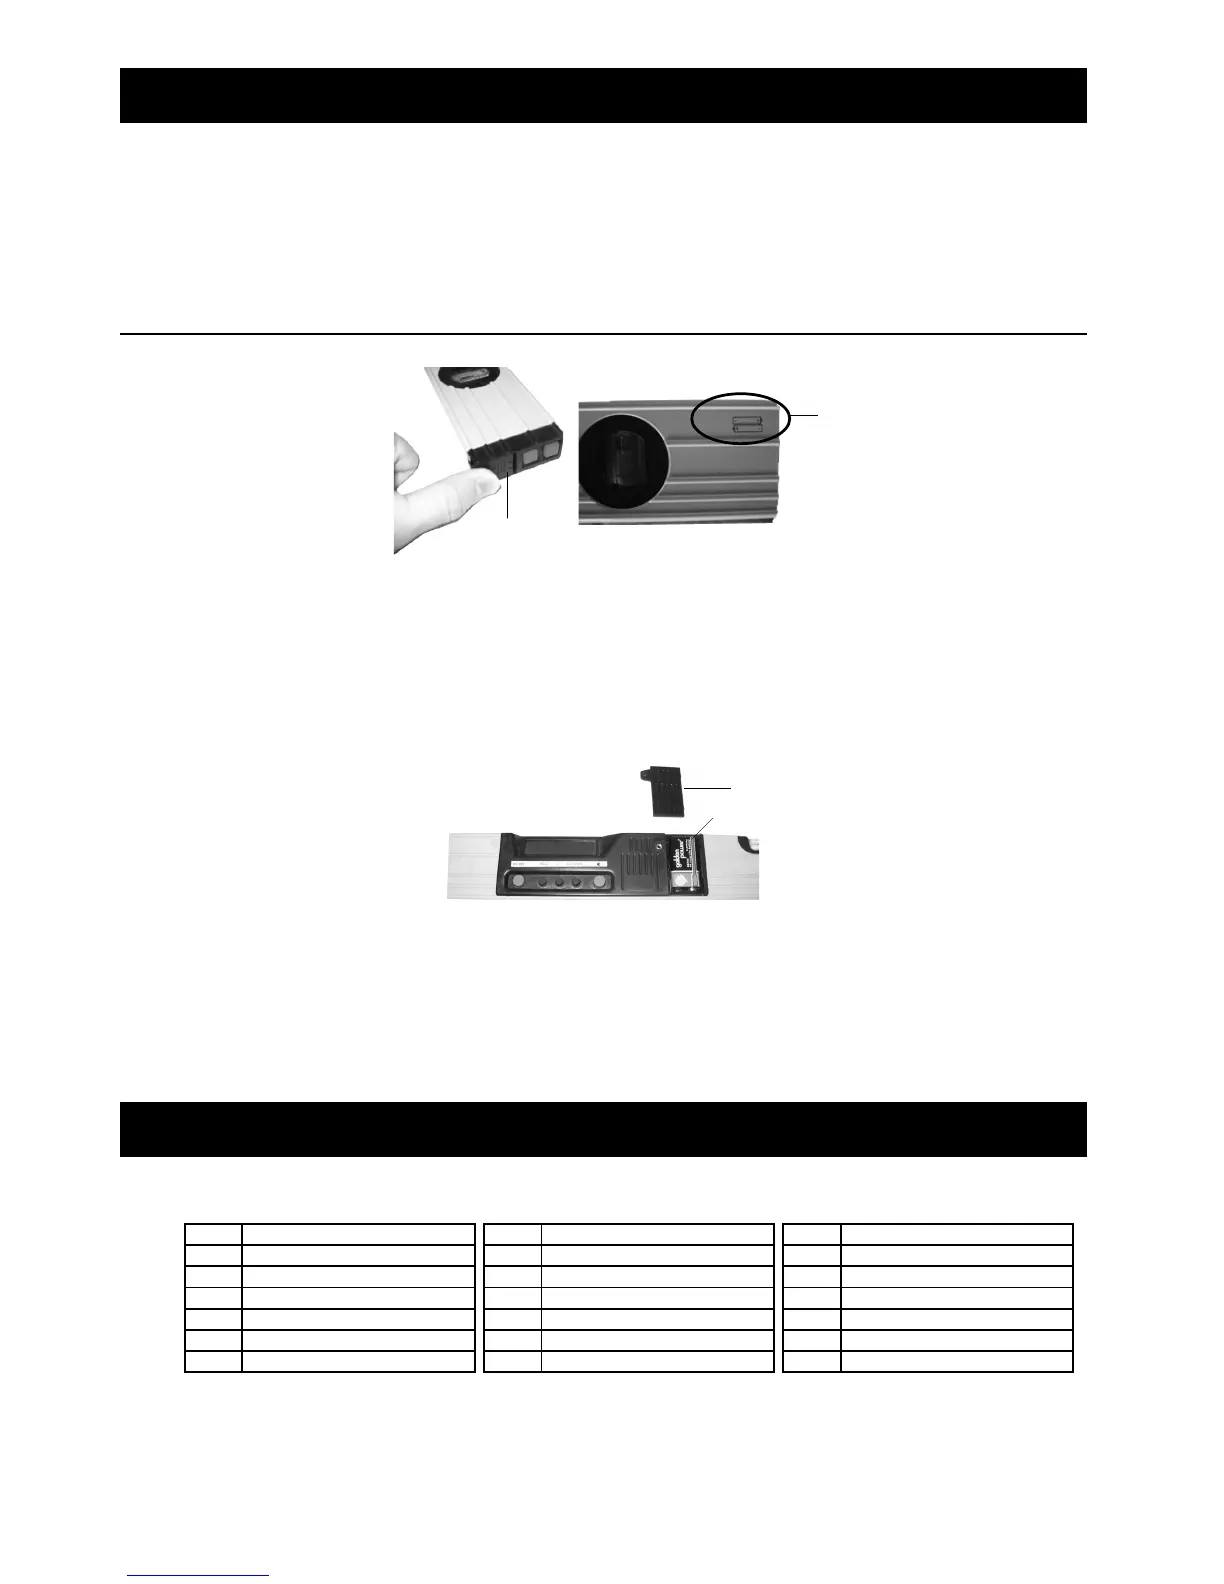
FIGURE 2
Battery Polarity
Direction
End Cap (14)
To change the “AAA” batteries that power the Laser, remove the End Cap (14) and set it
aside. See FIGURE 2, above.
2. Remove the old batteries and replace them with two fresh batteries. Make sure that you
match up the positive (+) and negative (-) ends to the diagram on the side of the level. See
FIGURE 2, above. Replace the End Cap (14).
3.
FIGURE 3
Battery Cover (16)
9 Volt Battery
To change the 9 Volt battery that powers the LCD (3), remove the Battery Cover (16) by first
removing the Screw (15).
4. Install a fresh battery making sure you match up the positive (+) and negative (-) terminals
as shown inside the battery compartment. Replace the Battery Cover (16) and the Screw
(15). See FIGURE 3, above.
Parts List
Part Description
1 Laser Diode
2 End Cap 1
3 LCD
4 On/Off Button
5 Hold Button
6 0% (Percent) Button
Part Description
7 Calibrate Button
8 Sound Button
9 Horizontal Dial
10 Vertical Vial
11 Body
12 Laser On/Off Buttons
Part Description
13 “AAA” Battery (Qty. 2)
14 End Cap 2
15 Screw
16 Battery Cover
17 9 Volt Battery
18 Slide Switch


 To Next Page